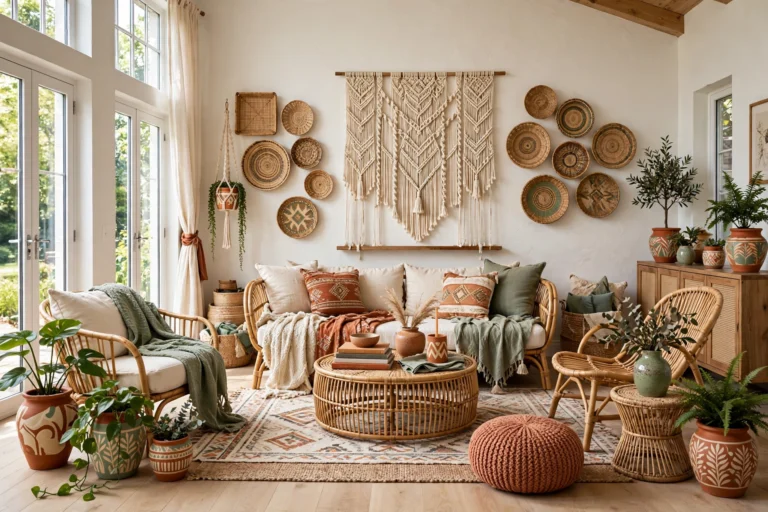
25 Easy DIY Home Decor Ideas You Can Finish in a Weekend
Introduction
A weekend is enough to change how your home feels. You do not need a contractor, a big budget, or a single power tool you have never touched before. Most of the projects in this guide need nothing more than paint, a few basic supplies, and a free Saturday and Sunday, and every one of them can be finished before Monday morning. That is the whole point of easy DIY home decor ideas weekend projects: small, satisfying changes that make a room feel fresh without turning your house into a building site.
The best weekend projects share three things. They are cheap, usually under fifty dollars in materials. They are forgiving, so a first-timer can get a good result without perfect technique. And they are visible, the kind of change you notice every time you walk into the room. A painted accent wall, a set of floating shelves, or a gallery wall you arranged yourself will do more for a room than a month of browsing decor shops. Pick the project that solves your biggest frustration, a bare wall, a cluttered corner, a tired piece of furniture, and start there.
This guide walks through twenty-five easy DIY home decor ideas you can finish in a weekend, from painting and upcycling to simple builds that need no more than a drill and a level. Each idea includes what you will need, how long it takes, and the mistakes to avoid, so you can spend your weekend making something you love instead of fixing something that went wrong.
1. Paint One Bold Accent Wall

Painting a single accent wall is the fastest way to transform a room, and it is the classic first DIY project for a reason. One wall in a deep green, warm terracotta, or rich navy changes the whole mood of the space, and because you are only painting one wall, the job takes an afternoon, not a weekend. Choose the wall your eye lands on first when you enter the room, usually the one behind the sofa or the bed, and let the other walls stay light so the colour reads as a feature rather than a cave.
The trick is in the prep, which takes longer than the painting itself. Fill any holes, sand rough spots, wipe the wall down, and tape the edges neatly. Use a good quality paint and a small roller for the main area with a brush for the edges, and plan on two coats for a rich, even finish. If you want more accent wall ideas before you commit to a colour, test a large swatch on the wall and live with it for a day, because paint that looks perfect in the shop can look very different in your light.
💡 Pro Tip: Buy a small sample pot and paint a large square on the wall first. Colours shift dramatically between morning and evening light, and a one-dollar swatch can save you from repainting a whole wall.
2. Build Simple Floating Shelves

Floating shelves are the easiest piece of furniture you will ever build, and they solve two problems at once: bare walls and cluttered surfaces. A pair of wooden shelves above a desk, a sofa, or a kitchen counter gives you a place for books, plants, and the objects you actually love, and the whole project takes about two hours. All you need is a pine board cut to length, a hidden bracket kit from the hardware store, a drill, and a level.
Measure twice and drill once, because shelves that are not level will announce themselves forever. Mark your studs, or use proper wall anchors if you cannot hit one, and test the shelf with a heavy book before you load it up. Style the shelves with a mix of heights, a tall vase, a stack of books, a small plant, and leave some empty space, because a shelf crammed edge to edge reads as storage, not decor. Two shelves with breathing room look far more expensive than four packed ones.
3. Create a Gallery Wall

A gallery wall turns a blank wall into the most personal spot in your home, and it costs almost nothing if you use frames you already own and prints you print yourself. Start by laying the arrangement out on the floor, mixing frame sizes and orientations until the shape feels balanced, then trace each frame onto paper, tape the paper to the wall, and hang through the paper. The floor layout step is what separates a gallery wall that looks curated from one that looks random.
Keep one unifying element so the collection feels intentional: frames in the same finish, a consistent colour palette in the art, or equal spacing between every frame. Two inches of space between frames is a good rule of thumb. Include something personal, a photo, a ticket stub, a piece of your child’s art, because a gallery wall made only of shop-bought prints looks like a hotel. If you want to learn how to hang wall decor like a designer, the same rules apply: plan on the floor, keep spacing even, and step back often to check the balance.
Easy DIY Home Decor Quick-Start Checklist
- ✅ Pick one project and buy all the materials before Saturday morning
- ✅ Clear the workspace and protect floors and furniture with drop cloths
- ✅ Test paint colours and finishes on a hidden spot first
- ✅ Measure twice, mark studs, and keep a level in your hand for every shelf
- ✅ Lay gallery walls and shelf arrangements out on the floor before hanging
- ✅ Let paint and glue dry fully between coats instead of rushing the finish
- ✅ Step back and look at the room from the doorway before calling it done
4. Chalk-Paint an Old Dresser

That tired dresser in the spare room is a weekend project waiting to happen. Chalk paint is the forgiving hero of furniture upcycling: it sticks to almost any surface without sanding or priming, dries fast, and gives furniture a soft, matte, vintage finish that looks far more expensive than the tin of paint cost. Clean the dresser well, remove the handles, and brush on two thin coats, letting each dry fully before the next.
The details are what make the transformation convincing. Swap the old handles for new brass or matte black pulls, and the dresser suddenly looks new rather than painted. Seal the top with clear wax or a matte sealer, because that is the surface that takes the most wear. If you are working on a tight budget, a living room makeover on a $500 budget can start with exactly this kind of project: one painted piece of furniture changes a room more than a dozen small accessories.
5. Make No-Sew Throw Pillow Covers

New throw pillows are one of the quickest ways to change a room’s colour story, but good ones are expensive, and the covers are the easy part to make yourself. No-sew pillow covers need only fabric, fabric glue or iron-on hem tape, and an envelope fold that wraps the pillow like a present. Choose a fabric with some weight, linen, cotton canvas, or a textured weave, and cut it generously so the cover fits snugly without straining the seams.
The secret to covers that look shop-bought is in the corners and the fit. Iron the fabric before you start, measure the pillow and add an inch on every side, and fold the envelope flap so it overlaps by at least six inches, so the pillow never peeks out the back. Mix two or three covers in coordinating colours and textures rather than a matching set, a solid, a stripe, and a textured neutral, and your sofa will look styled rather than uniform.
📌 Important: Pillow covers look best in a coordinated mix of solid, pattern, and texture. A matching set from one shop reads as a showroom; three covers that share one colour but differ in pattern read as a home.
Quick Comparison: Easy DIY Home Decor Ideas by Cost and Effort
6. Make a Macramé Wall Hanging

Macramé looks complicated and costs almost nothing to try, which makes it the perfect weekend craft. A wooden dowel, a ball of cotton cord, and two basic knots, the square knot and the lark’s head, are all you need to make a wall hanging that softens a bare wall beautifully. There are free video tutorials that walk through each knot slowly, and after the first row, your hands learn the rhythm and the rest goes quickly.
Start small, because a first project that is too ambitious is how craft supplies end up in a drawer. A hanging about the width of your shoulders is a good first size, and you can always make a bigger one next weekend. Comb out the fringe at the bottom with a wide-tooth comb for that soft, feathery finish, and hang it where it gets good light so the shadows of the knots play on the wall behind it.
7. Paint Terracotta Pots for an Indoor Herb Garden

Terracotta pots are cheap, and a row of them painted in your kitchen’s colours turns a windowsill into a herb garden that looks intentional instead of improvised. Paint the outside of the pots with acrylic or chalk paint, let them dry, then seal the inside with a clear sealer so moisture does not bubble the paint off over time. Plant basil, mint, parsley, and chives, and label each pot with a small wooden tag or a painted strip.
The trick is grouping. One painted pot on its own looks like a craft project; five in a row, in two or three coordinating colours, looks like a design choice. Keep the heights varied by stacking one pot on a small wooden riser, and water from the bottom by setting the pots in a shallow tray, which keeps the paint dry and the herbs happy. Fresh herbs within reach of the stove are also genuinely useful, which is more than most decor can claim.
8. Build a Pallet Coffee Table

A pallet coffee table is the classic weekend build, and it is easier than it looks if you start with a clean, heat-treated pallet rather than a random one from behind a shop. Look for the HT stamp, which means heat-treated and safe for indoor use. Sand it thoroughly, paint or stain it, add four short legs or caster wheels, and top it with a piece of cut glass or a plywood panel for a smooth surface.
Sanding is the step nobody wants to do and everybody regrets skipping. Pallets are rough, and splinters are not a design feature. Spend a full hour with coarse sandpaper, then fine, and round every edge you will touch. Casters are worth the extra few dollars, because a table you can roll aside is far more useful than one you have to drag, and they give the piece a purposeful, industrial look.
9. Hang a Rope-Framed Mirror

A round mirror with a rope frame is one of those projects that looks like it came from a boutique and costs a fraction of the shop price. Wrap thick jute rope around a plain round mirror, gluing as you go, and add a loop of rope at the top for hanging. The whole job takes about an hour, and the result adds light and texture to any wall, especially a dark hallway or a small entryway that needs opening up.
⚠ Warning: A framed mirror is heavier than it looks, and a picture hook rated for the mirror’s weight is not optional. Use a proper wall anchor or hang from a stud, and never trust a single small nail for glass.
Mirrors work hardest in small, dark spaces, so hang yours opposite a window or a lamp to bounce light around the room. A rope mirror over a console table in the entryway is a classic pairing, and it gives you a last look before you leave the house. If the rope frays at the ends, a dab of clear glue seals it neatly.
10. Try Peel-and-Stick Wallpaper

Peel-and-stick wallpaper is the renter’s best friend and the weekend decorator’s secret weapon. One roll covers an accent wall, the back of a bookcase, or a single drawer front, and it peels off cleanly when you change your mind. Choose a pattern you genuinely love rather than a safe one, because the whole point is a statement, and measure the wall carefully so you order enough, adding ten percent for pattern matching and mistakes.
Work slowly from the top down, peeling the backing a few inches at a time and smoothing with a plastic card as you go. Bubbles are almost always fixable: lift the paper back to the bubble and re-smooth rather than pushing the air toward the edge. Keep the pattern aligned at every seam, because a half-inch mismatch at eye level is the one thing everyone will notice.
11. Upcycle Glass Jars into Vases

Glass jars are free decor hiding in your recycling, and a weekend is enough to turn a shelf of them into a set of vases that looks deliberate. Clean the jars thoroughly, remove the labels with hot soapy water, and then decorate them: a coat of matte spray paint in a soft colour, a wrap of jute twine around the neck, or a dip in gold paint for the bottom third. Group them in threes on a windowsill or a dining table with a single stem in each.
The key is consistency. Jars in three different heights but the same finish look like a set; jars in three different finishes look like recycling. Spray paint gives the smoothest result, so work outdoors or in a ventilated space and use light, even coats rather than one heavy one, which drips. A set of matching jars also makes a lovely centrepiece for a dinner party, filled with fresh flowers or simple greenery cut from the garden.
12. Make a Woven Basket Storage Wall

Baskets are the prettiest way to hide clutter, and a wall of flat woven baskets is a weekend project that costs very little and looks like a boutique hotel. Collect baskets in different sizes from thrift shops and discount stores, then arrange them on the floor first, mixing sizes and patterns, before hanging them with small nails or removable hooks. The mix of textures and tones is what makes it work, so do not buy a matching set.
This project shines in an entryway or a living room corner, where the baskets can hold the small things that usually end up on surfaces: keys, dog leads, sunglasses, mail. Hang the largest baskets at the centre and work outward, keeping the spacing even. If you are short on wall space, the same idea works on the back of a door, and the baskets still earn their keep as storage.
13. Paint Your Front Door a New Colour

Your front door is the first thing visitors see and the last thing most people think to paint, which is exactly why it makes such a good weekend project. One tin of exterior paint in a bold colour, deep teal, warm red, sunny yellow, or classic black, transforms the whole entrance in a single afternoon. Remove the hardware, clean the door thoroughly, sand lightly, and use a paint made for exterior doors so the finish survives weather and daily use.
Choose a colour that works with your house, not against it. A red brick house loves a deep green or navy door; a white house can take almost anything. Paint the door while it is still hung, working top to bottom so drips get caught by the next section, and leave it open to dry with a doorstop so it does not stick to the frame. New hardware in a finish that matches the rest of the house, and the entrance looks like a different home entirely.
14. Build a DIY Headboard

A headboard is the single piece that makes a bedroom feel finished, and a homemade one is far cheaper than a shop-bought version. The simplest design is a plywood panel cut to the width of the bed, covered with foam and fabric, and mounted to the wall behind the bed. Choose a fabric with some texture, linen, velvet, or a nubby weave, and pull it tight over the foam so the surface is smooth and drum-tight.
💡 Pro Tip: Headboards should match the width of the mattress, not the frame, and sit about 120 centimetres tall so pillows do not cover the design. Measure twice before you cut anything.
Tufting is optional and harder than it looks, so for a first headboard, skip the buttons and let the fabric do the work. A plain upholstered panel in a rich colour, sage green, warm ochre, or deep navy, looks far more expensive than a complicated tufted one done badly. Mount it to the wall with French cleats so it stays put and can be removed without damage when you redecorate.
15. Stencil a Tile Floor

Painted and stencilled tiles are one of the most dramatic weekend transformations, and they work on bathroom floors, laundry rooms, and entryways. Clean the tiles thoroughly, prime them with a bonding primer made for tile, then paint the base colour and stencil a pattern over the top with a dense foam roller. Seal everything with two coats of clear polyurethane so the finish survives mopping and foot traffic.
The stencil is the whole project, so take your time aligning it. Start in the centre of the room and work outward, using a small level to keep the pattern straight, and let each tile dry before moving the stencil, or the pattern will smudge. A bold black-and-white pattern looks graphic and modern, while a soft grey pattern reads as classic tile. If you are still deciding whether to commit, try the same technique on a small laundry room first, where the stakes are low and the result is easy to love.
16. Make a Ladder Shelf

A ladder shelf leans against the wall and needs no fixing, which makes it one of the friendliest builds for a beginner. Two side rails, four or five rungs that widen toward the bottom, and a few screws are all it takes. Sand everything smooth, paint or stain it to match the room, and lean it against the wall at a slight angle so the shelves sit level. It holds books, plants, towels, or folded blankets, depending on the room.
The angle matters: if the ladder is too upright, things slide off; too far out, and it eats floor space. Around seventy-five degrees from the floor is a good starting point, and a small felt pad under each foot stops it sliding on hard floors. Style the shelves with the heaviest items at the bottom and the lightest at the top, which keeps the whole thing stable and looks naturally balanced.
17. Frame Fabric as Textile Art

Beautiful fabric is art that costs a fraction of a framed print, and framing it takes minutes. Choose a fabric with a bold pattern, a block print, a vintage scarf, or a remnant from a fabric shop, and stretch it over a canvas frame or mount it in a simple frame behind glass. The pattern does all the work, so the framing should be as quiet as possible: a thin black or natural wood frame, nothing ornate.
This is a particularly good project for rooms that need colour but cannot take more clutter, because textile art adds pattern without adding objects. A large piece over a sofa or a bed anchors the whole room, while a small trio in a hallway adds rhythm. If the fabric is precious, use a frame with UV-protective glass and keep it out of direct sunlight so the colours stay true.
18. Create a Cozy Reading Nook

A reading nook needs only three things: a comfortable seat, good light, and a surface for a cup of tea. That means almost any unused corner can become one in a weekend. Start with a chair you already own, add a floor lamp with a warm bulb, a small side table, and a soft throw, then finish with a basket of books and a cushion. The whole project is really an exercise in arranging things you already have.
The details make it feel like a destination rather than a chair in a corner. A small rug under the chair defines the space, a wall shelf at arm’s height holds the current book, and a curtain or a tall plant on one side gives a sense of enclosure. Keep the palette warm and the lighting low, because a reading nook should feel like an invitation to sit down and stay a while.
19. Swap Out Cabinet Hardware

New cabinet hardware is the smallest project with the biggest visual return, and it is the one most people put off for years. A set of brass pulls in a kitchen or matte black knobs in a bathroom changes the whole feel of the room in an hour. Measure the distance between the existing screw holes before you buy, because matching that measurement means no new holes to drill and no filling to do.
If the new handles need different holes, fill the old ones with wood filler, sand smooth, and touch up the paint before drilling. Buy one handle first and test it on a single door, because hardware that looks right online can feel wrong in your hand. A budget kitchen makeover often starts here: new pulls, a fresh coat of paint on the cabinets, and the kitchen looks like it had a renovation for the price of a takeaway dinner.
20. Make Hanging Planters

Hanging planters bring greenery to eye level and free up every surface in the room, which makes them perfect for small spaces. A simple macramé hanger or a length of rope knotted around a pot is all you need, plus a ceiling hook rated for the weight of a watered plant. Trailing plants like pothos or string of pearls look best, because their leaves cascade down and soften the whole corner.
📌 Important: Hang the plant with its saucer still underneath, or water it over the sink and let it drain before rehanging. A single overwatering can stain a floor or a rug permanently.
Hang planters near a window but not in direct sun for most houseplants, and group two or three at different heights rather than one alone, which can look lonely. A cluster of hanging planters in a kitchen window turns the most ordinary view into a green wall, and the plants will tell you quickly whether the spot suits them.
21. Build a Crate Storage Bench

Wooden crates stacked and screwed together make a storage bench that works in an entryway, at the foot of a bed, or under a window. Four crates on their sides, screwed together in pairs and topped with a cushion, give you open cubbies for shoes, books, or toys, and the whole build takes an afternoon. Sand the crates well, paint or stain them, and add small feet so air circulates underneath.
The cushion is what turns crates into furniture. Measure the top, cut a piece of foam to fit, and cover it with a washable fabric, because a bench cushion gets sat on by everyone, including pets. Keep the crates’ open sides facing forward for easy access, and use baskets inside the cubbies for the things you do not want on show. It is a project that looks handmade in the best way: practical, charming, and entirely yours.
22. Make a Seasonal Wreath

A wreath on the front door is the cheapest way to mark a season, and a homemade one lasts for years if you store it properly. Start with a grapevine or wire wreath form, then add greenery, real or faux, with a hot glue gun, working in one direction around the form so the layers overlap naturally. Finish with a bow, dried oranges, pinecones, or whatever suits the season.
The trick is fullness. A sparse wreath looks unfinished, so keep adding greenery until you cannot see the form underneath, and step back often to check the shape from a distance. Faux greenery is worth the investment for a wreath you will reuse, because real greenery dries out and sheds. Hang it with a simple ribbon over the door, and change the accent pieces with the seasons while keeping the same base.
23. Paint Wooden Picture Frames

Old wooden frames from thrift shops are a weekend goldmine. A coat of spray paint in a single colour, matte black, antique gold, or a soft sage, unifies a mismatched collection into a gallery-ready set. Clean the frames, sand lightly, and spray in thin, even coats outdoors, letting each coat dry before the next, because one heavy coat drips and ruins the finish.
Group the painted frames together on one wall for a cohesive gallery, or use a single large painted frame to showcase a favourite print. The uniform colour is what makes the collection look intentional, so resist the urge to paint each frame a different colour. A bedroom makeover on a budget can begin with exactly this: painted frames, a few prints you love, and a wall that suddenly feels curated.
24. Create a Fabric Memo Board

A fabric-covered memo board is a pretty way to keep track of the week, and it doubles as wall decor in a home office or kitchen. Wrap a cork board or a sheet of foam board in a fabric you love, staple it neatly at the back, then add ribbon in a criss-cross pattern to tuck notes, photos, and invitations under. The whole project takes an hour and costs less than a takeaway.
Choose a fabric that works with the room, because the board will be on the wall permanently. A linen in a warm neutral is safe; a bold floral is a statement. Hang it where you will actually use it, by the front door for keys and reminders, or above a desk for inspiration and deadlines. Keep the notes you tuck under the ribbon current, because a memo board full of last year’s invitations is clutter with a frame.
25. Style a Coffee Table Centrepiece Tray

A tray is the easiest styling trick in home decor: it gathers objects into a group, protects the table surface, and makes the whole arrangement look deliberate. Choose a tray that fits the table, wood, rattan, or metal, then fill it with three things of different heights: a small vase with greenery, a stack of two books, and a candle or a small bowl. That is the whole formula, and it works on almost any coffee table.
The tray also makes cleaning easy, which is a genuine benefit in a lived-in room: lift the tray, wipe the table, put it back. Change the contents with the seasons, fresh flowers in spring, a pinecone and a candle in winter, and the table always feels current. If your living room needs a bigger change first, a tray is the finishing touch after the larger projects, not the starting point, but it is the touch that makes the room feel done. For more on keeping a kitchen tidy with the same idea, pantry organization ideas use the same tray principle inside cupboards.
Common Easy DIY Home Decor Mistakes
Mistake 1: Starting five projects at once
The most common weekend DIY mistake is starting everything on Saturday morning and finishing nothing by Sunday night. A half-painted wall, a half-built shelf, and a pile of fabric on the sofa is not a makeover, it is a mess. Pick one project, finish it completely, and only then start the next. A finished project feels like progress; five unfinished ones feel like failure.
Mistake 2: Skipping the prep work
Prep is boring and it is also the difference between a result you love and one you hide. Paint peels off uncleaned surfaces, shelves fall off unanchored walls, and stencils smudge on dusty tiles. Cleaning, sanding, priming, and measuring take an hour and save a weekend. Every professional decorator will tell you the same thing: the prep is the project.
Mistake 3: Buying cheap tools and materials
The cheapest paint, the cheapest brush, and the cheapest brackets will cost you twice: once when you buy them and again when you redo the work. A decent brush leaves no streaks, a good roller leaves no texture, and proper wall anchors hold. You do not need the most expensive option, but the bottom shelf is almost never a bargain.
Mistake 4: Ignoring scale and proportion
A tiny frame on a huge wall looks lost, and a shelf that is too deep for the room becomes a hazard. Measure the wall, measure the furniture, and sketch the arrangement before you buy anything. The most common proportion mistake is hanging art too high: the centre of a picture should sit at eye level, about 145 centimetres from the floor, not near the ceiling.
Mistake 5: Copying a trend instead of your taste
A project copied from a trend you do not love will look dated within a year and will never feel like your home. The best weekend projects reflect what you actually like: the colours you wear, the textures you touch, the rooms you linger in. Trends are useful for ideas, but your taste is what makes a room feel like home.
Frequently Asked Questions
1. What is the easiest DIY home decor project for a complete beginner?
Painting an accent wall or making no-sew pillow covers are the easiest starting points. Both need minimal tools, take only a few hours, and are very forgiving of mistakes. Start with one of these to build confidence before trying a build like floating shelves.
2. How much should a weekend DIY project cost?
Most of the projects in this guide cost between ten and fifty dollars in materials. Paint, fabric, and hardware are the main expenses, and using furniture and frames you already own keeps costs low. Set a budget before you shop and stick to it.
3. Do I need power tools for these DIY decor ideas?
No, most of these projects need only a drill, a level, and a screwdriver. A drill is the one tool worth owning, because it makes hanging shelves, mirrors, and hardware far easier. Everything else can be done with hand tools.
4. Can renters do these DIY home decor projects?
Yes, many of these ideas are renter-friendly. Peel-and-stick wallpaper, removable hooks, freestanding ladder shelves, and painted furniture you own are all safe in a rental. Always check your lease before drilling or painting walls.
5. How long does chalk paint take to dry on furniture?
Chalk paint dries to the touch in about thirty minutes and is ready for a second coat in one to two hours. Let the finished piece cure for at least twenty-four hours before heavy use, and seal the top with wax or a clear sealer for durability.
6. What is the best paint for an accent wall?
A good quality interior emulsion in a matte or eggshell finish works best for most accent walls. Matte hides wall imperfections, while eggshell is easier to clean. Always test a sample on the wall first, because colours change with the light.
7. How do I make my DIY projects look professional instead of homemade?
The difference is in the finishing: sand every edge smooth, use thin even coats of paint, keep lines crisp with painter’s tape, and hide all fixings. Clean edges and consistent finishes are what make a project look bought rather than made.
Conclusion
A weekend is a surprisingly powerful unit of home improvement. Twenty-five projects, one room at a time, and a home starts to feel like it was made for you, because in a very real sense it was. The best project is the one you actually finish, so pick the idea that excites you most, buy the materials on Friday evening, and start on Saturday morning while your energy is high.
Do not worry about getting everything perfect on the first try. Paint can be repainted, shelves can be rehung, and every project teaches you something for the next one. The goal is not a showroom; it is a home that feels warm, personal, and a little bit proud of itself. Start with one wall, one shelf, or one dresser, and by Sunday night you will have proof that you can change your home with your own two hands.