18 Open Kitchen Shelving Ideas That Look Great and Stay Organized
Introduction
Open kitchen shelving is the kitchen idea people love in photographs and fear in real life, usually for the same reason: everything is on show. Done badly, open shelves become a dusty parade of mismatched mugs, chipped plates, and appliances nobody uses. Done well, they make a kitchen feel larger, brighter, and far more personal than a wall of closed cabinets ever could, because the things you actually cook with become part of the room instead of hiding behind doors.
The secret is that open shelving is not a storage system on its own; it is a display system that only works when the rest of the kitchen does its share of the hiding. The best open kitchens pair a few beautiful shelves with plenty of closed storage for the ugly essentials, keep the shelf contents edited to what is used weekly, and style each shelf like a small composition rather than a warehouse row. Like the best small kitchen decor ideas, the goal is a kitchen that works on a busy Tuesday, not just on photo day.
Below are eighteen open kitchen shelving ideas that look great and stay organized, from the first edit that makes everything else possible to the five-minute weekly habit that keeps the shelves from sliding back into clutter. Pick the three or four that solve your kitchen’s worst problem — visual chaos, dark corners, or shelves that never get used — and start there. A shelf you can actually cook from is a shelf you will love looking at every single day.
1. Start With Everyday Dishes Only

The first rule of open shelving is also the simplest: only everyday dishes earn a place on it. Plates, bowls, and glasses you reach for daily belong on open shelves, because they cycle through the dishwasher too often to gather dust, and because using them is what keeps the shelves looking alive. Everything else — the fondue set, the holiday platters, the twelve novelty mugs — belongs in a closed cabinet, where it can wait quietly for its one day a year.
Start by pulling every dish you own out of the cabinets and sorting it into daily, weekly, and rarely used groups, then be honest about the daily group. Most households eat from the same eight to twelve plates and bowls, and those are the only pieces the shelves need to hold. When a shelf holds only what gets used, it never looks cluttered, because nothing sits long enough to become a display of forgotten things.
2. Choose One Material Palette

Open shelves look chaotic fastest when every material in the kitchen competes at once: white stoneware next to patterned melamine next to coloured glass next to stainless steel. Choosing one dominant material palette — warm white stoneware with wood, for example, or clear glass with brass — instantly calms a whole wall of shelves, even when the shapes vary. The eye reads the shelf as one collection instead of a jumble of unrelated objects.
That does not mean everything must match exactly, which would look like a showroom rather than a kitchen. Pick one material for about seventy percent of what sits on the shelves, then let a second material appear as an accent: wooden boards among white dishes, or a few amber glasses among clear ones. A limited palette is also forgiving when you add a new piece, because anything in the palette family will sit happily beside what is already there.
💡 Pro Tip: If your dishes are a mixed set you cannot replace, unify them with a single shelf colour instead. Paint the shelves or the wall behind them one calm tone, and the mixed dishes will read as one collection against it, which costs far less than buying a whole new set of plates.
3. Style in Layers, Tall to Short
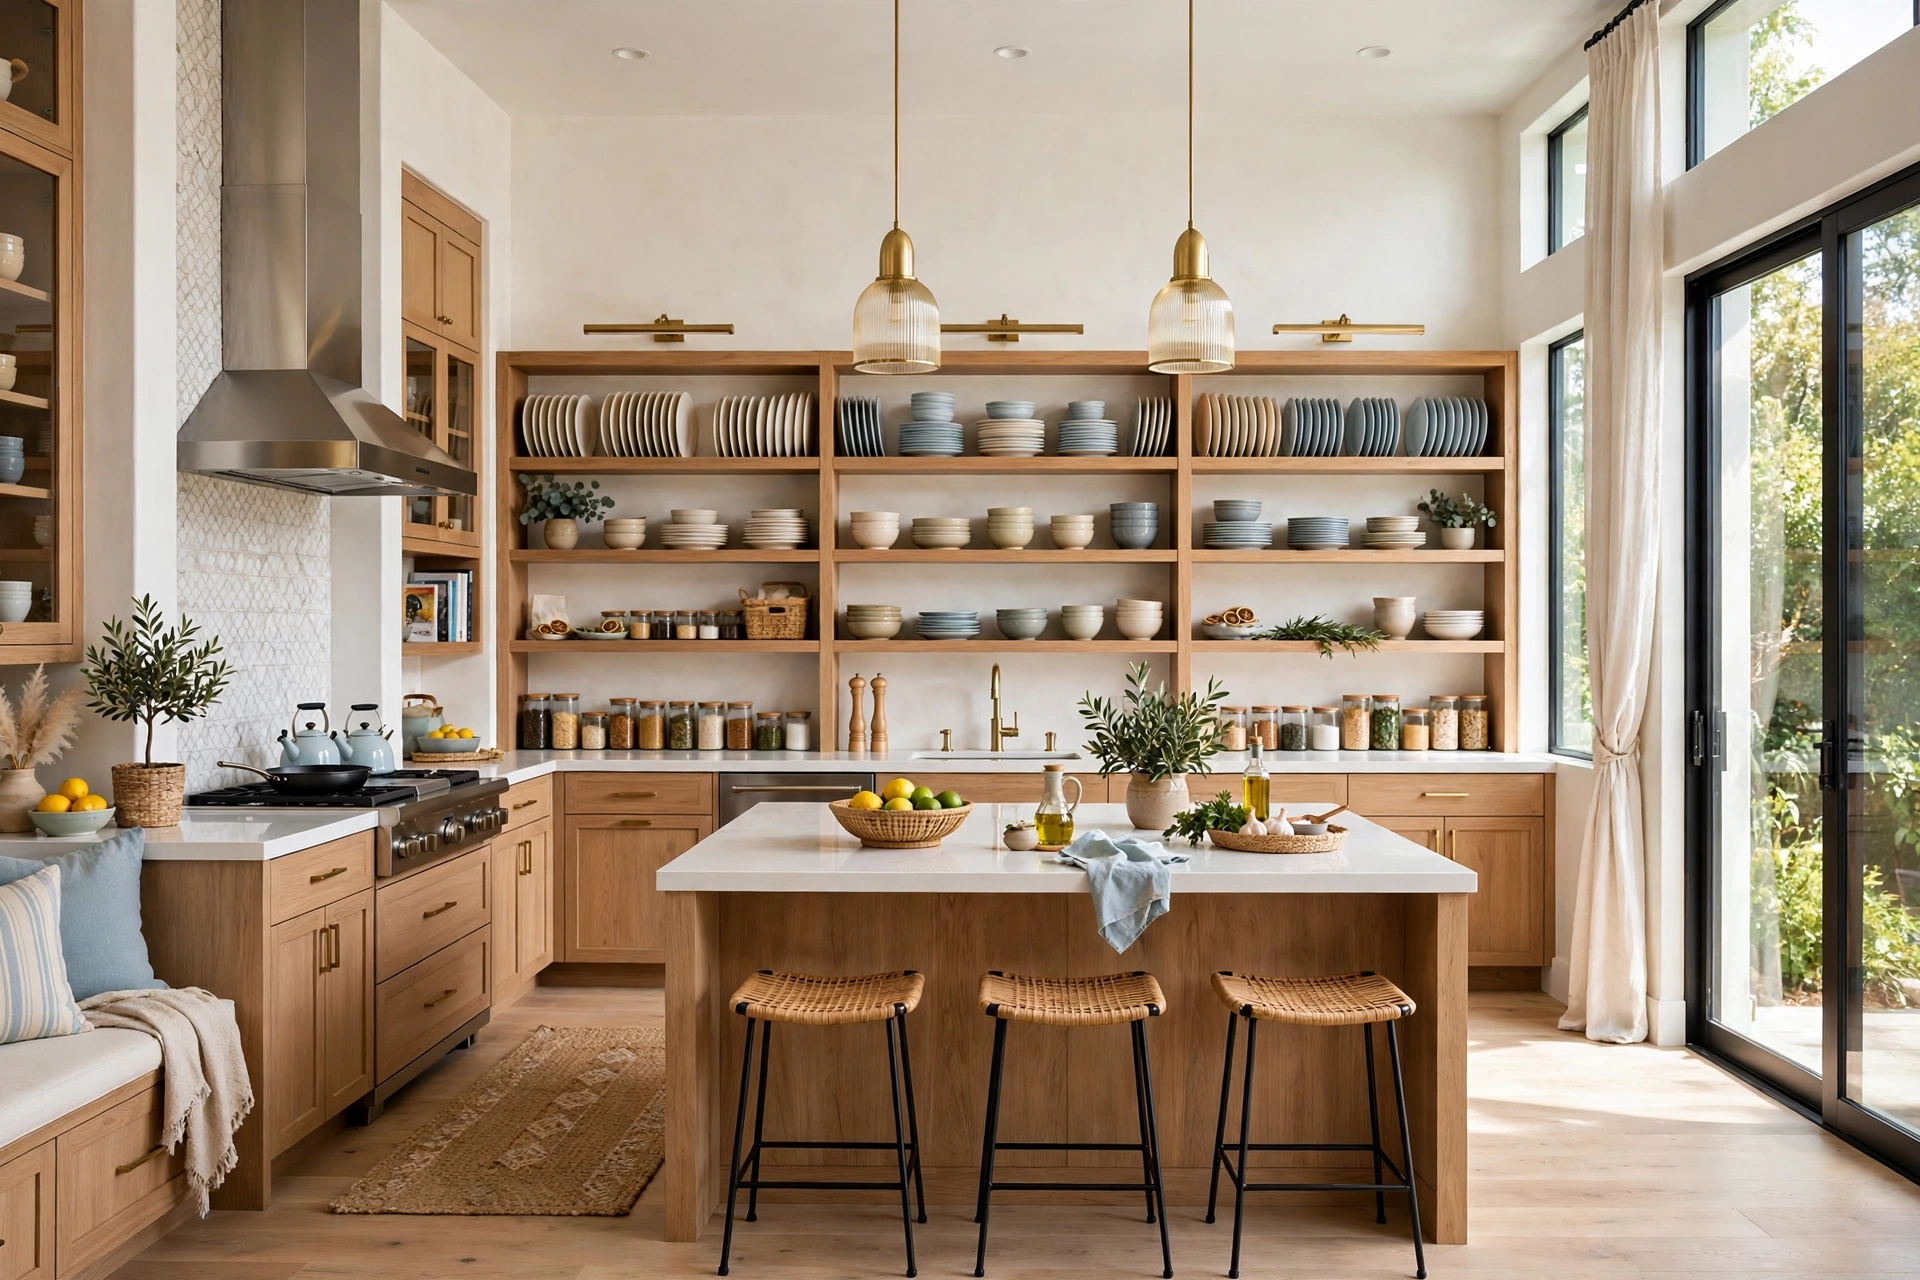
A shelf styled in a single flat row looks like a shop display, while a shelf styled in layers looks like a home. The layering rule is simple: tallest at the back, shortest at the front, with something in between to bridge the heights. Stacked bowls in front of upright plates, a small jar in front of a tall pitcher, a short plant in front of a leaning board — each layer gives the eye somewhere to travel, and nothing hides completely behind anything else.
Work from the back of the shelf forward, placing the tallest items first and checking from the front as you go, since a shelf only ever gets seen from the front. Leave breathing room between groups rather than filling every centimetre, because negative space is what makes a styled shelf look calm instead of crammed. Two or three layered groups per shelf, with a gap between them, will always look better than one unbroken row of objects.
Open Kitchen Shelving Quick-Start Checklist
- ✅ Keep only everyday dishes on open shelves; store rarely used pieces behind closed doors
- ✅ Choose one dominant material palette, such as white stoneware with wood accents
- ✅ Style each shelf in layers, tallest at the back and shortest at the front
- ✅ Mix at least one closed cabinet run with your open shelves for the ugly essentials
- ✅ Light the shelves so dishes and jars are visible in the evening, not just by day
- ✅ Leave breathing room between groups; never fill a shelf edge to edge
- ✅ Edit the shelves for five minutes once a week so clutter never creeps back
4. Mix Open and Closed Storage

The kitchens with the most beautiful open shelving almost never have only open shelving. They mix one or two runs of open shelves with closed cabinets below, beside, or above them, so the pretty everyday pieces live on show while the mismatched, bulky, and rarely used things have a proper home. This mix is what makes open shelving livable rather than a full-time styling job, because the shelves only have to hold the best-looking fraction of what you own.
Plan the mix before you remove a single cabinet door: decide which wall or run becomes open, and make sure the closed storage that remains can absorb everything that will not go on the shelves. Lower cabinets, a pantry cupboard, and one tall closed unit are usually enough, especially when paired with smart pantry organization ideas for the food itself. When the closed storage is planned first, the open shelves stay edited by design, not by constant willpower.
5. Light the Shelves Properly
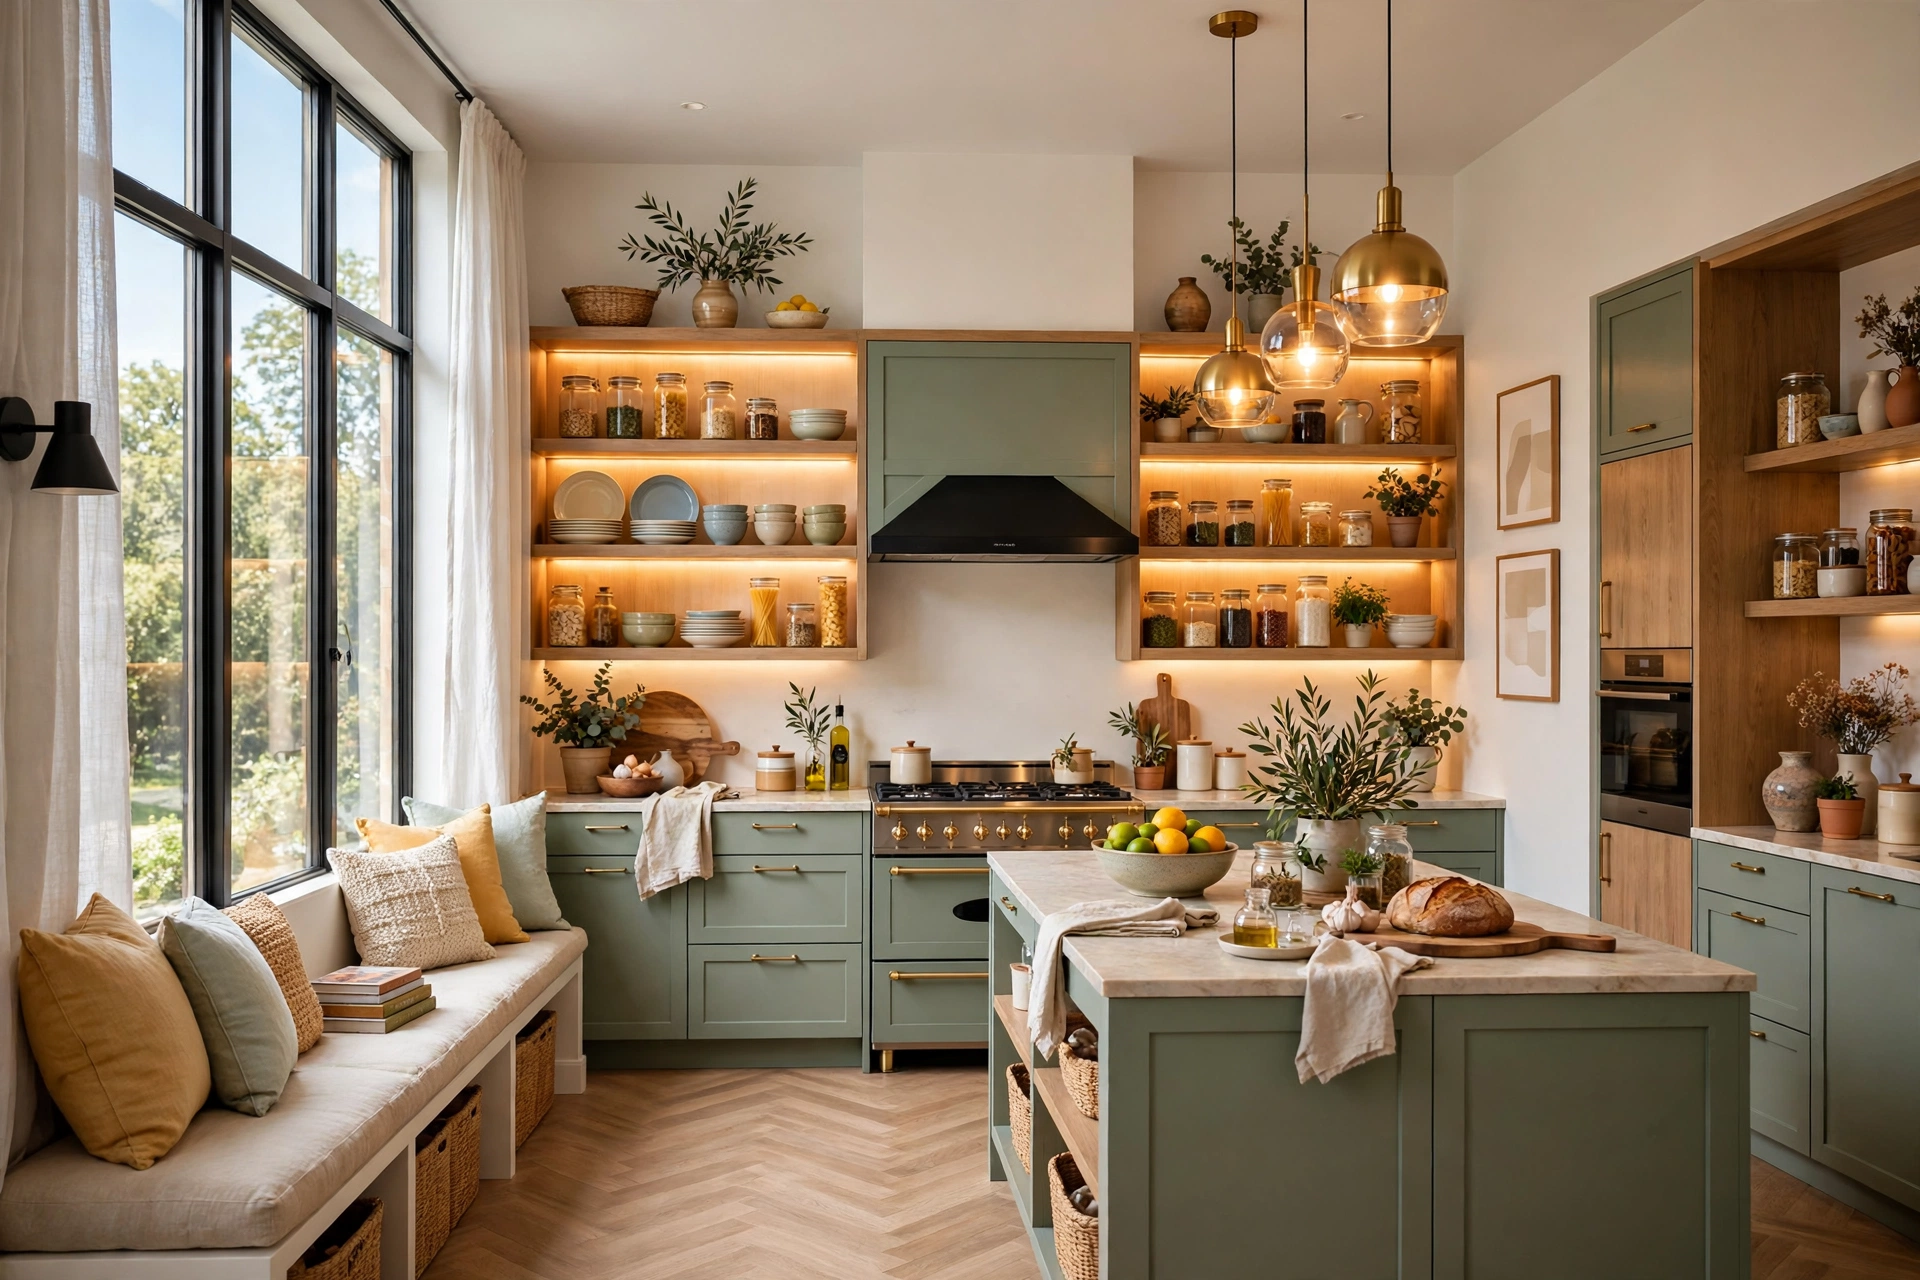
Open shelves without light are just shadows after sunset, and a shelf full of white dishes in a dark corner looks grey and uninviting no matter how well it is styled. Light is what turns shelves from storage into a feature: a slim LED strip under each shelf, a small puck light above a display run, or a picture light over a single statement shelf washes the dishes in warm light and makes the whole kitchen glow in the evening.
Battery-operated LED strips with adhesive backing need no wiring, which makes them a practical option in rentals and in kitchens where the shelves went up after the electrics were finished. Choose warm white light, around 2700 to 3000K, so the glow feels like evening sun rather than a laboratory, and run the strip the full length of the shelf so there are no dark gaps. Good kitchen counter decor always considers evening light, and shelves are no exception: they are seen most in the evening, when dinner is cooking and guests are standing around.
Quick Comparison: Open Kitchen Shelving by Cost and Effort
6. Add a Rail Under the Bottom Shelf

The underside of the lowest open shelf is wasted space in most kitchens, and a slim rail mounted there turns it into the hardest-working strip in the room. Hang everyday mugs on S-hooks, clip a small basket for tea and coffee supplies, or hang measuring cups and small utensils where they are always within reach. The rail keeps those small, fiddly items off the shelf surface itself, which leaves the shelf free for the larger pieces that actually look good on display.
Keep the rail to one row and hang only what you use daily, because a rail crowded with every mug you own quickly reads as clutter hanging in mid-air. Mount it toward the front edge of the shelf so items hang clear of the backsplash and are easy to grab, and match its finish to your faucet or shelf brackets so it reads as part of the design. A rail is also one of the most forgiving no-drill storage ideas when fitted with adhesive mounts on a smooth shelf underside, though heavier mug collections deserve proper screws into the shelf itself.
7. Use Matching Jars and Canisters

Few moves make open shelves look instantly more expensive than decanting dry goods into matching jars and canisters. A row of mismatched packets, torn boxes, and branded bags reads as a pantry spill, while a row of clear glass jars or matching ceramic canisters reads as a deliberate collection, and it is also far more practical. You can see at a glance what is running low, ingredients stay fresher in sealed containers, and pouring from a jar is easier than wrestling with a torn bag mid-recipe.
Start with the five things you reach for most — flour, sugar, rice, pasta, and coffee — and keep the jar set to one material and one lid style so the row reads as a set. Square jars waste less shelf depth than round ones, which matters on a standard shelf, and labelling the jars on the side that faces out keeps everyone in the household putting things back in the right place. Keep the tallest jars at the back of the shelf and the smallest at the front, following the same layering rule as the dishes.
📌 Important: Never load an open shelf with heavy jars of flour and sugar without checking what the shelf and its brackets can actually hold. A shelf that sags under weight is both ugly and unsafe. Spread heavy jars across two shelves, keep the heaviest on the lowest shelf, and use brackets rated well above the load you plan to put on them.
8. Display Cookbooks and Boards

Cookbooks and wooden cutting boards are the two shelf items that earn their display space twice over, because they are both decor and tools. A short row of cookbooks with attractive spines, a stack of two or three books laid flat with a small plant on top, or two or three boards leaned against the backsplash in graduated sizes all add warmth, height, and texture that plates and jars alone cannot provide. They make a shelf look like it belongs to someone who cooks, not like a shop display.
Keep the cookbook collection to the books you actually cook from — five to eight well-loved titles beat twenty pristine ones that never leave the shelf — and keep boards you cook with in a drawer or on a lower shelf, treating the leaned boards as decor so they stay clean. If your backsplash is patterned tile, choose plain wood boards so the two do not compete, and if the shelf is directly beside the stove, keep books and boards a safe distance from steam and splashes that would stain them.
9. Create a Coffee and Tea Shelf

A dedicated coffee and tea shelf turns a scattered morning routine into a small ritual and solves the scattered-mug problem in one move. Gather the coffee maker or kettle, the mugs you actually use, sugar, and spoons onto one shelf or one end of a shelf, close to an outlet and away from the main prep zone. Hanging two or three mugs on hooks underneath the shelf above keeps them off the shelf surface entirely, which leaves room for the jars and the coffee itself.
Keep the station compact and honest: only the coffee and tea gear you use every morning earns a place here, and a small jar of beans or a tiny plant can soften the corner without taking over. If the coffee gear starts spreading across the whole shelf run, the station has grown too big, and it is time to edit it back to its own zone. A coffee shelf works best as one clearly bounded group among the other shelf groups, not as a takeover of the entire wall.
10. Keep a Plant on Every Other Shelf
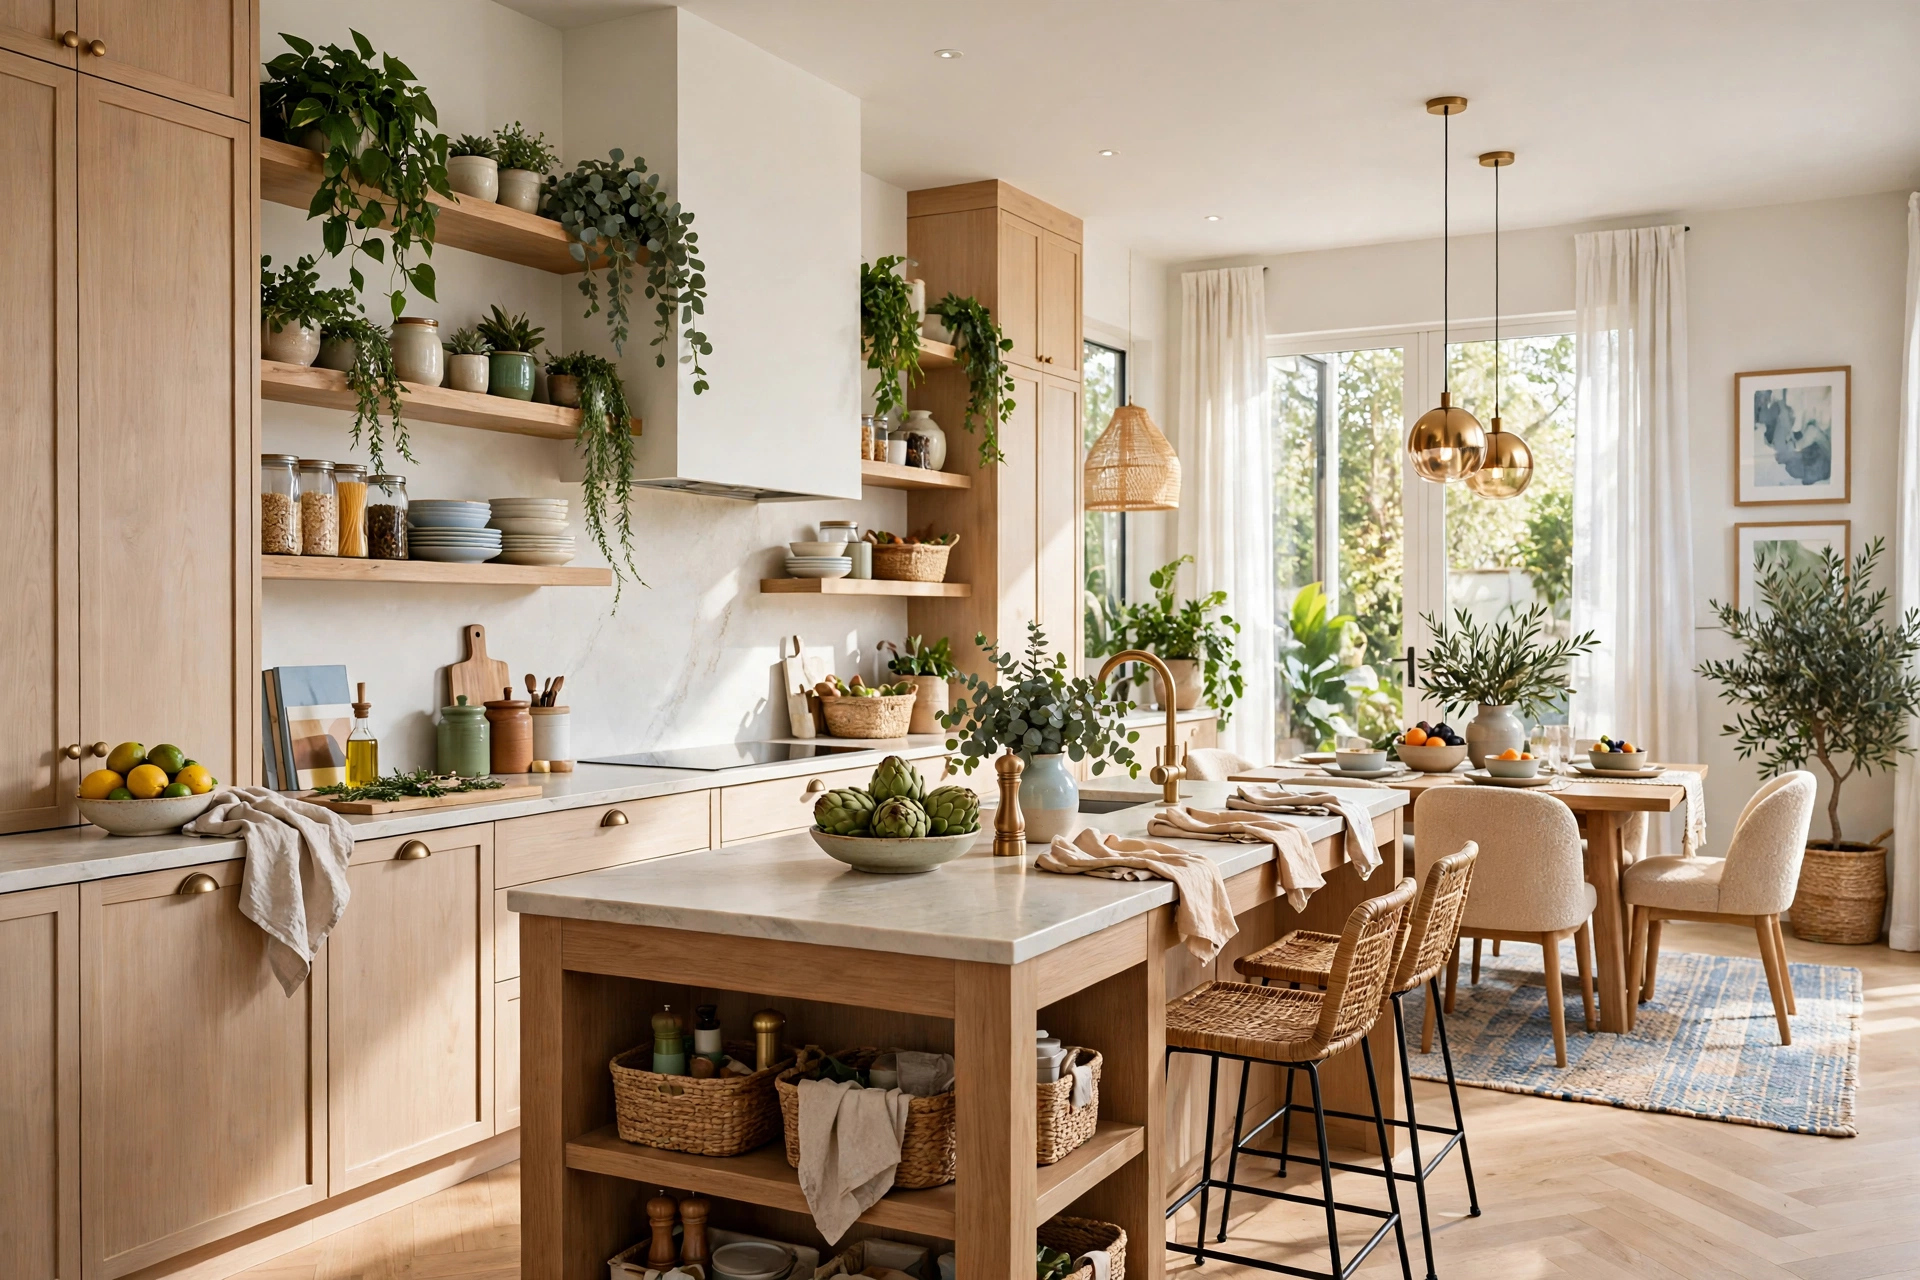
A living plant is the fastest way to soften a wall of open shelves, because dishes, jars, and boards are all hard surfaces, and one trailing pothos or small potted herb breaks that hardness with colour and movement. The rule that works best is a plant on every other shelf, not every shelf, so the greenery reads as an accent rather than a garden centre display, and so the plants never steal space from the dishes that need to live there.
Choose plants that tolerate kitchen conditions: pothos and trailing philodendron for high shelves, herbs for a shelf near the window, and small succulents where light is limited. Give trailing plants room to hang without draping over the dishes below, and water them over the sink rather than on the shelf, so drips never reach the plates. A plant that is easy to care for will stay beautiful; a plant that needs constant attention on a high shelf will become one more thing to resent.
11. Style Around the Sink Window

The wall beside or above a sink window is often the best place in the kitchen for open shelving, because the window already brings light and a view, and the shelves borrow both. A single shelf on each side of the window, or one short shelf across the window wall above eye level, frames the window beautifully and puts everyday glasses and small plants exactly where they catch the light. It also turns a wall that would otherwise hold a cabinet into a brighter, more open-feeling stretch of kitchen.
Keep the window shelves light and low in profile: glasses, small jars, and one plant, rather than heavy stacks of plates that block the light. Check the shelf height carefully so nothing hangs into the window’s opening path, and avoid putting anything on a window shelf that will be ruined by direct sun, such as herbs that scorch or oils that go rancid in heat. When styled lightly, window shelves make the sink the prettiest workstation in the kitchen instead of the most ignored one.
12. Use Baskets for the Ugly Essentials
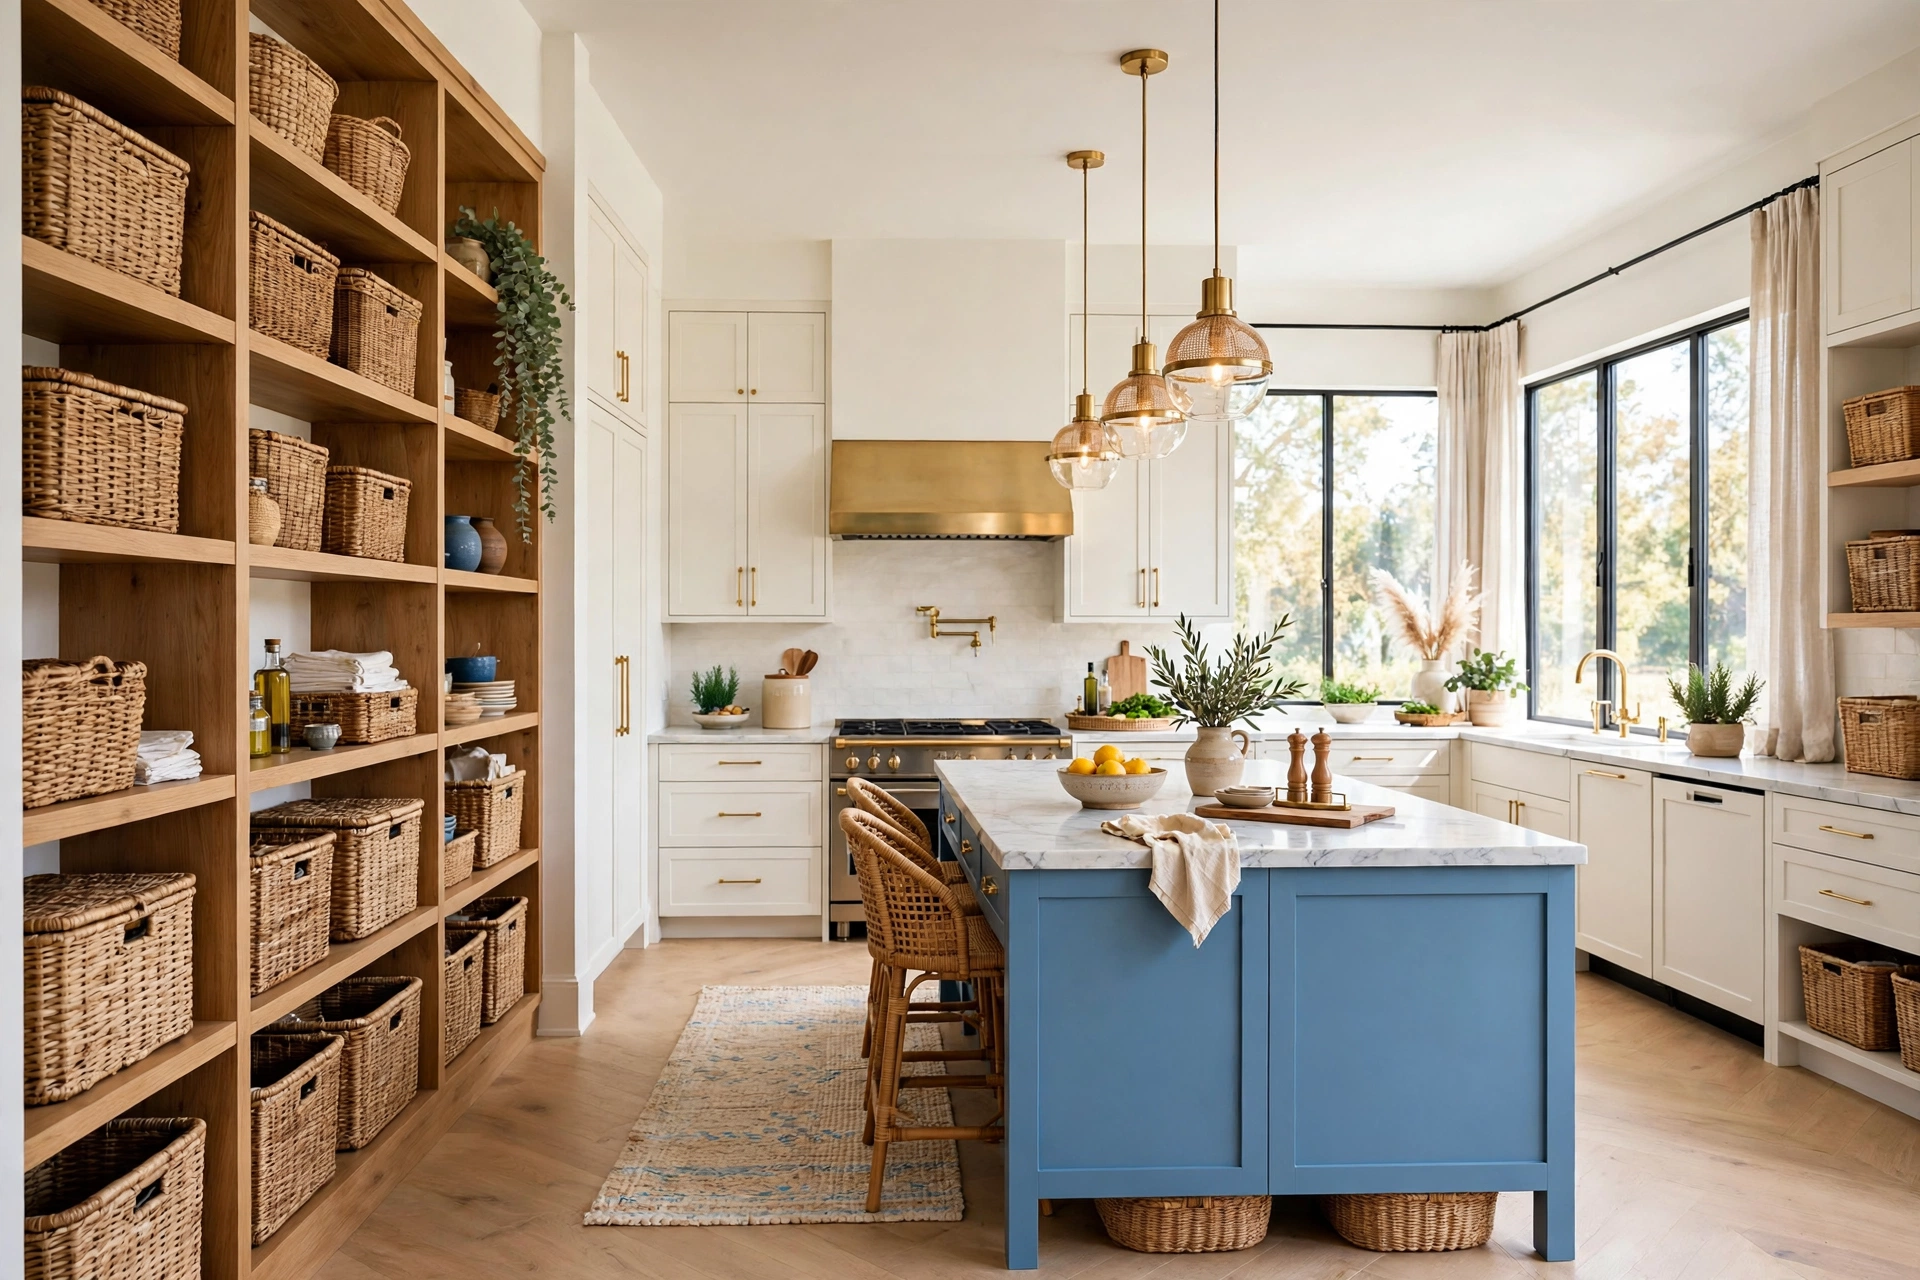
Every kitchen has essentials that are useful but not beautiful: packet mixes, snack bars, cleaning cloths, spare batteries for the kitchen timer, and the tea towels that never quite match. Baskets are how those essentials live on open shelves without ruining the look. A woven or fabric basket corrals a whole category into one calm shape, hides the mismatched packaging inside, and pulls out like a drawer when you need something from it.
Use one basket per category and label it, because an unlabelled basket becomes a junk drawer within a month, and keep baskets to the lower shelves where their weight is easy to manage. Woven baskets also add the natural texture that hard kitchen surfaces need, warming up a wall of tile, metal, and glass. Keep the basket count low — two or three across a whole shelf run is plenty — so the shelves still read as open and airy rather than as a wall of boxes.
⚠️ Warning: Never store food directly in an open woven basket without a liner or sealed containers inside. Crumbs collect in the weave, attract pests, and are almost impossible to clean out properly. Line food baskets with a washable cloth or use sealed jars and packets inside the basket, and wash the liner regularly.
13. Go Dark With Moody Shelving
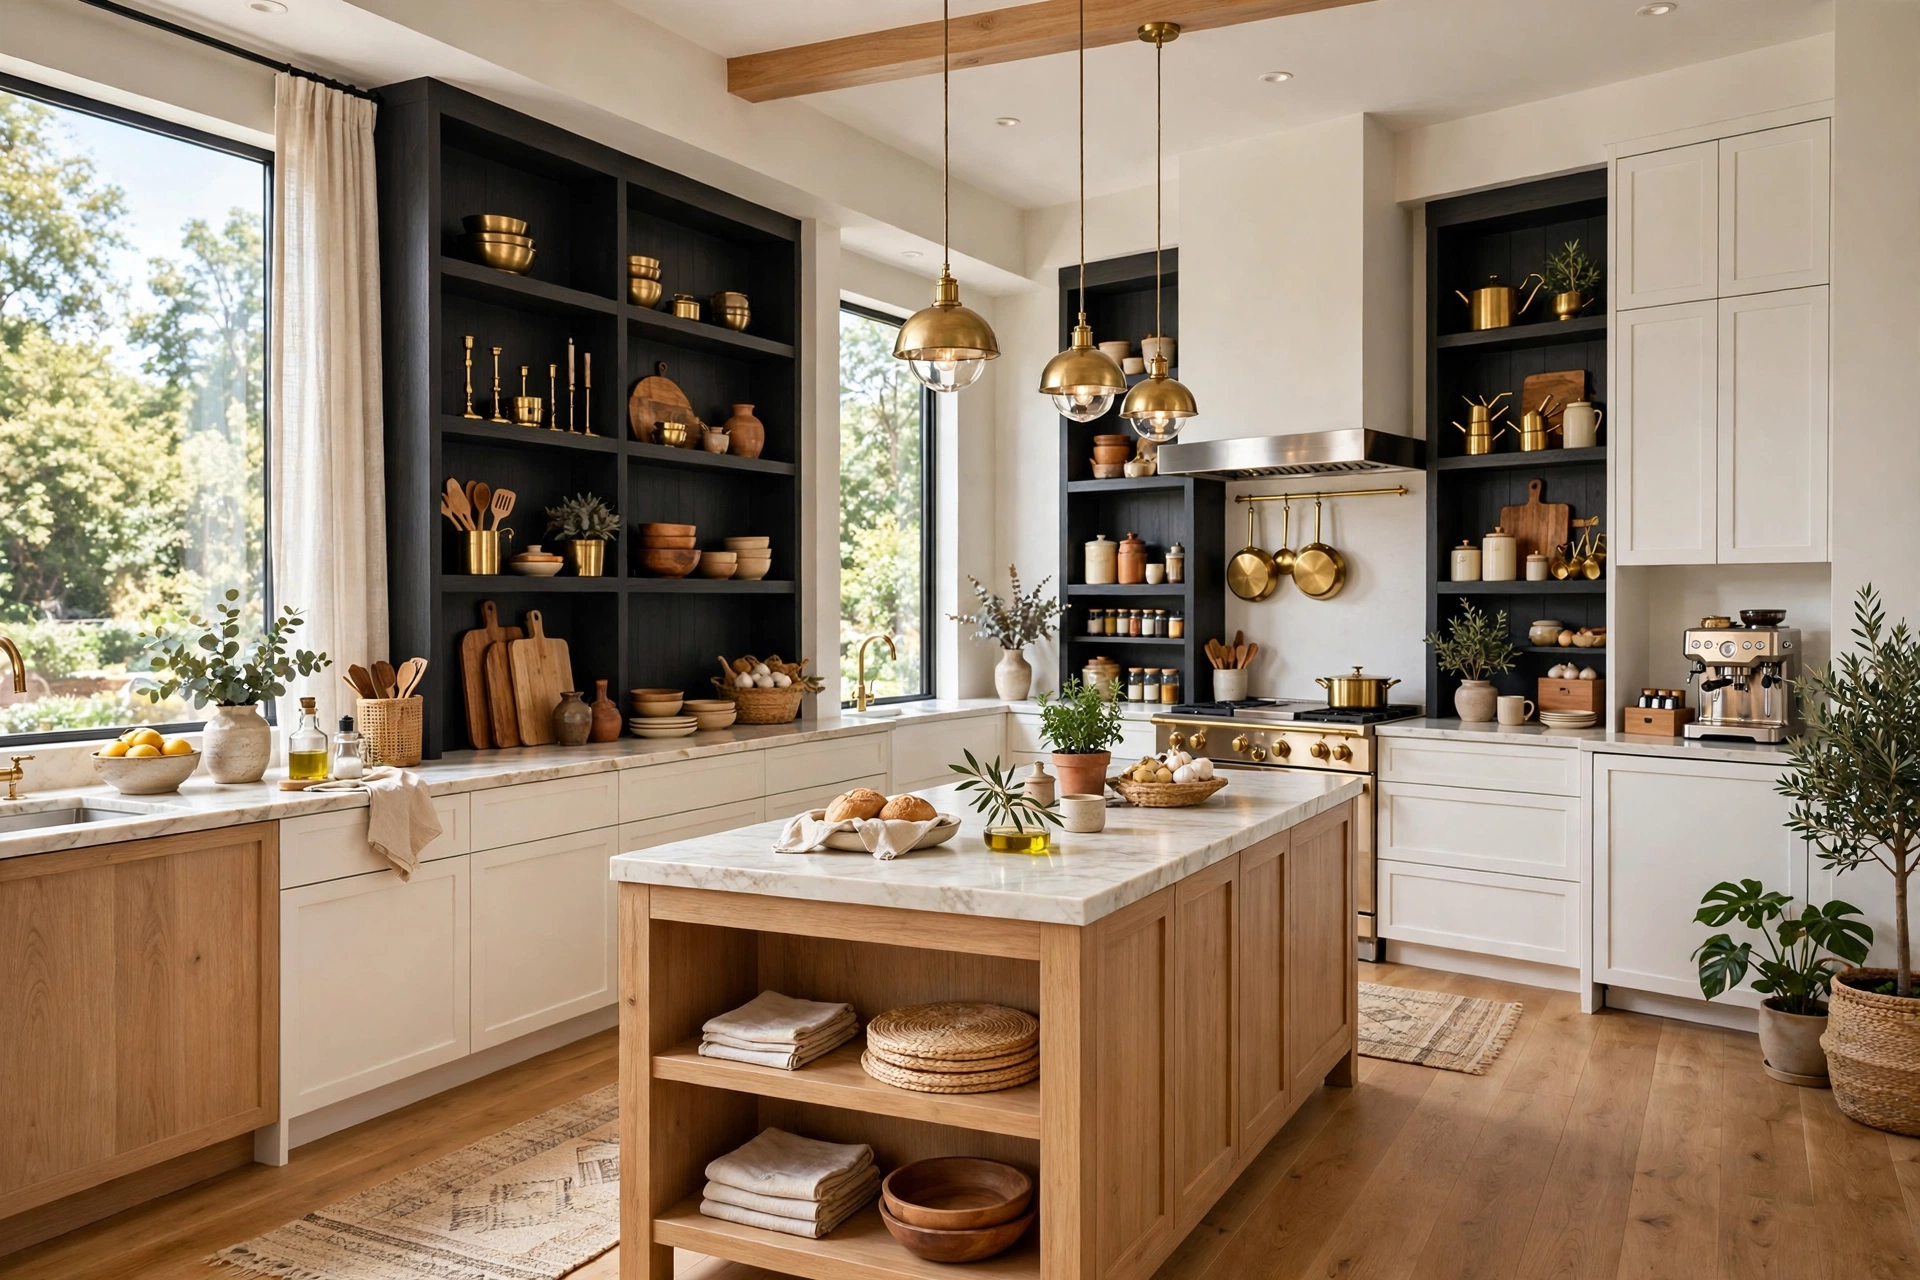
Open shelving does not have to be white and bright to look good. Dark shelves — deep walnut, charcoal-painted wood, or black metal brackets with dark boards — create a moody, collected kitchen that makes brass, copper, and warm wood tones glow against it, and they hide everyday wear far better than pale shelves do. A dark shelf run works especially well in kitchens with dark lower cabinets, where it reads as a deliberate continuation of the palette rather than a random accent.
Balance is what makes dark shelving work: pair dark shelves with light dishes or light walls so the display does not disappear into shadow, and add the shelf lighting from idea five, because dark shelves absorb light instead of reflecting it. Keep the contents edited even more ruthlessly than on pale shelves, since clutter reads faster against a dark background. Done with restraint, moody shelving looks expensive, intentional, and far more forgiving of daily life than a pristine white wall.
14. Try a Single Long Shelf, Not Many Short Ones

A single long shelf running the full length of a wall often looks calmer than three or four short shelves stacked in a grid, because the eye reads one continuous line instead of a set of boxes. A long shelf also gives you room to create proper breathing space between groups, which is the hardest thing to achieve on a short shelf where two groups already fill the width. In a galley kitchen or above a long counter run, one shelf at eye level can hold the entire everyday collection without the wall feeling busy.
The practical catch is support: a long shelf needs brackets or a hidden rail at regular intervals, and the span between supports must match the shelf material, or it will sag in the middle under plates and jars. Check the manufacturer’s span guidance before you buy, and keep heavy items near the supports rather than in the middle of the longest span. A single long shelf is also easier to dust and edit than a stack of short ones, because there is only one surface to maintain.
15. Make a Kids’ Reachable Shelf

If children use the kitchen, one low open shelf just for them changes the daily dynamic completely. A reachable shelf with their own plates, bowls, cups, and a snack basket means children can set the table, help themselves to a snack, and put their own dishes away without climbing or asking an adult for every item. It also protects the rest of the shelves, because children stop pulling at the high, pretty displays once they have a shelf that is genuinely theirs.
Keep the kids’ shelf low, sturdy, and limited to unbreakable or everyday pieces — melamine or stoneware they can safely handle, not the good glasses or anything sharp. Label it with a picture label for younger children, and keep it to one shelf, not a whole run, so the kitchen still reads as an adult room with a child-friendly corner. The shelf teaches independence and tidiness at once, because a child who can reach their own dishes can also learn to put them back.
16. Rotate Seasonally, Not Constantly
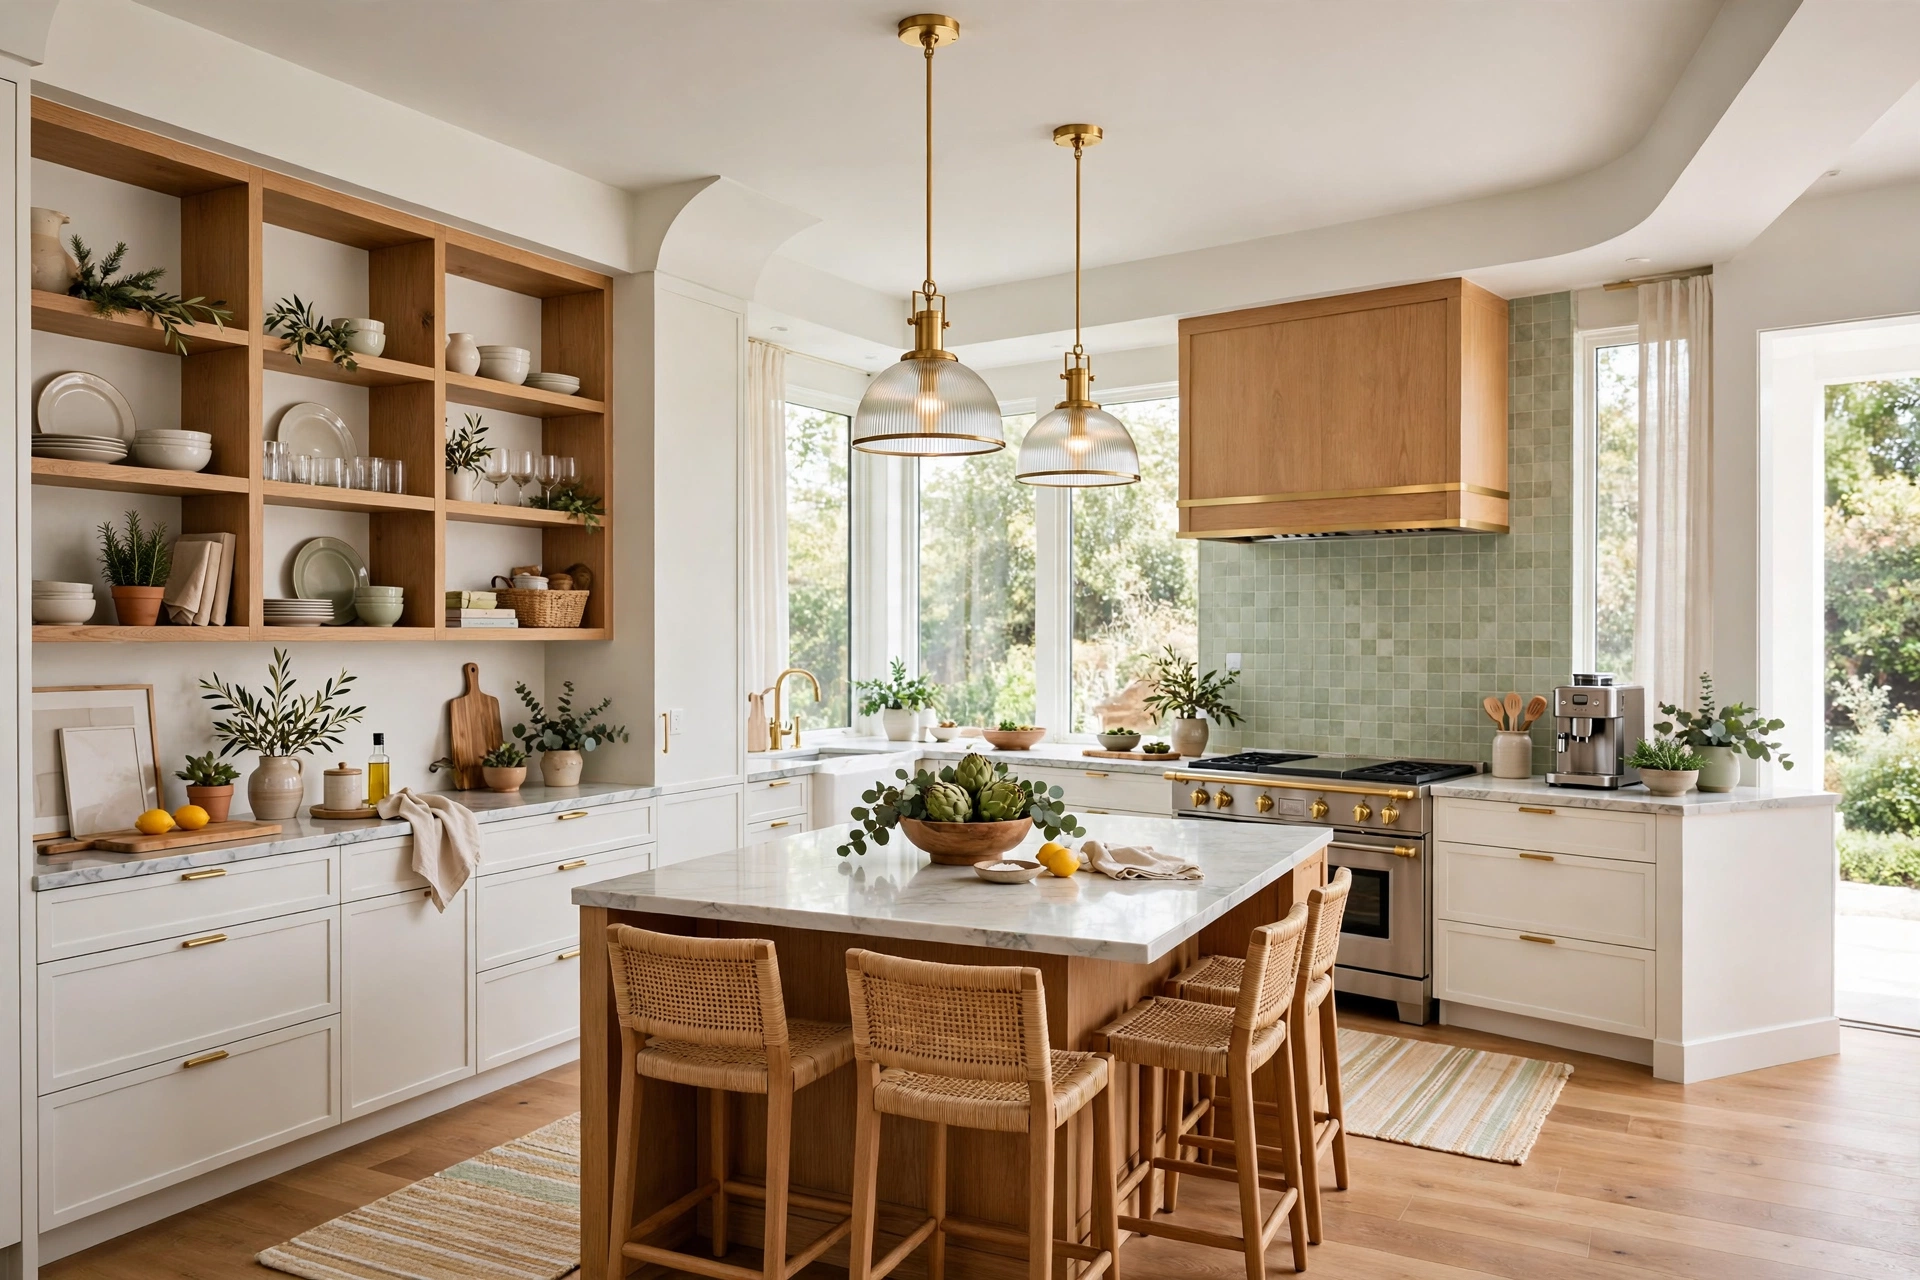
Open shelves look tired fastest when they never change, and they look exhausting when they change every week. The middle path is a seasonal rotation: keep the everyday dishes and jars in place all year, and swap only one or two decorative elements with the season. A sprig of eucalyptus in autumn, a small vase of fresh flowers in spring, a bowl of citrus in summer, a pine sprig and a candle in winter — small swaps that make the shelves feel current without a full restyle.
Set a simple rule for the rotation: one decorative swap per shelf, once per season, and nothing new comes onto the shelf until something old comes off it. That rule keeps the shelves from slowly accumulating ornaments until the dishes have nowhere to go, and it makes the seasonal change feel like a small pleasure rather than a chore. The everyday core stays constant, which is exactly what makes the shelves usable, while the seasonal accents keep them looking loved.
💡 Pro Tip: Photograph your shelves after a styling session you love, and keep the photo on your phone. When a shelf drifts over the following months, the photo shows you in seconds what belongs where, which turns the weekly edit from a guessing game into a two-minute reset.
17. Pair Shelves With a Backsplash Feature
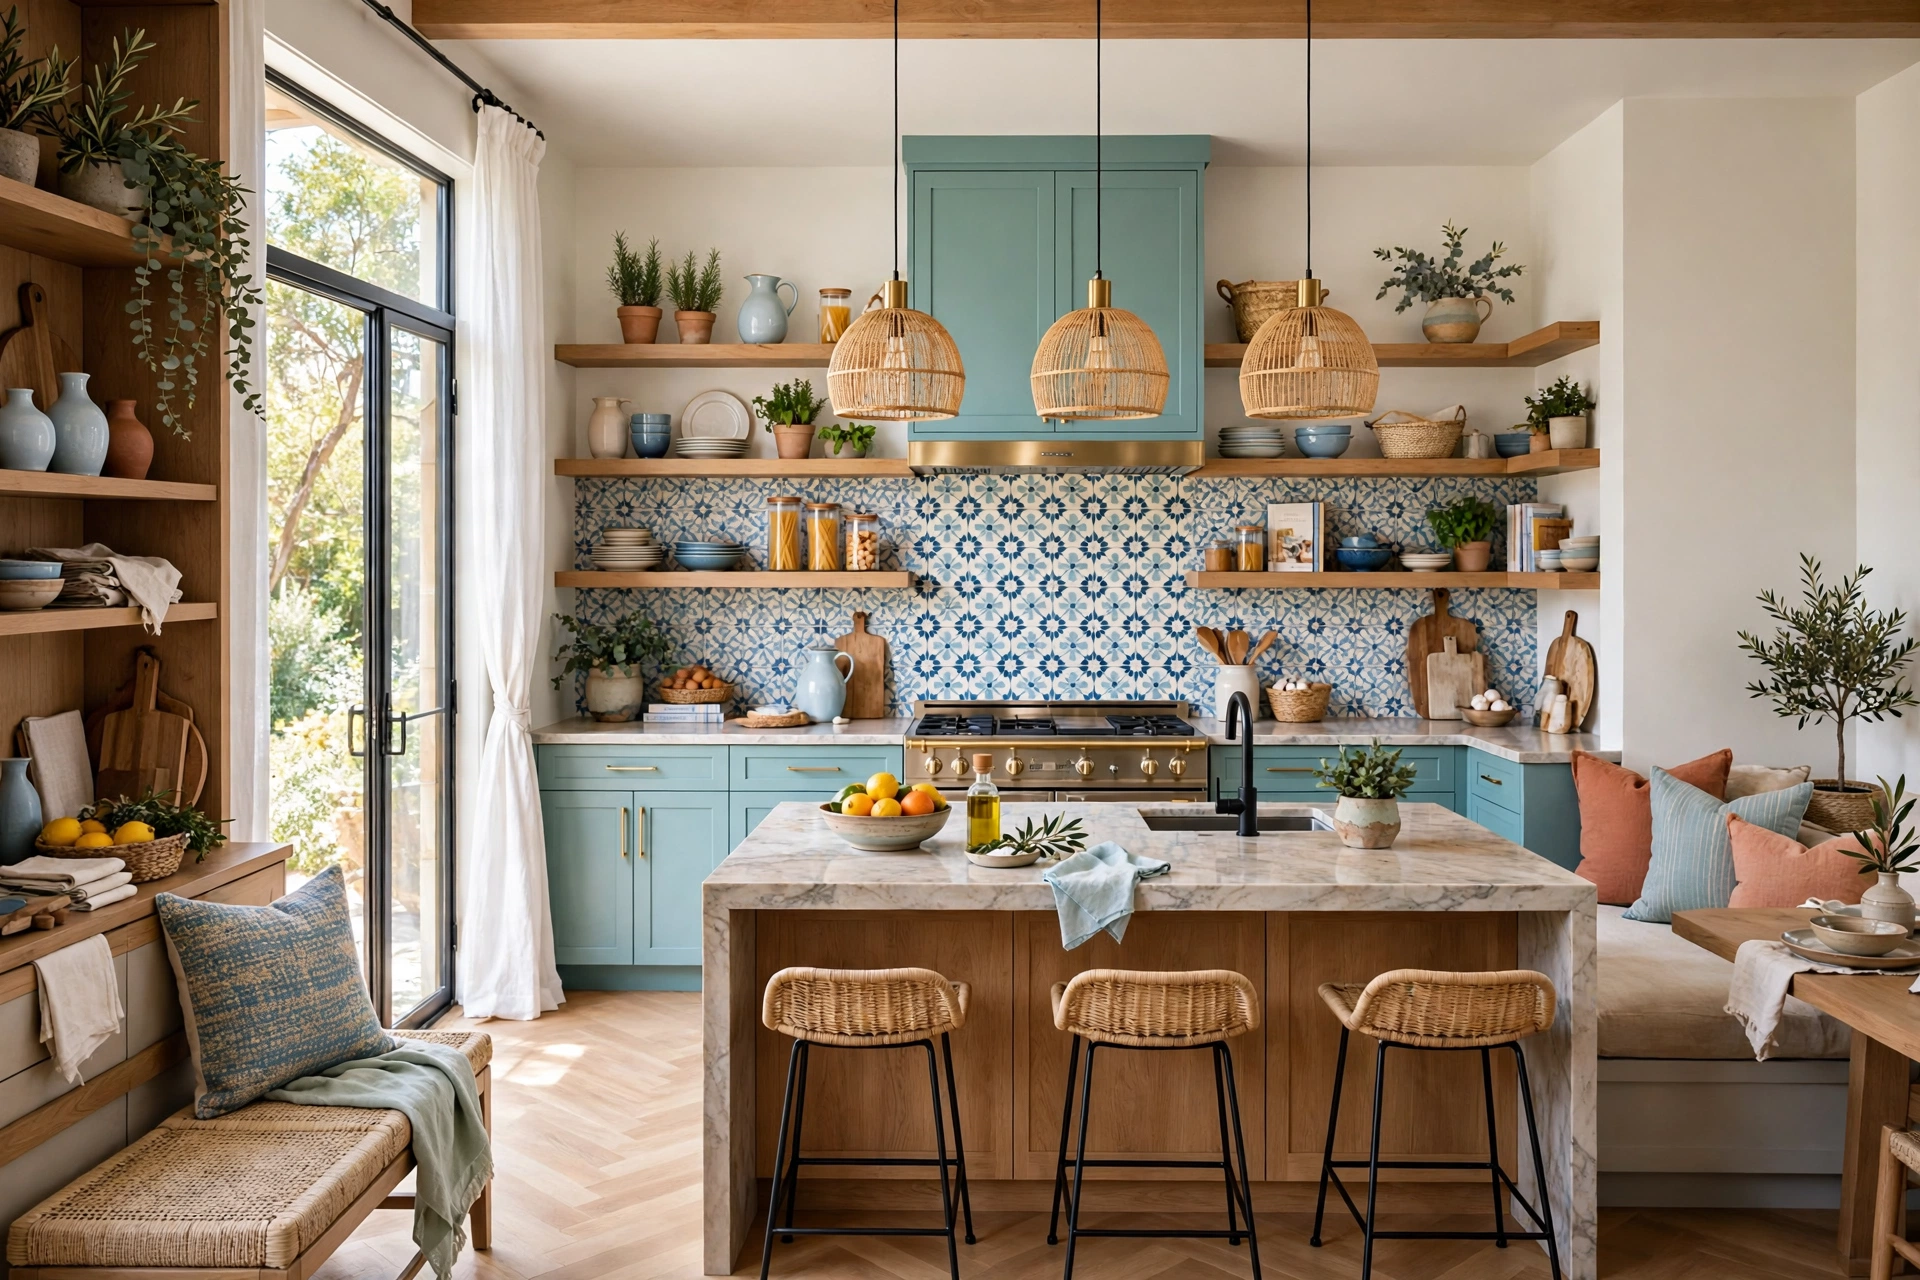
Open shelves look their best when the wall behind them does some of the work, and a backsplash feature is the easiest way to give them a backdrop. A run of patterned tile, a painted plaster wall, a beadboard panel, or even a single bold paint colour behind the shelves turns plain dishes into a display, because the background adds pattern and depth that the shelf contents alone cannot provide. The shelves and the backsplash should be planned together, not as two separate decisions.
Keep the pairing calm: a busy backsplash calls for plain dishes and minimal styling, while a plain backsplash can carry more colour and texture on the shelves. If you are renting, a removable tile decal or a painted board mounted behind the shelves gives you the same backdrop effect without touching the landlord’s tile. Whichever route you choose, the backsplash should frame the shelves rather than compete with them, so stand back and check the whole wall from the doorway before you call it finished.
18. Edit Weekly in Five Minutes
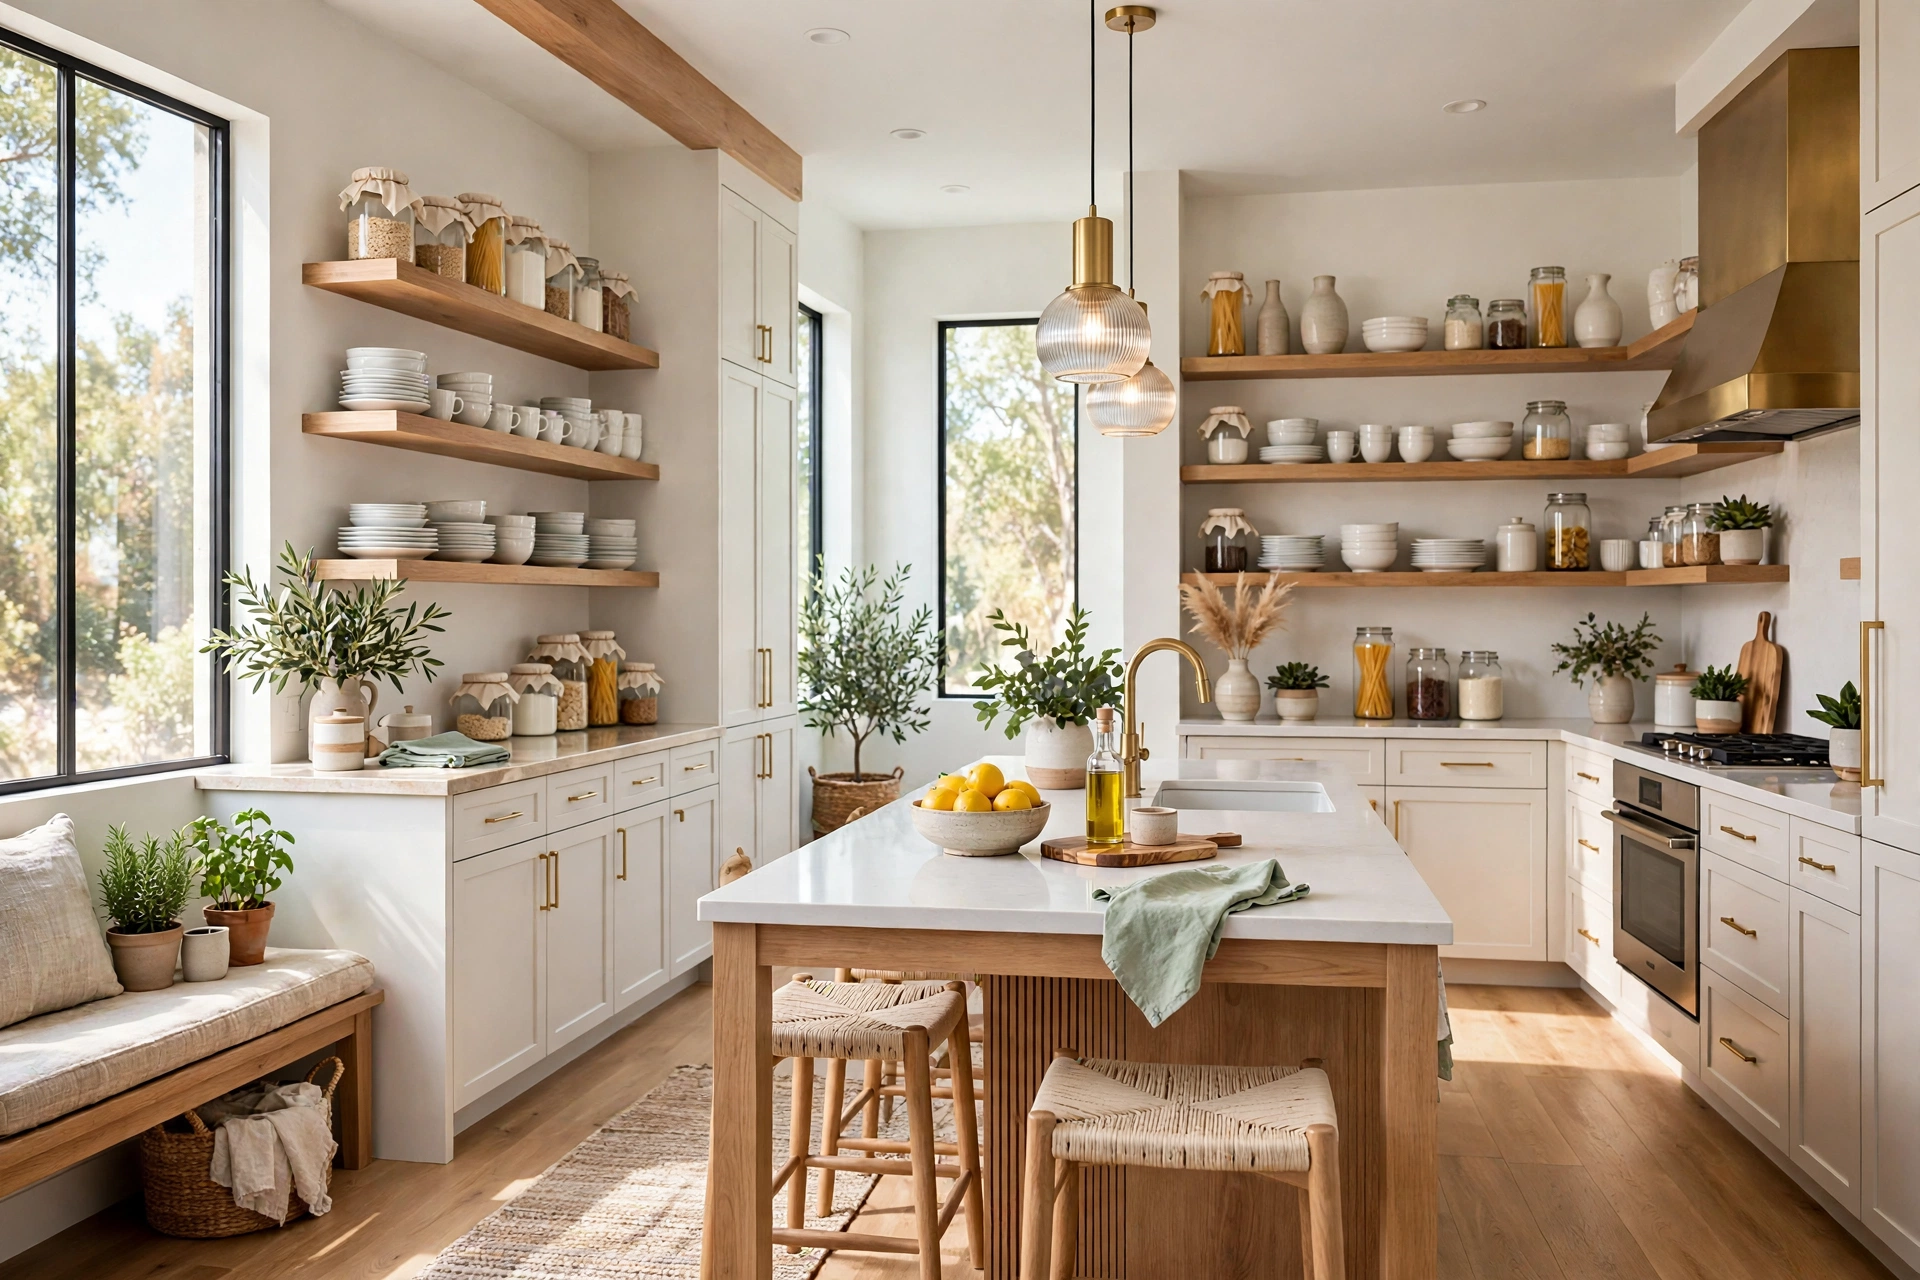
The best open shelving system in the world fails without maintenance, and the maintenance is smaller than you think: five minutes, once a week. Pick one day, stand in front of the shelves, pull off anything that drifted there during the week, put back anything that migrated to the wrong shelf, wipe one shelf if it needs it, and check that the dishes on show are still the ones you actually use. Five minutes weekly beats a three-hour restyle every six months, because the shelves never get bad enough to dread fixing.
Tie the edit to something you already do, like writing the shopping list or unpacking groceries, so it becomes a habit instead of a chore, and involve the household: the person who cooks least often is often the best editor, because they see the drift with fresh eyes. A shelf that gets five minutes a week stays a shelf you love looking at, year after year, and it is the single habit that separates kitchens whose open shelves stay beautiful from kitchens whose shelves quietly slide back behind cabinet doors.
Common Open Kitchen Shelving Mistakes
Mistake 1: Putting Everything You Own on Show
The most common open shelving mistake is treating the shelves as extra cabinet space and loading them with everything you own. Shelves are a display for the best-looking, most-used fraction of your kitchen, not a warehouse for the whole collection. When everything is on show, nothing looks special, and the kitchen reads as cluttered no matter how tidy each individual item is. Edit first, display second, and let the closed cabinets do the heavy lifting.
Mistake 2: Choosing Style Over Reach
A shelf styled for a photograph often puts daily plates on the highest shelf and decorative pieces at hand height, which means every meal starts with a climb and a stretch. Put the food you use daily at eye level and within easy reach, even if it is less pretty, and save the beautiful display for the top shelf. A kitchen is a working room first and a photo second, and shelves that fight your daily routine will be resented within a week.
Mistake 3: Ignoring Weight and Bracket Ratings
Open shelves fail in the most literal way when weight is ignored: brackets bend, boards sag, and in the worst case a loaded shelf comes off the wall. Every shelf has a real weight limit, and plates, jars, and books are far heavier than they look in a group. Check bracket ratings before you load a shelf, spread heavy items across shelves, keep the heaviest low, and anchor into studs or proper wall fixings rather than relying on plasterboard alone.
Mistake 4: Forgetting Dust and Grease
Open shelves collect dust and cooking grease in a way closed cabinets never do, and a shelf beside the stove can develop a sticky film within weeks if it is never wiped. Budget for the cleaning reality when you plan shelves: keep shelves away from the direct splash and steam zone beside the hob where possible, choose dishes that wash easily, and wipe the shelf surfaces weekly as part of the five-minute edit. A shelf system that ignores cleaning will look tired fast, no matter how beautiful its first week was.
Mistake 5: Skipping the Closed Storage Plan
A kitchen with only open shelves and no closed storage plan is a kitchen with nowhere to hide the ugly essentials, and the shelves will eventually absorb them. Before removing cabinet doors, decide exactly where the mismatched, bulky, and rarely used items will live, and make sure that storage actually exists. The closed plan is not the boring part of open shelving; it is the part that makes the open part possible.
Frequently Asked Questions
1. Are open kitchen shelves practical for everyday cooking?
Yes, when they hold only everyday dishes and are paired with closed storage for everything else. Daily plates and glasses cycle through the dishwasher too often to gather dust, and having them at eye level makes cooking faster, not slower. The impractical version is a kitchen with only open shelves and no closed plan, which turns every shelf into a styling job.
2. How do I keep open shelves from looking cluttered?
Edit ruthlessly, choose one material palette, style in layers with breathing room between groups, and keep each shelf about two-thirds full. The cluttered look almost always comes from too many items, too many materials, or no gaps between groups, rather than from any single item. A five-minute weekly edit keeps the calm in place once you have achieved it.
3. What should I put on open kitchen shelves?
Everyday plates, bowls, and glasses, matching jars of staples you use weekly, a few cookbooks, leaning boards, and one plant per every other shelf. Keep rarely used, mismatched, or purely functional items behind closed doors. If you would not want guests to see it, it belongs in a cabinet, not on a shelf.
4. Do open shelves collect a lot of dust?
They collect more dust than closed cabinets, but daily-use dishes stay clean because they are washed so often, and a weekly wipe handles the rest. Keep shelves away from the hob’s direct grease zone where possible, and wipe shelf surfaces during the weekly edit. The dust problem is real but small, and it is the price of a kitchen that feels open and personal.
5. Can renters have open kitchen shelving?
Yes, in most rentals, by removing cabinet doors and storing them safely for move-out, by using adhesive-mounted rails and LED strips, or by adding a freestanding shelf unit that leans against the wall. Always check your lease and keep the original doors and hardware in a labelled bag so the kitchen can be restored exactly. The no-drill storage ideas in this guide’s renter sections are the safest starting point.
6. How high should open kitchen shelves be?
The lowest shelf should sit about 45 to 50 centimetres above the counter, which puts everyday dishes within easy reach without blocking the work surface. Leave about 30 to 35 centimetres between shelves so plates and jars fit comfortably with room to lift them out. If a shelf is too high to reach without a step stool, it should hold display pieces only, never daily dishes.
7. Are open shelves cheaper than cabinets?
Usually, yes, because a shelf board and brackets cost far less than a cabinet carcass with doors and hinges, and removing cabinet doors costs nothing at all. The savings shrink if you need new brackets, lighting, and matching jars, but even with those, a shelf run is typically cheaper than the equivalent cabinets. The real cost is the editing and weekly upkeep, which is time rather than money.
Conclusion
Open kitchen shelving works when it is treated as a display for the best part of your kitchen, not as extra storage for all of it. Keep the everyday dishes on show, hide the rest behind closed doors, choose one calm palette, light the shelves well, and edit them for five minutes a week. Those five habits are the whole system, and they are what separate shelves that stay beautiful from shelves that slide back into clutter.
Start today with the free moves: pull the rarely used pieces off the shelves, group what remains by material, and leave breathing room between the groups. Then add one upgrade that solves your biggest frustration, whether that is lighting, a rail under the lowest shelf, or matching jars for the staples. A shelf you can cook from is a shelf you will love looking at, and your kitchen will feel larger, brighter, and more personal for it.