How to Add Storage to a Small Apartment Without Drilling
Introduction
Small apartments run out of storage long before they run out of anything else. The closets are shallow, the cabinets are few, and every surface slowly disappears under things that don’t have a home. The natural answer — mounting shelves and racks wherever there’s wall — collides with the renter’s reality: drilling holes costs deposit money, and in many leases it’s simply not allowed. So the storage problem goes unsolved, and the apartment feels smaller every month as clutter claims more territory.
Here’s the good news: damage-free storage has never been better. Adhesive hooks that hold real weight, tension rods that wedge in with no hardware, furniture that stores without touching a wall, and organizers that exploit the back of every door — together they can add the storage of a whole extra closet without a single hole. If you’ve been collecting tiny apartment decorating ideas but the storage chapter is always missing, this guide fills it.
What follows are fifteen drill-free storage ideas, each practical and rental-safe. None of them require tools beyond maybe a screwdriver for furniture assembly, and all of them come off cleanly at move-out. Work through the list, pick the three to five that match your apartment’s worst storage gaps — the entryway pile, the cabinet chaos, the bathroom clutter — and add them this weekend. Your walls stay pristine, your deposit stays yours, and your apartment finally has a place for everything.
1. Adhesive Hooks and Wall Strips That Leave No Trace
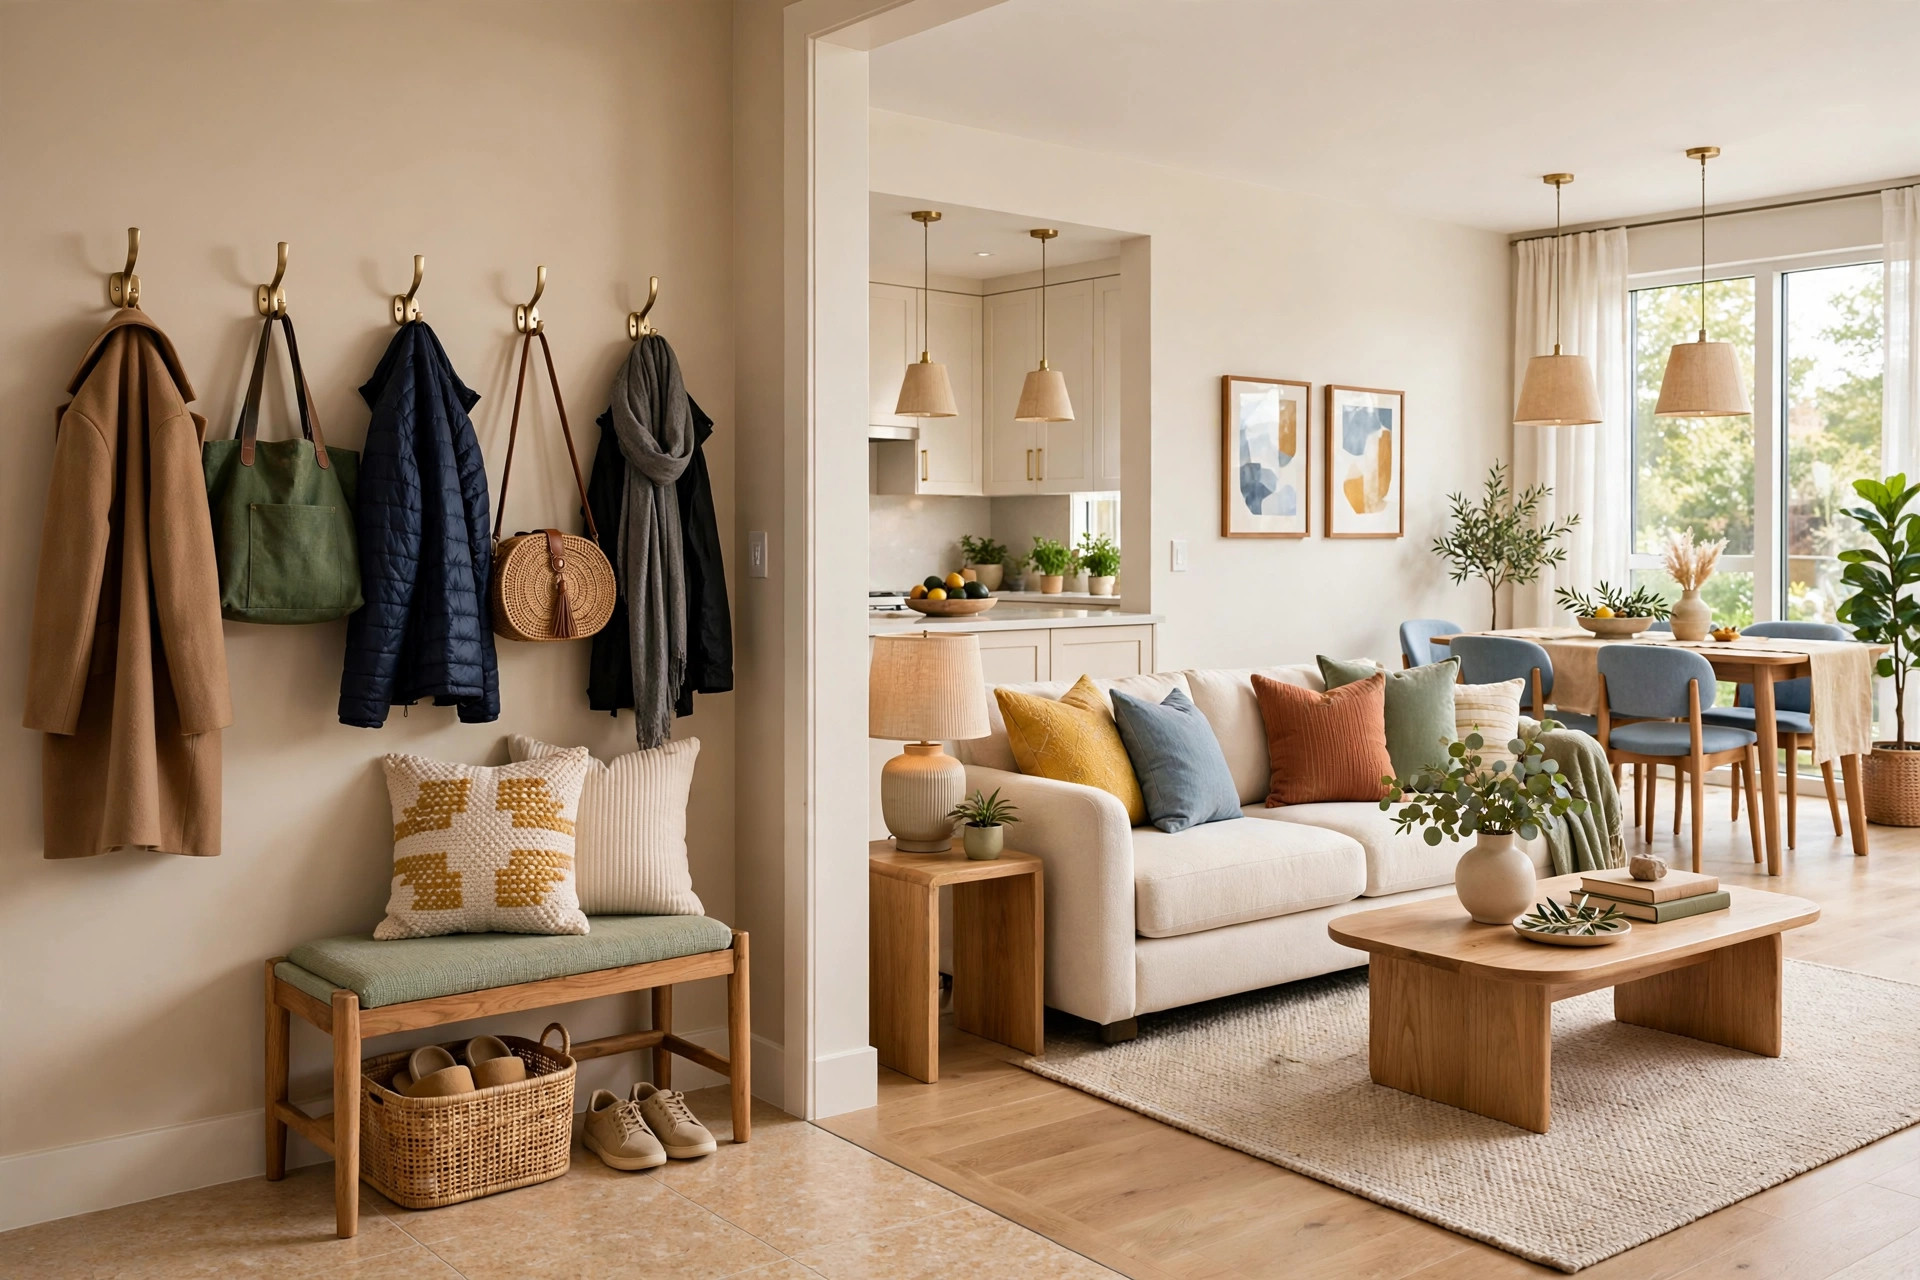
The single most versatile no-drill storage tool is the adhesive hook. Modern removable strips hold anything from keys to a winter coat, releasing cleanly with a slow pull that stretches the adhesive instead of tearing paint. Run them in rows along entryway walls for coats and bags, inside closet walls for belts and scarves, in the kitchen for mugs and utensils, and in the bathroom for robes and towels. A dead wall becomes a storage zone in ten minutes, and at move-out the whole system disappears.
Success comes down to prep and patience. Clean the surface with rubbing alcohol first — dust and cooking film are the real reason hooks fail. Press the strip firmly for thirty seconds, then wait the full curing time before hanging anything. Be honest about weight ratings: a hook rated for a few pounds holds a robe beautifully and fails dramatically under a loaded backpack, so spread heavy loads across two hooks.
📌 Important: Test adhesive strips on a hidden patch of wall first — behind a door or inside a closet. Most release cleanly from standard latex paint, but they can pull up flat or matte finishes and fresh paint that’s less than a few weeks old. One small test patch saves you from learning this on a highly visible wall.
2. Over-the-Door Organizers: Doors Are Free Real Estate

Every door in your apartment is a storage wall you haven’t used. Over-the-door organizers hook over the top — no screws, no adhesive — and instantly create shelves, pockets, or racks where there was painted wood. In the bedroom, a pocket organizer holds shoes and accessories; in the pantry, a slim rack corrals bottles and cans; in the bathroom, a narrow shelf keeps toiletries off the counter. They work in every rental with zero commitment.
Fit is the one thing to check first. Measure the gap between the door top and the frame — a tight frame makes the door rub or refuse to latch. Interior doors usually work best; shallow or metal frames may need slim foam-backed versions. Distribute weight thoughtfully too: keep heavy items low and centered, since a door loaded heavily on one side strains its hinges over time.
💡 Pro Tip: Line the metal hooks with small felt furniture pads where they touch the door’s top edge. The pads stop any scratching during daily use and silence the faint rattle that wire hooks can make every time the door swings.
3. Tension Rods Inside Closets and Cabinets

A tension rod is a spring-loaded pole that wedges itself between two walls with pure pressure — no brackets, no screws, nothing permanent. Inside a closet, a single tension rod creates a second hanging tier for shirts above and shoes below, or a shelf surface when laid across the frame with a flat board on top. Inside cabinets, a short tension rod mounted vertically creates instant dividers for baking sheets, cutting boards, and lids that otherwise slide around in a pile. Under the kitchen sink, a tension rod across the cabinet holds spray bottles by their triggers, freeing the entire cabinet floor for storage bins.
The trick is getting the span right. Measure the exact width at three points and choose a rod sized for the narrowest measurement — too long and it bows, too short and it slips. Twist to extend until snug, add one more half-turn, and test with a firm tug. For heavier loads like hanging clothes, choose rods with a locking mechanism rather than pure friction. And use rubber-capped versions on textured or uneven walls, where a plain rod can’t grip properly.
4. Leaning Ladder Shelves That Need No Anchors

A leaning ladder shelf rests against the wall at a slight angle, held up by gravity and its own geometry rather than brackets. That simple fact makes it one of the most renter-friendly storage pieces that exists: it adds four or five shelves of storage and display in a footprint barely wider than the shelf itself, and it leaves the wall untouched. Use one in the living room for books and plants, in the bathroom for folded towels, in the kitchen for cookbooks and jars, or in the entryway for shoes and keys. Some designs even include a fold-out desk surface midway down, turning the unit into a workspace too.
Style it with stability in mind. Put the heaviest items — books, baskets of linens — on the lowest shelves and keep the top light with decor and trailing plants. The lean angle means shelves tilt slightly, so corral small items with trays or bookends. If you have kids, pets, or live somewhere with tremors, add anti-slip pads under the feet and avoid fragile items up high. A ladder shelf that wobbles is simply overloaded at the top — redistribute and it settles immediately.
5. Freestanding Cube Shelving With Storage Bins

When the walls are off-limits, furniture has to do the wall’s job — and few pieces do it better than freestanding cube shelving. A four-by-two or five-by-three unit stands on its own, holds an enormous amount, and costs less than most people expect. Fill some cubes with books and plants, and slide fabric or woven bins into the rest for the ugly-but-necessary categories: cables, paperwork, seasonal accessories, cleaning supplies. The bins are the secret — they turn open shelving from visual clutter into a calm, uniform storage wall, the same thinking behind the best small space furniture ideas.
Placement changes what the unit does. Against a wall it’s a storage wall; turned perpendicular in a studio it becomes a room divider that zones the space while staying light. Keep the top lightly styled, and choose the bin-to-open ratio honestly: more bins if you hate dusting, more open cubes if you love curating. A loaded unit is top-heavy, so keep it level, store the heaviest bins low, and add a freestanding anti-tip device in homes with toddlers.
💡 Pro Tip: Buy your bins before you style the shelves, not after. Matching bins in one or two colors turn a budget cube unit into something that looks custom and expensive, while a jumble of mismatched bins makes even good furniture look like a dorm room.
6. Storage Ottomans and Lift-Top Benches

The storage ottoman is the hardest-working piece you can put in a small apartment without drilling anything. By day it’s a footrest, extra seating for guests, or a coffee table stand-in with a tray on top; lift the lid and it swallows blankets, board games, out-of-season clothes, or the pile of remotes and chargers colonizing your surfaces. Lift-top benches do the same job in entryways (shoe storage plus a place to sit while putting them on) and at the foot of the bed (extra bedding and off-season clothes inside, a finished look outside).
Choose with the lid in mind. A hinged top that opens fully and stays open is far easier to use than a lift-off top you have to set aside — especially in an entryway where your hands are full. Pick sturdy construction if the piece will double as seating, and size the interior honestly: measure what you plan to store first, because ottomans look roomy in the store and shrink when actual blankets go in. One large ottoman usually serves a small living room better than a coffee table plus a separate storage piece.
7. Under-Bed Drawers and Low Rolling Bins
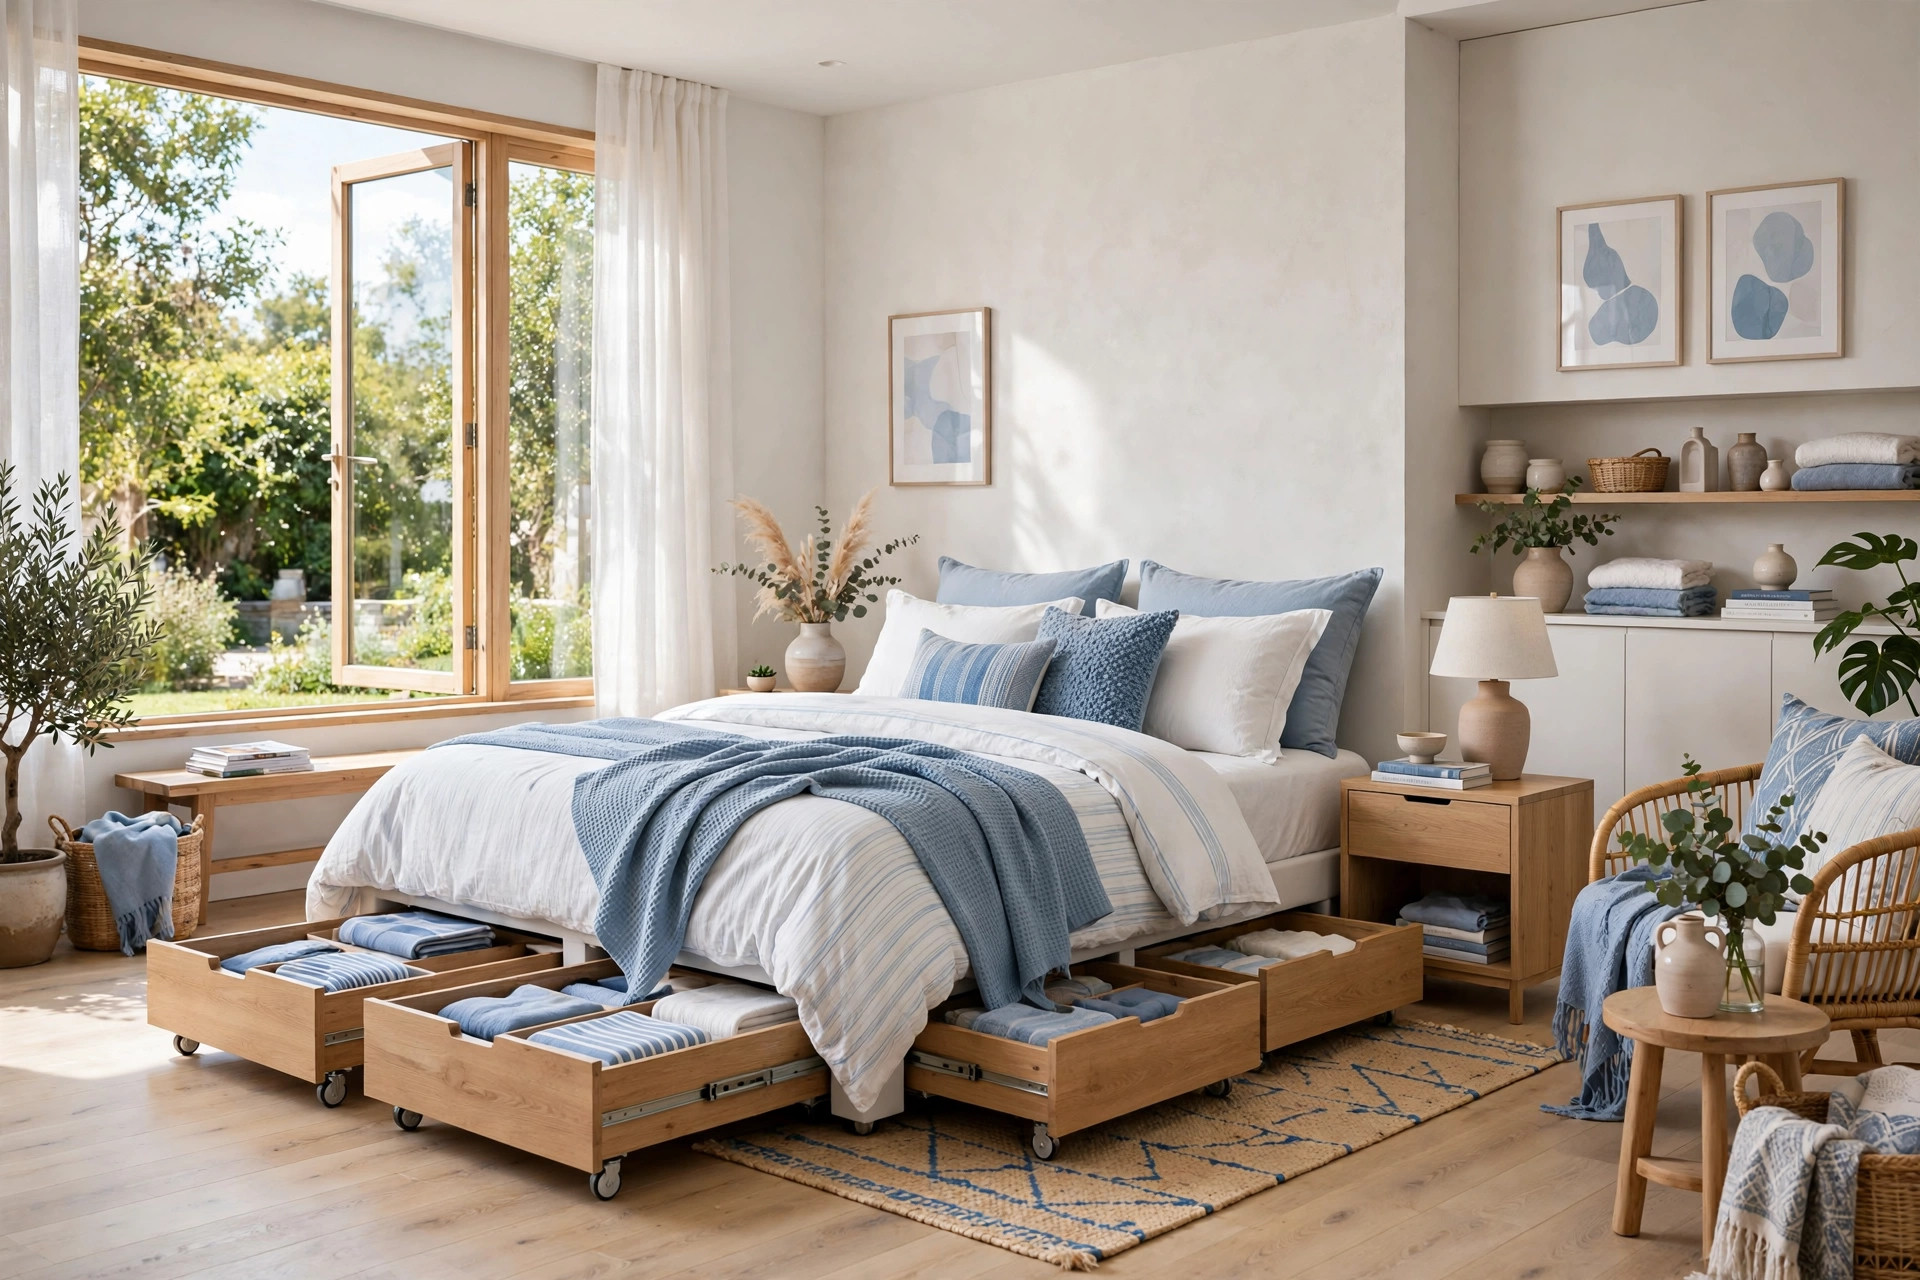
The space under the bed is the largest unused storage zone in most apartments — inches of depth across the whole bed footprint, completely out of sight. Low-profile rolling drawers or lidded bins slide in and turn it into a dresser you never see. Off-season clothes, spare bedding, luggage, and closet-crowding bulk all disappear under the bed, and the room looks instantly calmer. If your frame sits low, bed risers add clearance for taller bins in about five minutes.
Organization makes it work instead of becoming a junk drawer you can’t reach. Use lidded, flat bins — dust collects under beds fast — and label the outward-facing ends, or use clear bins so you can see contents without dragging everything out. Reserve the zone for monthly or seasonal categories and keep everyday items in the closet. Pair this hidden storage with the visual tricks in our guide to how to make a small bedroom feel bigger — storage and spaciousness are the same project in a small bedroom.
📌 Important: Measure the under-bed clearance before buying bins, including the floor trim and any center support bar on the frame — those bars sit lower than the rails and block bins that would otherwise fit. A tape measure now saves a frustrating return trip later.
8. Rolling Utility Carts for Kitchen and Bathroom
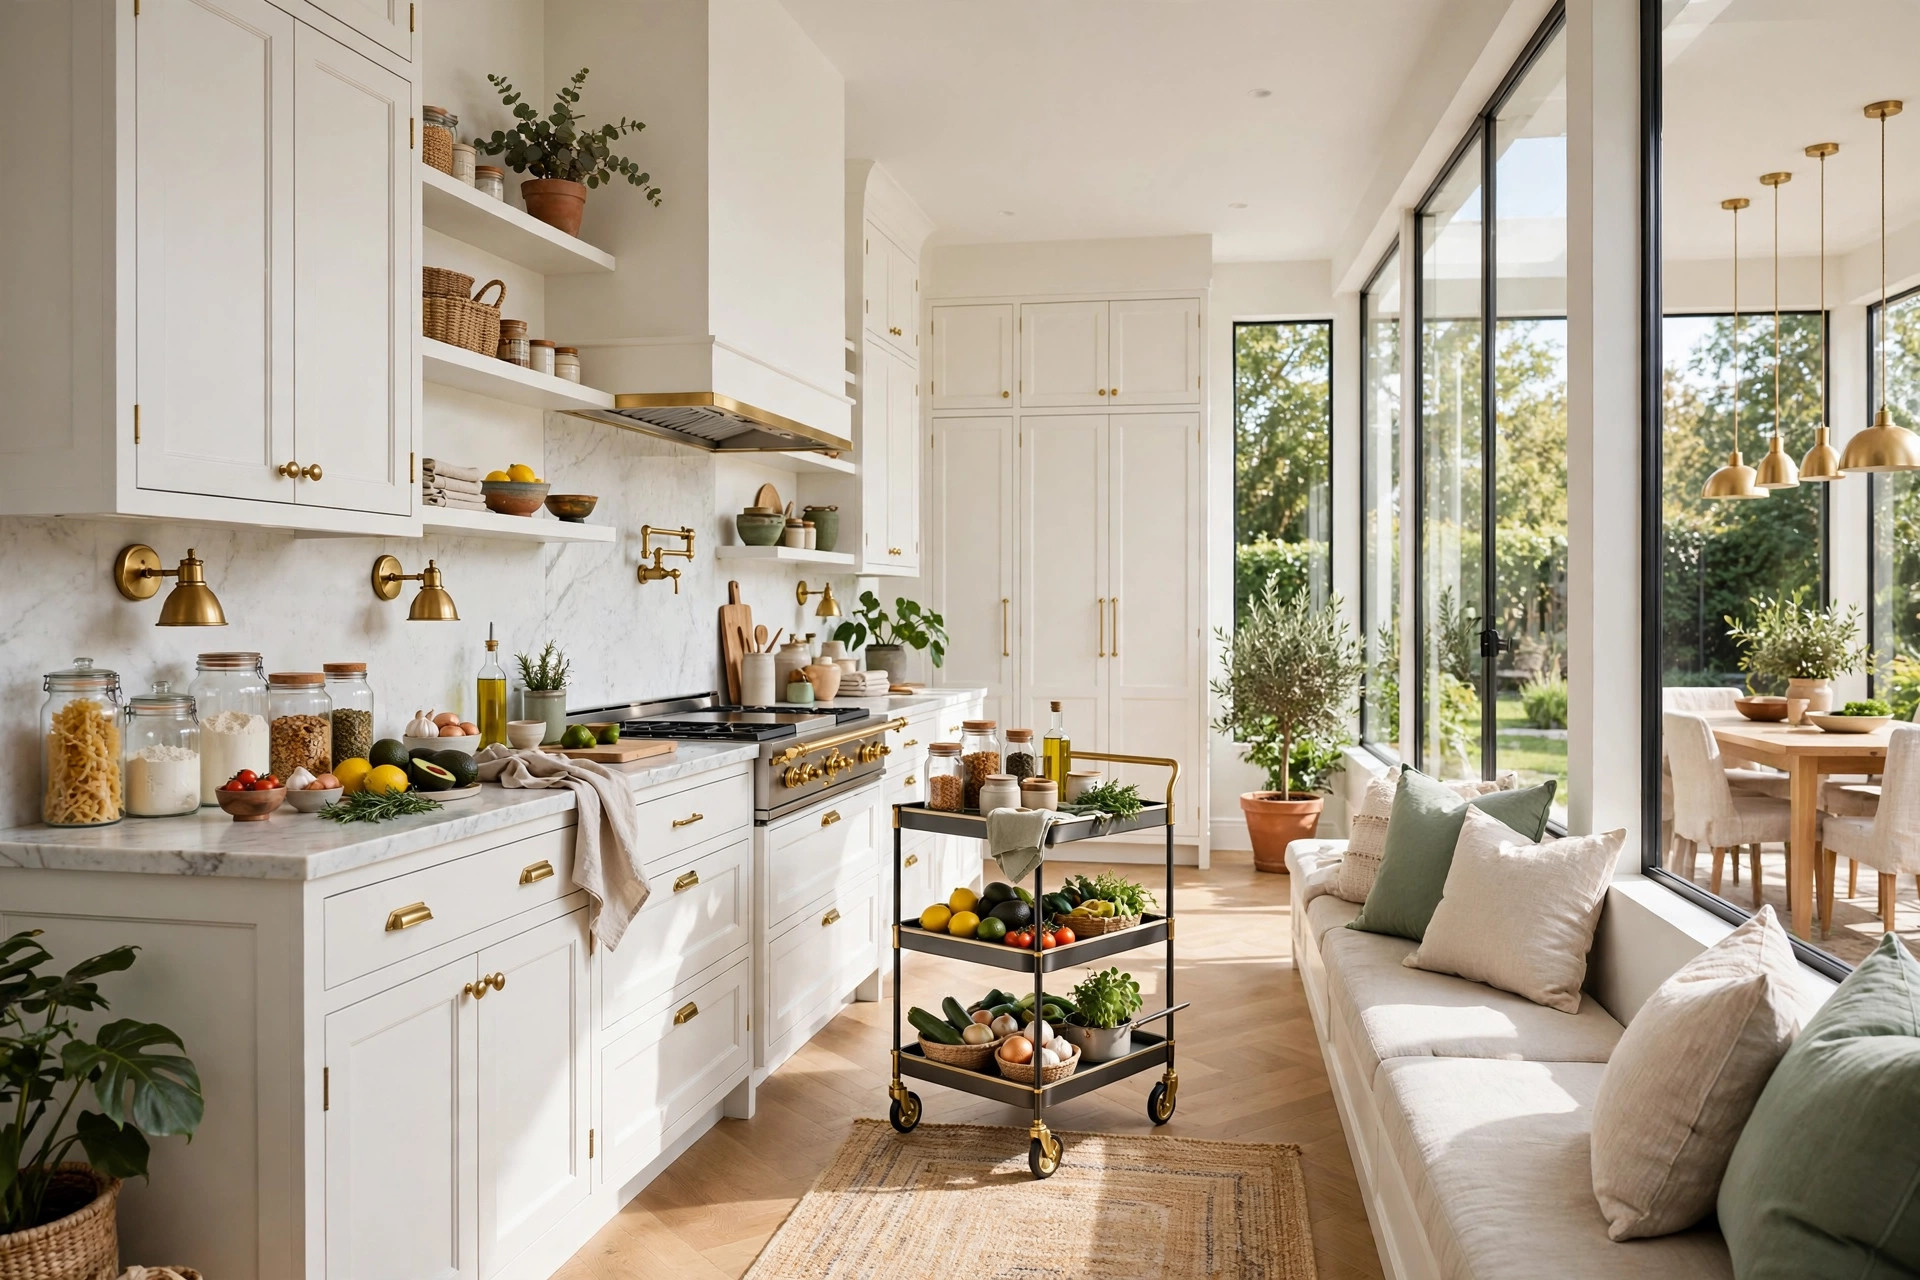
A rolling utility cart is storage on wheels, and wheels are a renter’s superpower: the cart goes where the work is and parks in a narrow gap when it’s done. In the kitchen, a slim cart adds prep-adjacent storage for oils, spices, and small appliances in apartments with almost no counter space. In the bathroom, a narrow cart slides between the toilet and the wall, holding towels and toiletries where there’s no vanity storage. In a home office corner or craft setup, a cart keeps supplies sorted in tiers instead of piled on the desk. Look for carts with removable or adjustable shelves so the tiers match what you’re actually storing.
Stability is the one thing to get right. Choose a cart with lockable casters and lock at least two wheels whenever you use it as a work surface — an unlocked cart that drifts while you’re chopping is a hazard. Keep heavy items on the lowest tier so the center of gravity stays low. Slim models around a foot deep park in gaps you didn’t know you had: beside the fridge, between the washer and wall, next to the nightstand.
9. Peel-and-Stick Rails and Adhesive Hook Bars
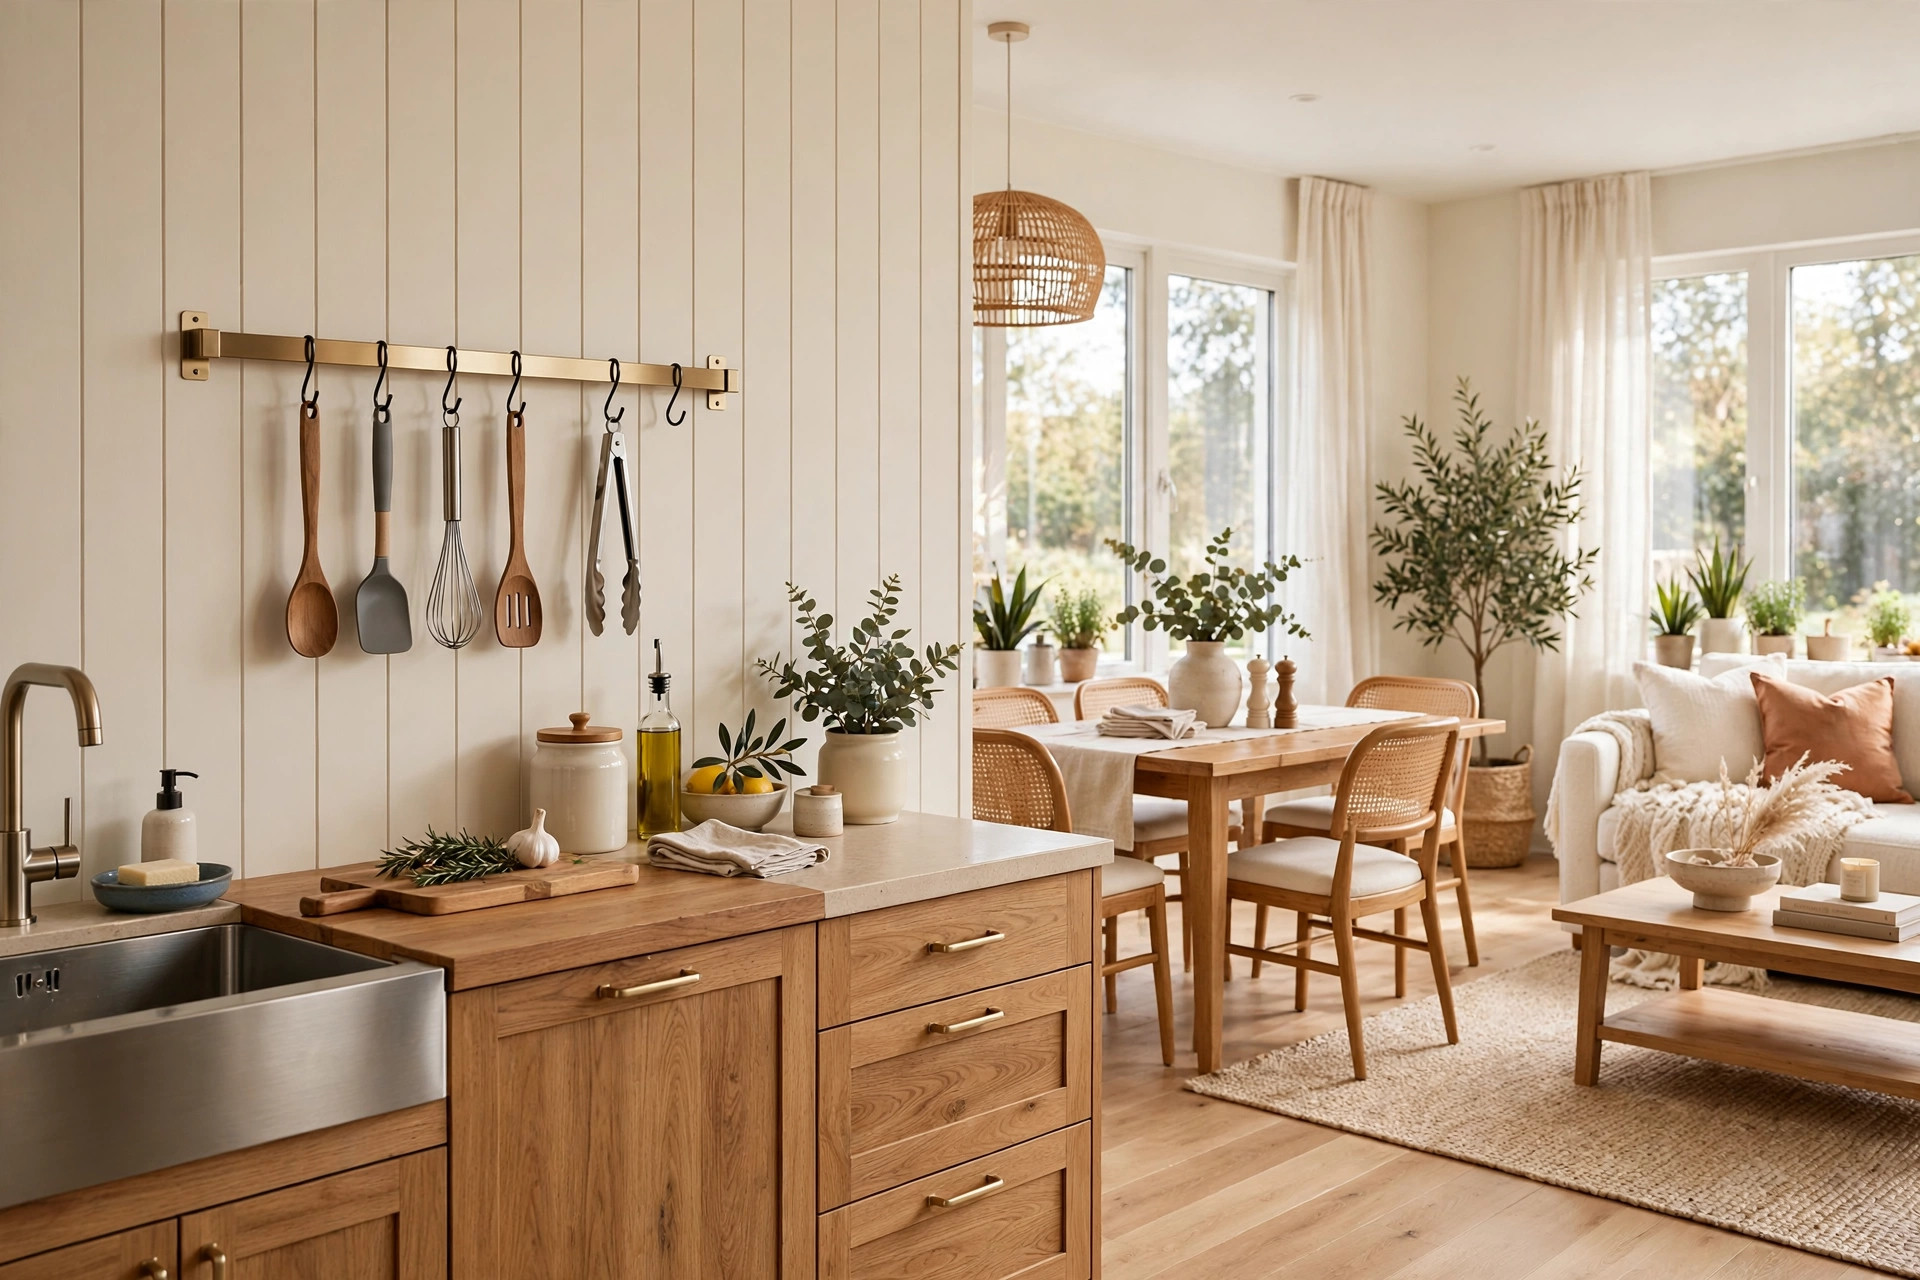
Where a single hook handles one item, a peel-and-stick rail handles a whole category. Adhesive-mounted rails with sliding hooks mount to the wall with heavy-duty removable strips and give you a row of hanging storage for kitchen utensils, entryway keys and leashes, bathroom tools, or cleaning supplies inside a cabinet door. Unlike screws, the strips release with a pull tab at move-out; unlike a single hook, the rail distributes weight across multiple mounting points, so it holds more with less risk. Mount one inside a pantry door for measuring cups, beside the stove for spatulas, or in the entryway as a grab-and-go station.
Location matters more than the product. These rails shine on smooth, clean surfaces — painted drywall, tile, glass, metal — and struggle on textured or porous walls where adhesive can’t get full contact. Follow the same prep ritual as hooks: alcohol wipe, firm thirty-second press, full curing time before loading. And group by routine: the rail earns its place when everything on it belongs to one daily flow, like the coffee station or the dog-walking kit, rather than a random assortment.
10. Stackable Bins and Nesting Crates
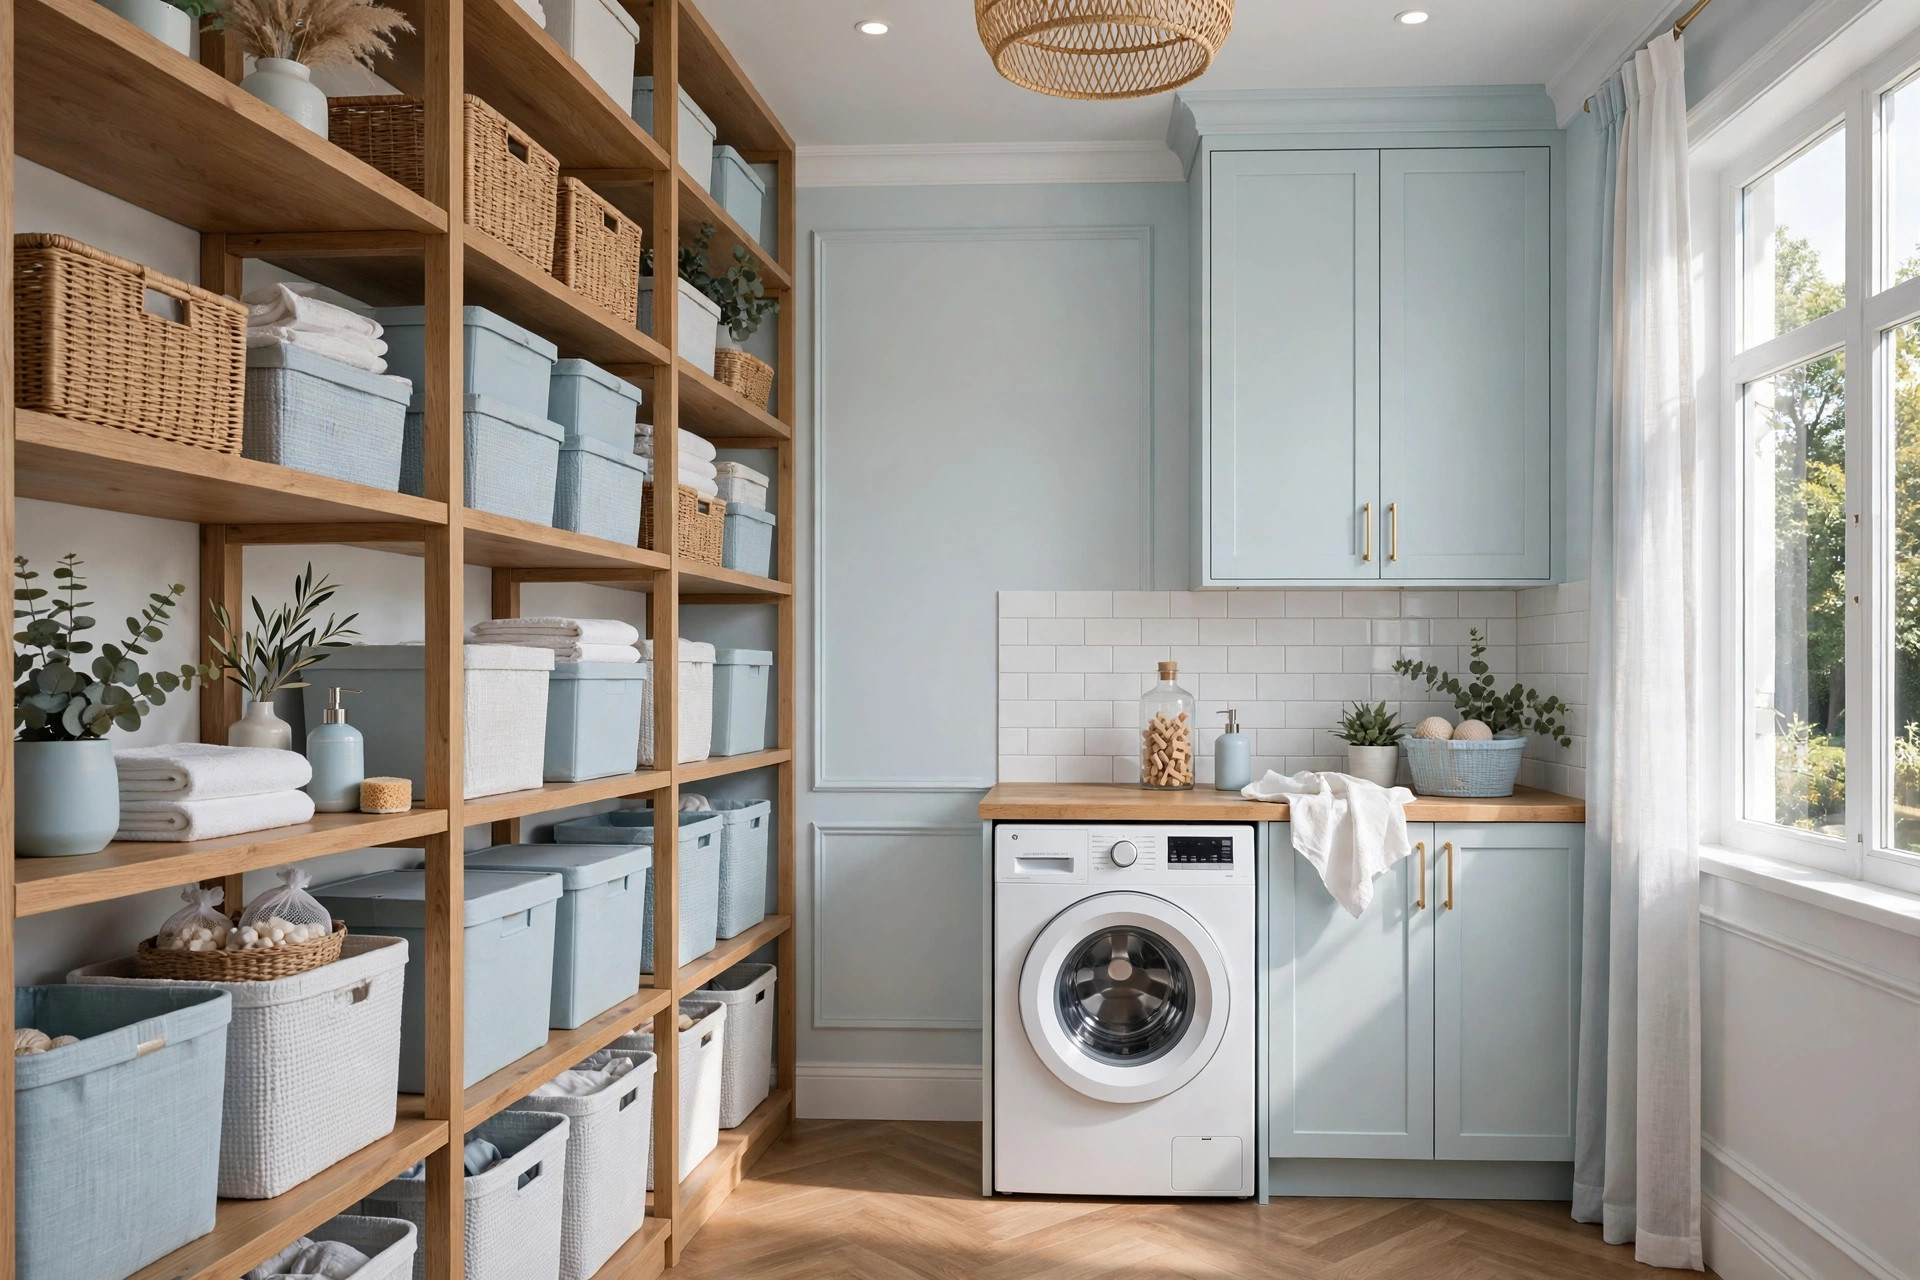
Not every storage problem needs furniture — sometimes it needs better boxes. Stackable bins turn a closet floor, laundry corner, or pantry shelf into organized vertical storage with zero installation. The key word is stackable by design: bins with interlocking lids or tapered nesting shapes stack safely without tipping. Use them for seasonal clothes, craft supplies, pantry overflow, and cleaning products. Clear bins show contents at a glance; opaque bins in one color look calmer on open shelves.
The discipline that makes bins work is the label. An unlabeled stack of identical bins is storage you can’t use — you’ll open three wrong ones and stop bothering. Label every bin on the side that faces out (“Winter scarves” beats “Misc.”), and stack no more than three or four high for bins you open regularly. Matching labeled bins are one of the cheapest upgrades that exist — a closet full of them looks custom for very little money, and the whole system is a core move in apartment decorating on a budget.
💡 Pro Tip: When stacking bins, put the least-used categories on top and daily items at waist height. The system only survives if the things you reach for most are also the easiest to reach.
11. Freestanding Garment Racks and Open Wardrobes

When the closet is full — or there barely is one — a freestanding garment rack adds hanging space out of thin air. A sturdy single- or double-rail rack holds a season of daily clothes, and an open-wardrobe design with base shelves adds folded storage and shoe space in the same footprint. No wall contact needed, suiting bedrooms, entryways, and laundry rooms. Styled well it reads as intentional decor: keep hanging clothes in one color family, add baskets on the base shelves, and it looks like a boutique display.
Buy for stability, not looks alone. A rack loaded with winter coats is heavy, so choose a wide base, sturdy uprights, and a weight rating well above what you’ll hang. Keep the heaviest items centered and low, and on hard floors stop it from walking with rubber feet or a rug underneath. In a studio, an open wardrobe doubles as a visual room divider — our studio apartment decor inspiration roundup has zoning tricks that pair perfectly with one.
⚠️ Warning: Cheap garment racks fail at the joints, usually right when they’re fully loaded. If a rack wobbles when you nudge it empty, it will not survive a full load of clothes — upgrade to a commercial-grade frame before trusting it with your wardrobe.
12. Suction-Cup Shelves and Caddies in the Bathroom
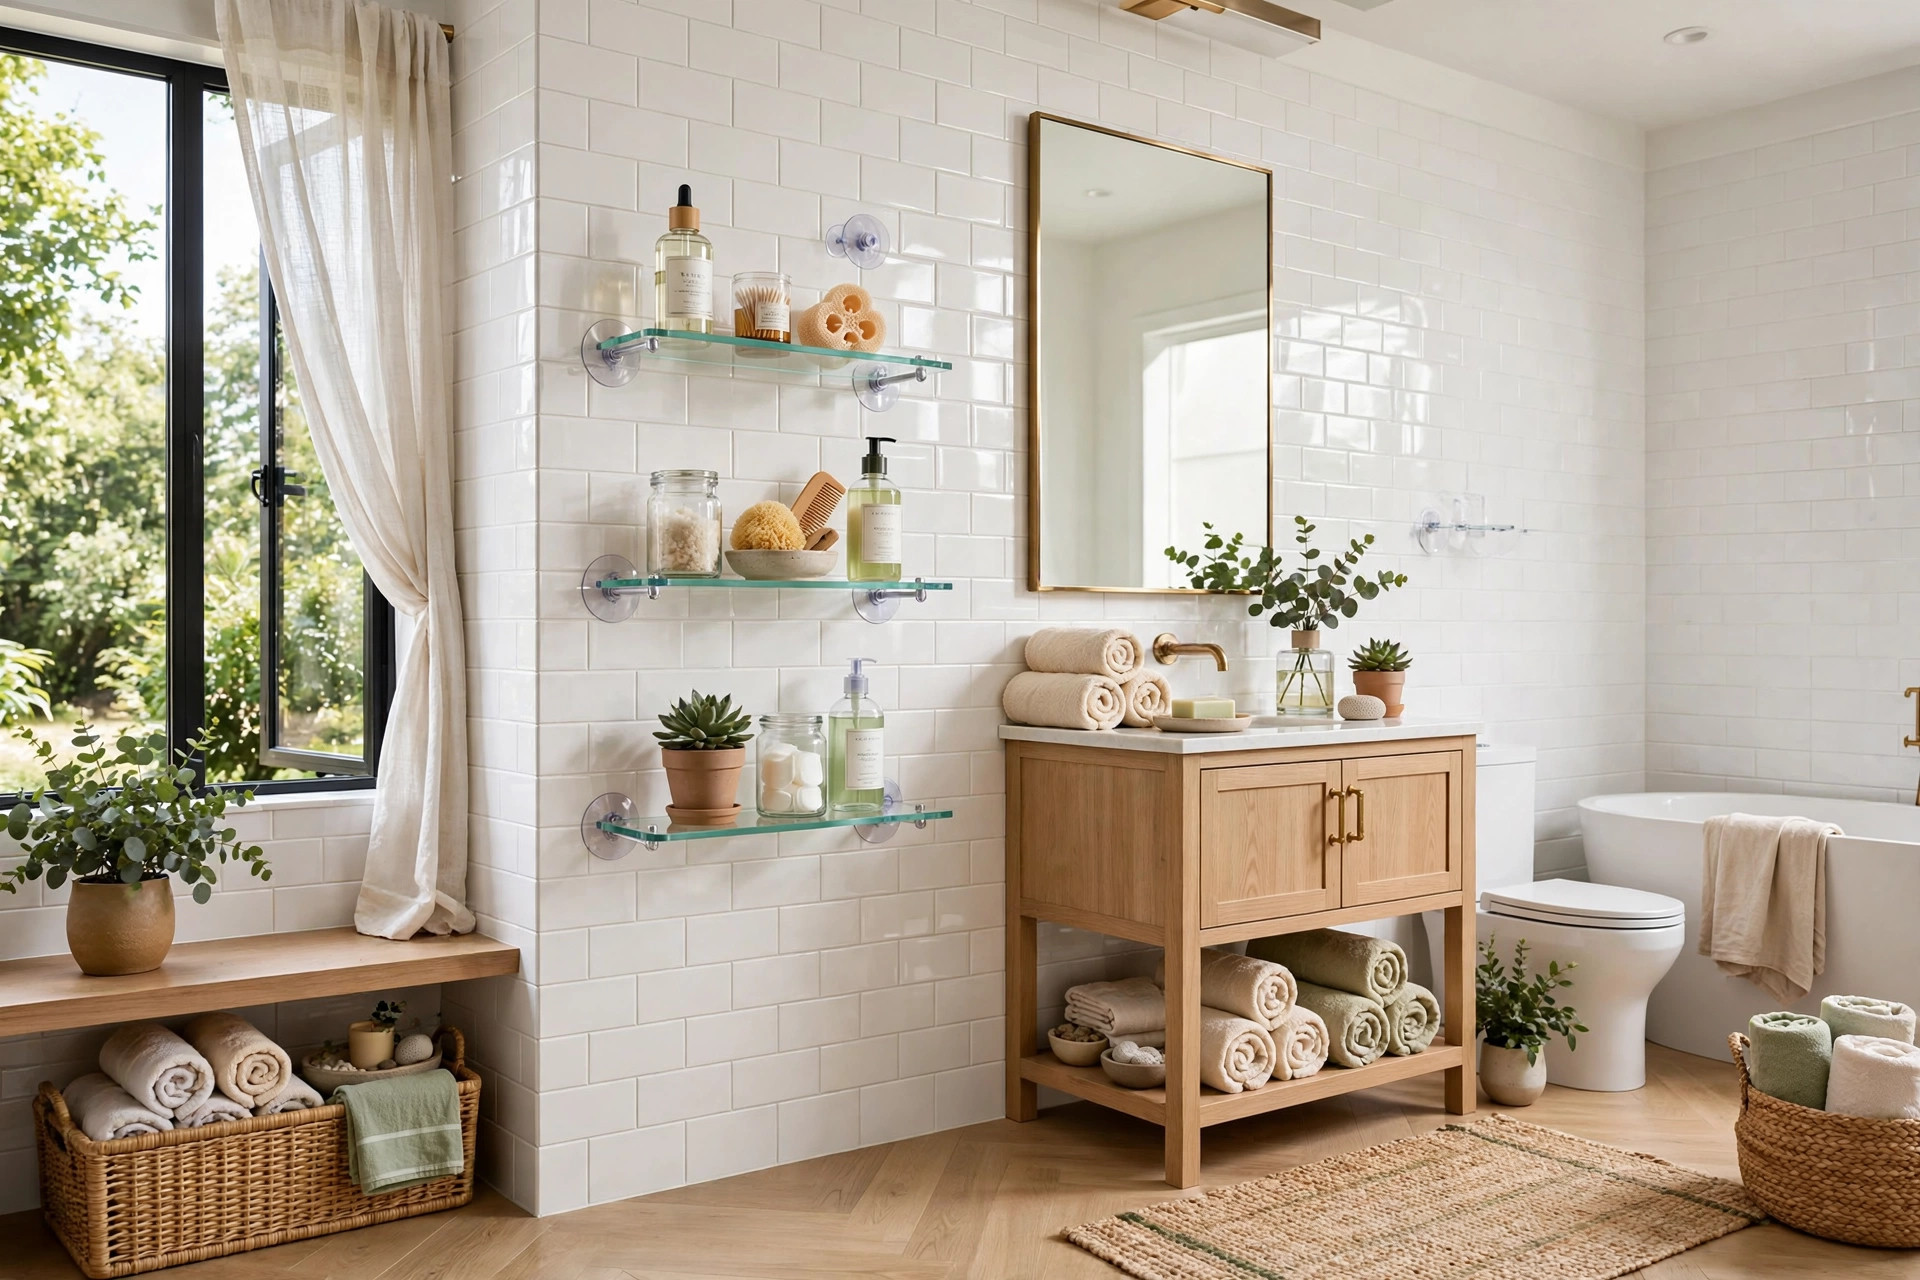
Rental bathrooms are the hardest rooms to store in: tiny, humid, and almost always off-limits for drilling into tile. Suction-cup shelves and caddies solve this by gripping smooth surfaces with vacuum pressure instead of hardware. A suction shelf in the shower holds shampoo and soap at arm’s height; a suction caddy on the mirror or tile corrals toothbrushes and skincare; a suction hook rail inside the cabinet door hangs hair tools. Modern suction mounts with locking levers hold far more than the old push-on cups, and they release with a tab when you want to reposition them.
Suction lives or dies on the surface. It grips smooth, non-porous surfaces — glossy tile, glass, mirrors, acrylic tub surrounds — and fails on textured tile, grout lines, and matte stone. Press the cup onto a clean, dry surface, engage the lock, and test with a tug before loading. Re-seat the cups every few months, since steam and temperature swings slowly weaken the seal — a quick release-and-repress takes ten seconds and prevents the midnight crash.
13. Under-Shelf Baskets and Cabinet Door Organizers
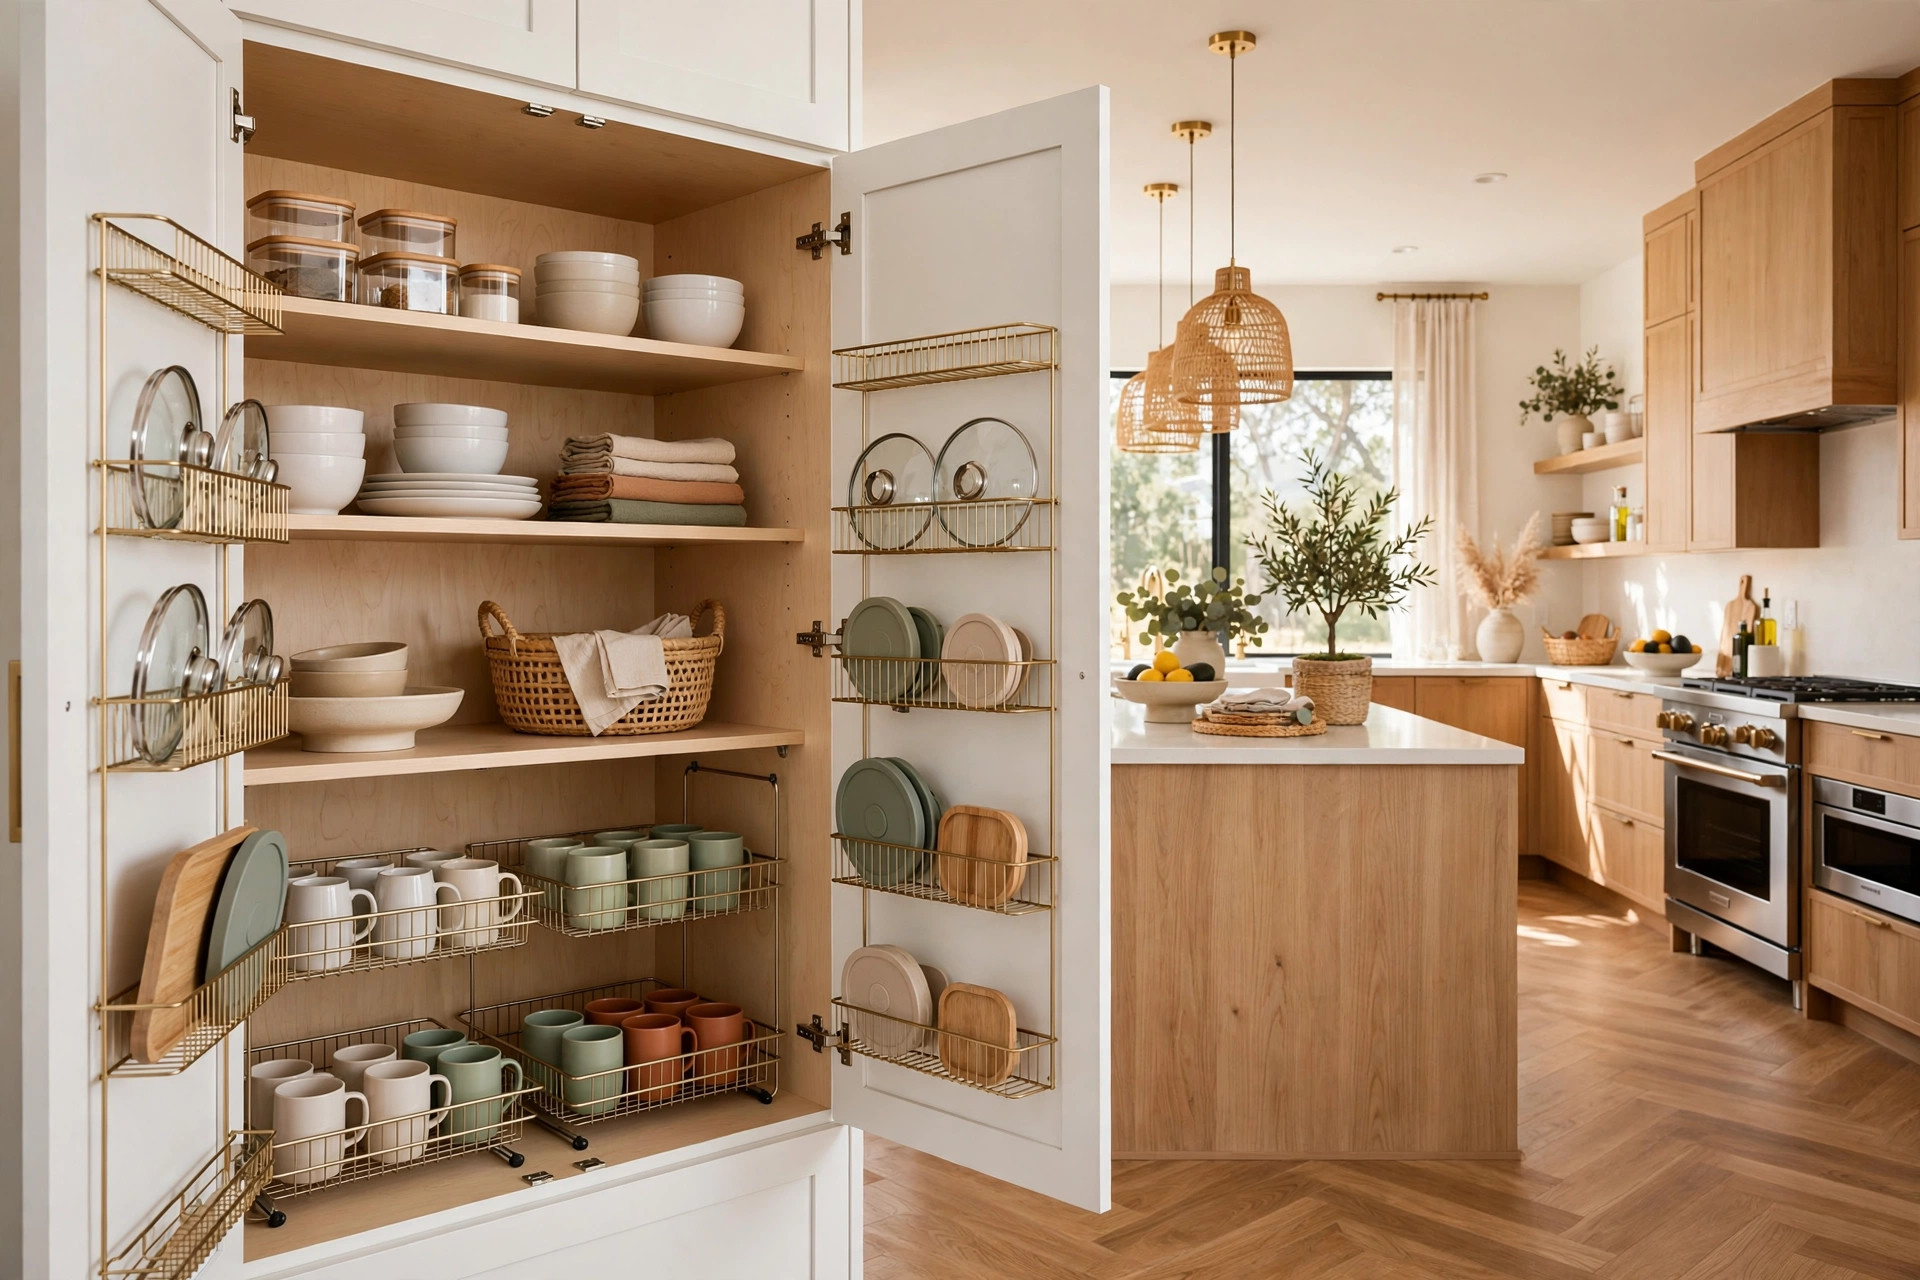
Kitchen cabinets waste their vertical space: one tall shelf holds a short stack of bowls, and the air above it does nothing. Under-shelf baskets clip onto the existing shelf and hang below it, creating a second tier for mugs, wraps, or spice jars with no tools at all. Inside cabinet doors, slim adhesive or over-door racks hold lids, wraps, cutting boards, and spices — the flat, awkward items that eat shelf space when laid flat. Together these two moves can nearly double a small kitchen’s storage without adding a single piece of furniture.
Measure before you buy, because cabinet interiors are unforgiving. Under-shelf baskets come in different depths and wire spacings — measure your shelf thickness and the clearance below it, and make sure the basket doesn’t block the door from closing. For cabinet-door racks, check that the door’s inner panel is flat enough for adhesive or hooks. Keep heavy items on the shelves themselves and light items in the door racks; a door loaded with cans strains hinges the same way an overloaded over-door organizer does.
14. Freestanding Nightstands and Headboard Shelving

The nightstand zone is small, but in a small bedroom it holds everything you touch daily: glasses, books, chargers, water, medication. When there’s no room for a full nightstand — or no wall to mount a floating one — freestanding alternatives fill the gap with zero installation. A slim C-shaped table slides its base under the bed with almost no footprint; a narrow rolling cart holds the same essentials in tiers; and a freestanding headboard with built-in cubbies turns the wall behind the bed into a bookshelf without touching the wall.
Match the solution to the bed’s geometry. C-tables need enough under-bed clearance for the base to slide; measure the frame height first. Freestanding headboard shelves need the bed positioned against them so they read as one unit. Keep the surface minimal by rule: lamp, book, water, and one small catch-all. The nightstand is the most visible clutter collector in a bedroom, and in a small room that clutter is visible from the door — which is exactly why the visual calm strategies in how to make a small room look bigger start with editing surfaces like this one.
15. An Entryway Hall Tree With Zero Screws
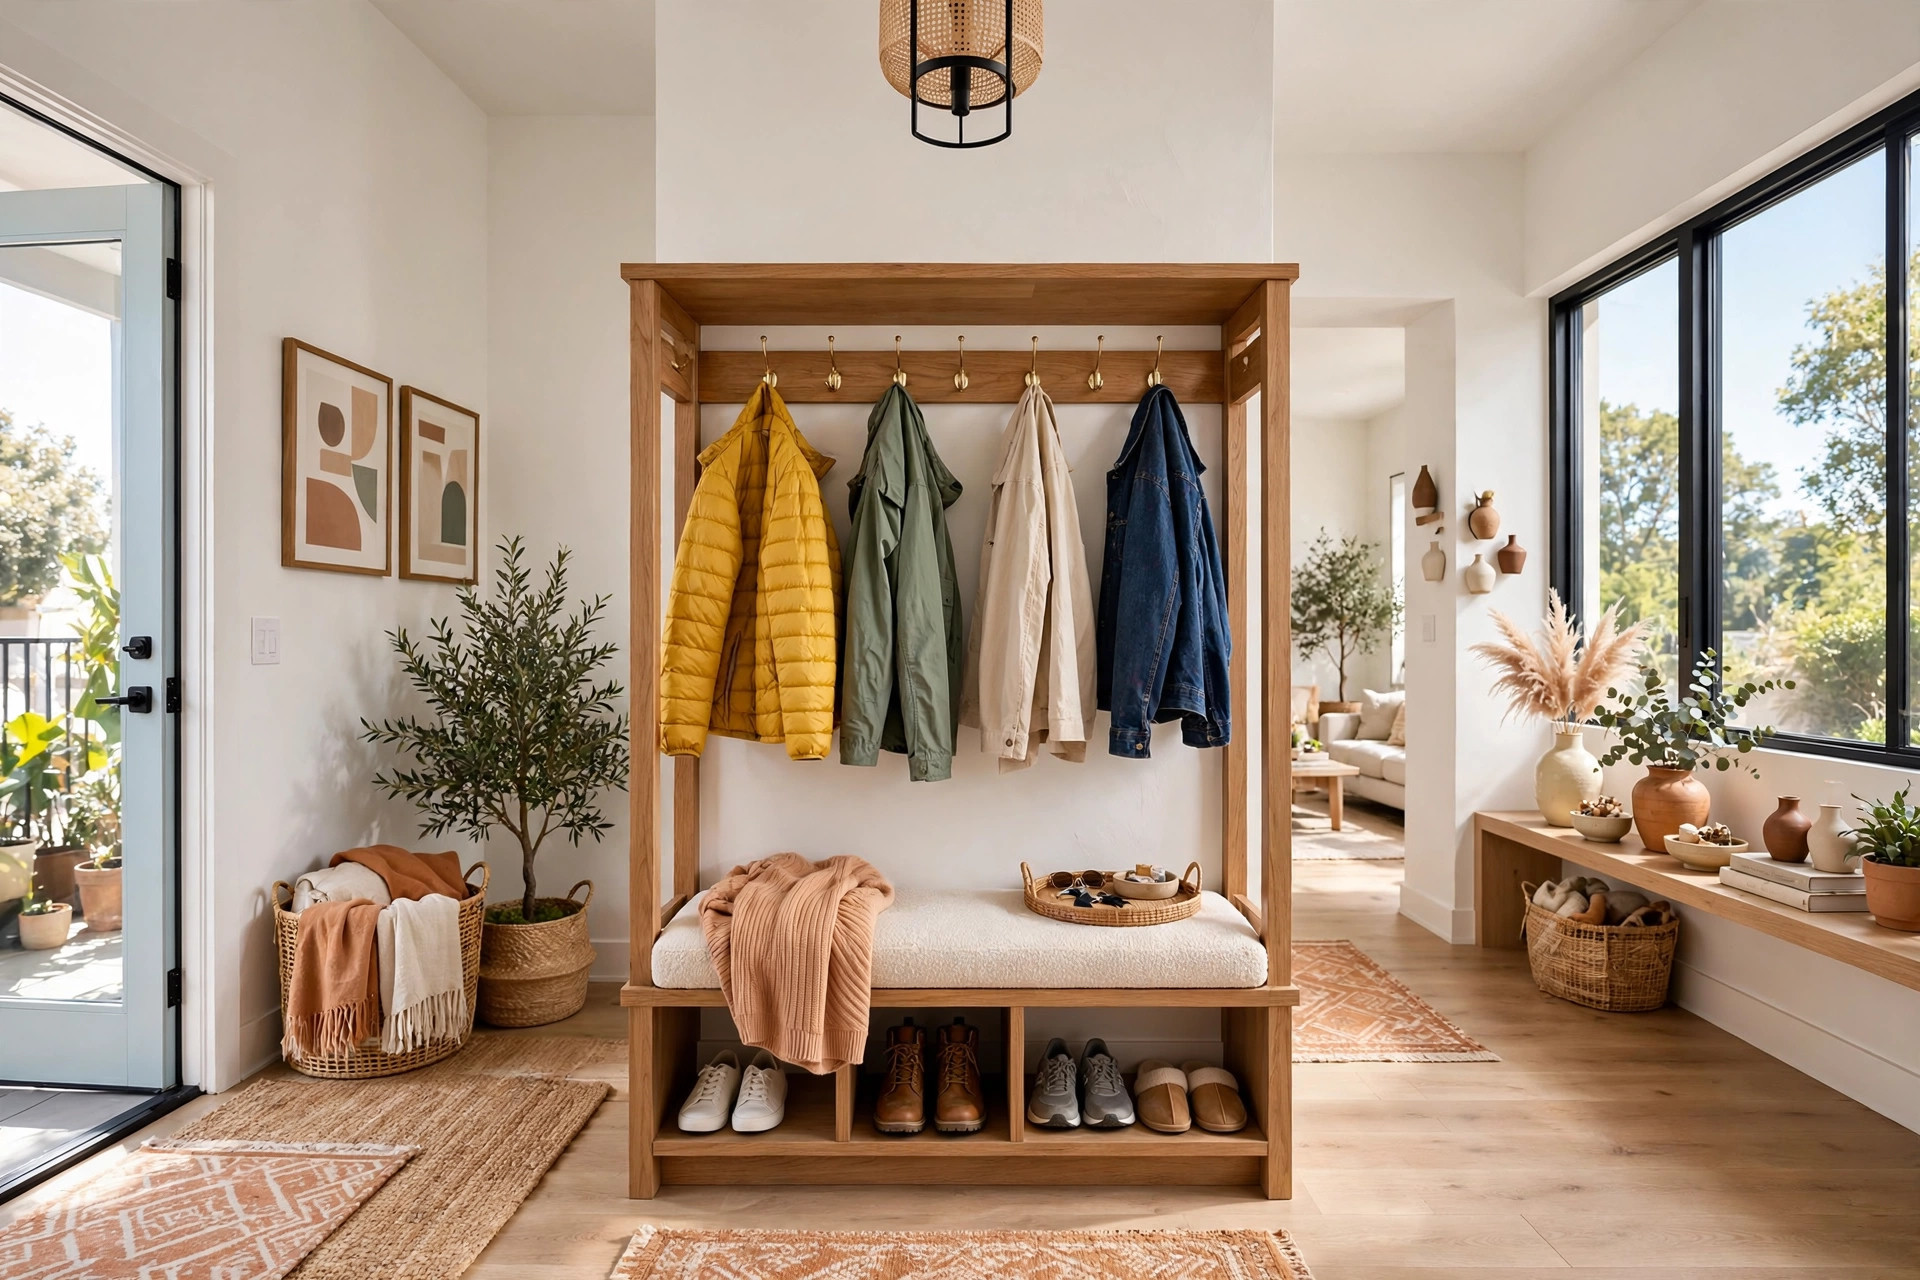
The entryway is where small apartments visibly fail: coats on the chair, shoes in a drift, keys and mail on whatever surface is nearest. A freestanding hall tree — a coat rack with bench and cubbies in one unit — solves all of it in about four square feet, with no wall contact required. Coats and bags hang on the hooks, shoes slide into the cubbies or under the bench, and the top shelf holds the basket for keys, sunglasses, and outgoing mail. One piece, and the entire entryway has an address for everything that used to land on the floor.
Choose a hall tree sized to your actual entry, not your dream entry. Measure the wall width and the depth it projects into the walkway — in a narrow entry, a unit deeper than about sixteen inches starts to block the path it was meant to organize. Look for a comfortable bench top for shoe duty and cubbies sized to your actual shoe collection. If a full hall tree won’t fit, assemble the same system from pieces: a freestanding coat rack, a small storage bench, and adhesive hooks deliver the same function in a slimmer line.
Quick Comparison: No-Drill Storage by Cost and Effort
No-Drill Storage Quick-Start Checklist
- ✅ Walk the apartment and list your three worst storage gaps — start there, not with a shopping cart
- ✅ Clean every mounting surface with rubbing alcohol before applying adhesive or suction
- ✅ Measure door gaps, cabinet depths, and under-bed clearance before buying anything
- ✅ Respect weight ratings on hooks, strips, and suction mounts — spread heavy loads across two
- ✅ Wait the full adhesive curing time before hanging anything, even if it feels solid
- ✅ Label every bin and basket so the system stays usable after the first month
- ✅ Test adhesive on a hidden patch of wall before committing to a visible spot
Common No-Drill Storage Mistakes
Mistake 1: Skipping surface prep before sticking anything up
Dust, grease, and humidity are the real reasons adhesive hooks and suction cups fail — not the products. A hook slapped onto a dusty wall holds for a week, then drops your coat at 3 a.m. Wipe every surface with rubbing alcohol, let it dry, and press the adhesive for thirty seconds. This two-minute ritual is the difference between storage that lasts years and storage that fails embarrassingly.
Mistake 2: Overloading hooks, rods, and suction mounts
Every damage-free product has a weight rating, and renters routinely treat it as a suggestion. A light hook will not hold a loaded tote bag; a curtain-tension rod will not hold winter coats; a suction cup will not hold a full-size dispenser forever. When a mount fails it can dent floors, break bottles, and damage the very wall you’re protecting. Read the rating, stay under it, and split heavy loads across two mounts.
Mistake 3: Buying organizers before measuring the space
Over-door racks that stop the door from closing, bins too tall for the under-bed clearance — the returns pile from no-drill storage is almost always a measuring failure, not a product failure. Apartment dimensions are unforgiving: doors, cabinets, and bed frames vary by inches, and organizers don’t flex. Measure twice, buy once, and keep the tape measure in your pocket while shopping.
Mistake 4: Creating storage you can’t actually reach or use
A top shelf you need a chair to reach, bins stacked four high that require restacking to open, a rolling cart parked behind the door it blocks — storage that fights you gets abandoned, and abandoned storage becomes clutter with extra steps. Design for your real routines: daily items at waist height, weekly items within easy reach, seasonal items in the hard-to-reach zones. The best system is the one you use without thinking.
Mistake 5: Forgetting that freestanding furniture can tip
Leaning shelves, tall cube units, and loaded garment racks are top-heavy by nature, and a climbing toddler or an excited pet can bring one down. Gravity-held doesn’t mean risk-free. Keep the heaviest items on the lowest shelves, make sure units sit level, and in homes with small children use freestanding anti-tip devices or wall-safe furniture straps that anchor without drilling. No storage upgrade is worth a safety incident.
Frequently Asked Questions
1. Will adhesive hooks damage my walls when I remove them?
Usually not. Pull the tab slowly downward to stretch the adhesive until it releases — on fully cured latex or eggshell paint, it leaves no trace. The risks are flat or matte finishes, which can peel, and fresh paint under a few weeks old. Test on a hidden patch first and never yank.
2. How much weight can no-drill storage actually hold?
More than most people assume, but less than a drilled anchor. Quality adhesive hooks handle a few pounds each; a rail with multiple mounting points handles more; tension rods suit light to medium loads like shirts or spray bottles. Freestanding furniture holds the most because it rests on the floor. Match the mount to the load and never exceed the stated rating.
3. What are the best no-drill storage options for renters specifically?
Build around four categories: adhesive hooks for walls, over-door organizers for doors, tension rods for closets and cabinets, and freestanding furniture (cube shelves, ottomans, garment racks) for the big storage jobs. Add suction mounts for the bathroom and under-bed bins for the bedroom, and you’ve replaced most of what drilling would have bought you — with your deposit intact.
4. Can tension rods really hold clothes without falling?
Yes, if the span is right and the rod is rated for it. Measure the exact width, choose a rod sized for the narrowest point, and tug-test before hanging anything. Locking-style rods beat pure friction rods for heavier loads. Keep the load reasonable and re-check tension every few months, since rods slowly loosen with daily use.
5. How do I add storage to a small kitchen without drilling?
Start inside the cabinets: under-shelf baskets double each shelf, door racks hold lids and wraps, and a tension rod under the sink lifts spray bottles off the floor. Add a slim rolling cart beside the fridge — storage plus prep space in one — and an adhesive rail near the stove for daily utensils. Together these add the equivalent of several extra cabinets, all removable at move-out.
6. What no-drill storage works in a bathroom with tile walls?
Suction-cup shelves and caddies: they grip glossy tile and glass with vacuum pressure and hold toiletries at arm’s height. Add an over-door rack for towels and a narrow rolling cart beside the vanity for the rest. Avoid adhesive strips on grout lines or textured tile — they need smooth surfaces — and re-seat suction cups every few months, since steam weakens the seal.
7. How do I keep no-drill storage from looking cheap or cluttered?
Three rules: match, label, and edit. Matching bins in one or two colors make budget shelving look custom; labels make storage look organized instead of chaotic; and keeping shelves two-thirds full with breathing room keeps everything reading as decor. Choose pieces in materials that suit your home — wood, woven, matte metal — and group items by routine so each zone looks intentional.
Conclusion
Adding storage to a small apartment without drilling isn’t a compromise — it’s a design discipline. Every idea in this guide respects two things at once: your space and your lease. Adhesive hooks, tension rods, over-door organizers, suction mounts, and smart freestanding furniture can rival a drilled-in system, as long as you measure first, prep surfaces, and respect weight ratings. The walls stay pristine, the deposit stays yours, and everything finally has a home.
Start this weekend with your three worst storage gaps, not a full-cart shopping spree. One wall of hooks by the door, one tension rod in the closet, one rolling cart in the kitchen — small, targeted wins that change how the apartment feels within a day. Once everything has an address, the decorating you already love finally gets room to breathe.