How to Make DIY Floating Shelves: A Complete Beginner’s Guide
Introduction
Floating shelves look like magic. A clean wooden plank seems to hover on the wall with no visible brackets, no screws, and nothing holding it up — just a beautiful surface ready for books, plants, and the things you love. The good news is that there is no magic involved at all. A floating shelf is one of the simplest woodworking projects a beginner can tackle, and once you understand how the hidden bracket works, you can build a set of shelves in a single afternoon with basic tools.
Learning how to make DIY floating shelves is one of the highest-value skills in home decorating. A pair of shelves can transform a blank wall in a living room, add storage to a small kitchen, or give a bathroom a place for towels and plants — all for a fraction of what shop-bought shelves cost. The materials are cheap, the steps are straightforward, and the result looks far more expensive than it is.
This complete beginner’s guide walks you through every step, from choosing your wood and measuring your wall to mounting the bracket and styling the finished shelf. You do not need a workshop, a table saw, or any previous woodworking experience. If you can hold a drill and follow a tape measure, you can make floating shelves that are strong, level, and beautiful.
1. Choose the Right Shelf Style for Your Space

Before you buy a single piece of wood, decide what style of floating shelf suits your room. The simplest design is a solid timber plank with a hidden rod bracket — a clean, chunky shelf that works in almost any home. Thinner shelves with a metal bracket plate suit modern and minimalist rooms, while reclaimed or live-edge wood gives a rustic, farmhouse feel. The style you choose decides the thickness of your wood and the type of bracket you will need, so settle this first.
Think about what the shelf will hold. A shelf for books and heavy ceramics needs thick, solid wood and a strong bracket fixed into wall studs. A shelf for a few framed photos and a small plant can be lighter and thinner. Be honest about the load, because the most common floating shelf failure is a shelf that looks lovely on day one and sags or pulls out of the wall a month later under weight it was never built to carry.
Also consider the room itself. In a kitchen, shelves should sit high enough to clear the worktop but low enough to reach every day. In a living room, a shelf above a sofa works best when it is roughly the width of the furniture below it, or a little narrower. Sketch your idea on paper first, with rough measurements, and live with the sketch for a day before you commit to cutting wood.
2. Pick Your Wood and Know What to Avoid

The wood you choose decides how your shelf looks and how long it lasts. Pine is the friendliest choice for beginners: it is cheap, easy to cut and sand, and takes paint and stain well. Oak and walnut cost more but give a richer, more premium finish that suits a living room or home office. If you want a painted shelf, a good-quality plywood or MDF board with a solid wood edge is a sensible, budget-friendly option.
Buy your timber from a reputable supplier and check each board before you take it home. If you have already tried DIY furniture makeover ideas, you will know that the quality of the starting material decides the quality of the finish. Sight along the length of the board like looking down a rifle barrel — if it twists, bows, or cups, put it back and choose another. A warped board will never sit flat against the wall, no matter how good your bracket is. Also check for knots that are loose or cracked, because a knot in the wrong place can weaken the shelf where the bracket rods go in.
Avoid the cheapest construction-grade timber, which is often damp and rough, and avoid very thin boards under 20 millimetres for a floating shelf, because they cannot hide a bracket inside them. For most rooms, a board 25 to 40 millimetres thick, 200 to 250 millimetres deep, and 600 to 1200 millimetres long is the sweet spot. If you are making your first set, start with a modest length — a shorter shelf is easier to keep level and much more forgiving of small mistakes.
3. Measure Twice and Get the Placement Right

Placement is the difference between shelves that look designed and shelves that look like an afterthought. Start by deciding the height. A good rule is to hang living room shelves at eye level when you are sitting down, roughly 120 to 150 centimetres from the floor, and kitchen shelves about 45 to 60 centimetres above the worktop so you can reach them without stretching. Mark the spot lightly with a pencil, then step back and look at it from across the room before you commit.
If you are hanging two or more shelves, spacing matters just as much as height. Leave 30 to 45 centimetres between shelves so you have room for books, vases, and plants without everything feeling cramped. Use a spirit level and a long straight edge to draw a faint horizontal line where the bottom of each shelf will sit, and measure from the same fixed point — the floor or the worktop — for every shelf, because floors are rarely perfectly level and measuring from the floor at each end can leave shelves that slope.
This is also the moment to find your wall studs, because the strongest floating shelves are always fixed into studs, not just into plasterboard. A cheap electronic stud finder will beep over each stud, or you can tap the wall and listen for the solid thud that marks timber behind the plaster. Mark every stud with a small pencil cross and keep the marks until the shelf is up — they are the reason your shelf will still be on the wall in five years.
💡 Pro Tip: Cut a paper template the exact size of your shelf and tape it to the wall first. Live with it for a day, move it up or down, and check it from the sofa and the doorway before you drill a single hole.
Floating Shelves Quick-Start Checklist
- ✅ Choose a shelf style and thickness that suits the room and the load
- ✅ Buy straight, dry timber — check each board for warps and loose knots
- ✅ Mark the shelf height with a pencil line and a spirit level
- ✅ Find and mark every wall stud behind the shelf position
- ✅ Gather tools: drill, spirit level, stud finder, tape measure, pencil, screws and wall plugs
- ✅ Cut, sand, and finish the wood before you mount anything
- ✅ Test the bracket on the shelf before you fix it to the wall
4. Gather Your Tools and Materials

You do not need a workshop full of tools to make floating shelves, and this is one of the most satisfying DIY room decor on a budget projects you can take on. The essentials are a power drill with wood and masonry bits, a spirit level, a tape measure, a pencil, a stud finder, and a saw — a hand saw works perfectly well for one or two shelves, though a circular saw or a mitre saw makes the job faster and neater. Add sandpaper in 120 and 220 grit, a paintbrush or cloth for finishing, and safety glasses, because drilling into a wall throws dust everywhere.
For materials, you need your chosen timber, a hidden floating shelf bracket kit, screws, and wall plugs matched to your wall type. Bracket kits usually come with steel rods that slide into holes drilled in the back of the shelf and a mounting plate that screws to the wall. Buy a kit rated for more weight than you expect the shelf to carry — a bracket rated for 20 kilograms is a sensible minimum for a living room shelf, and heavier for books.
Check your wall type before you buy fixings. A solid brick or block wall takes standard wall plugs and screws. A plasterboard wall needs special plasterboard anchors, and ideally the bracket screws should land in at least one stud. If you are unsure what your walls are made of, drill a small test hole in a hidden spot and look at the dust: grey powder means masonry, while white dust and a hollow feeling means plasterboard. Getting the fixings right is the single most important safety step in this whole project.
5. Cut Your Boards to Size
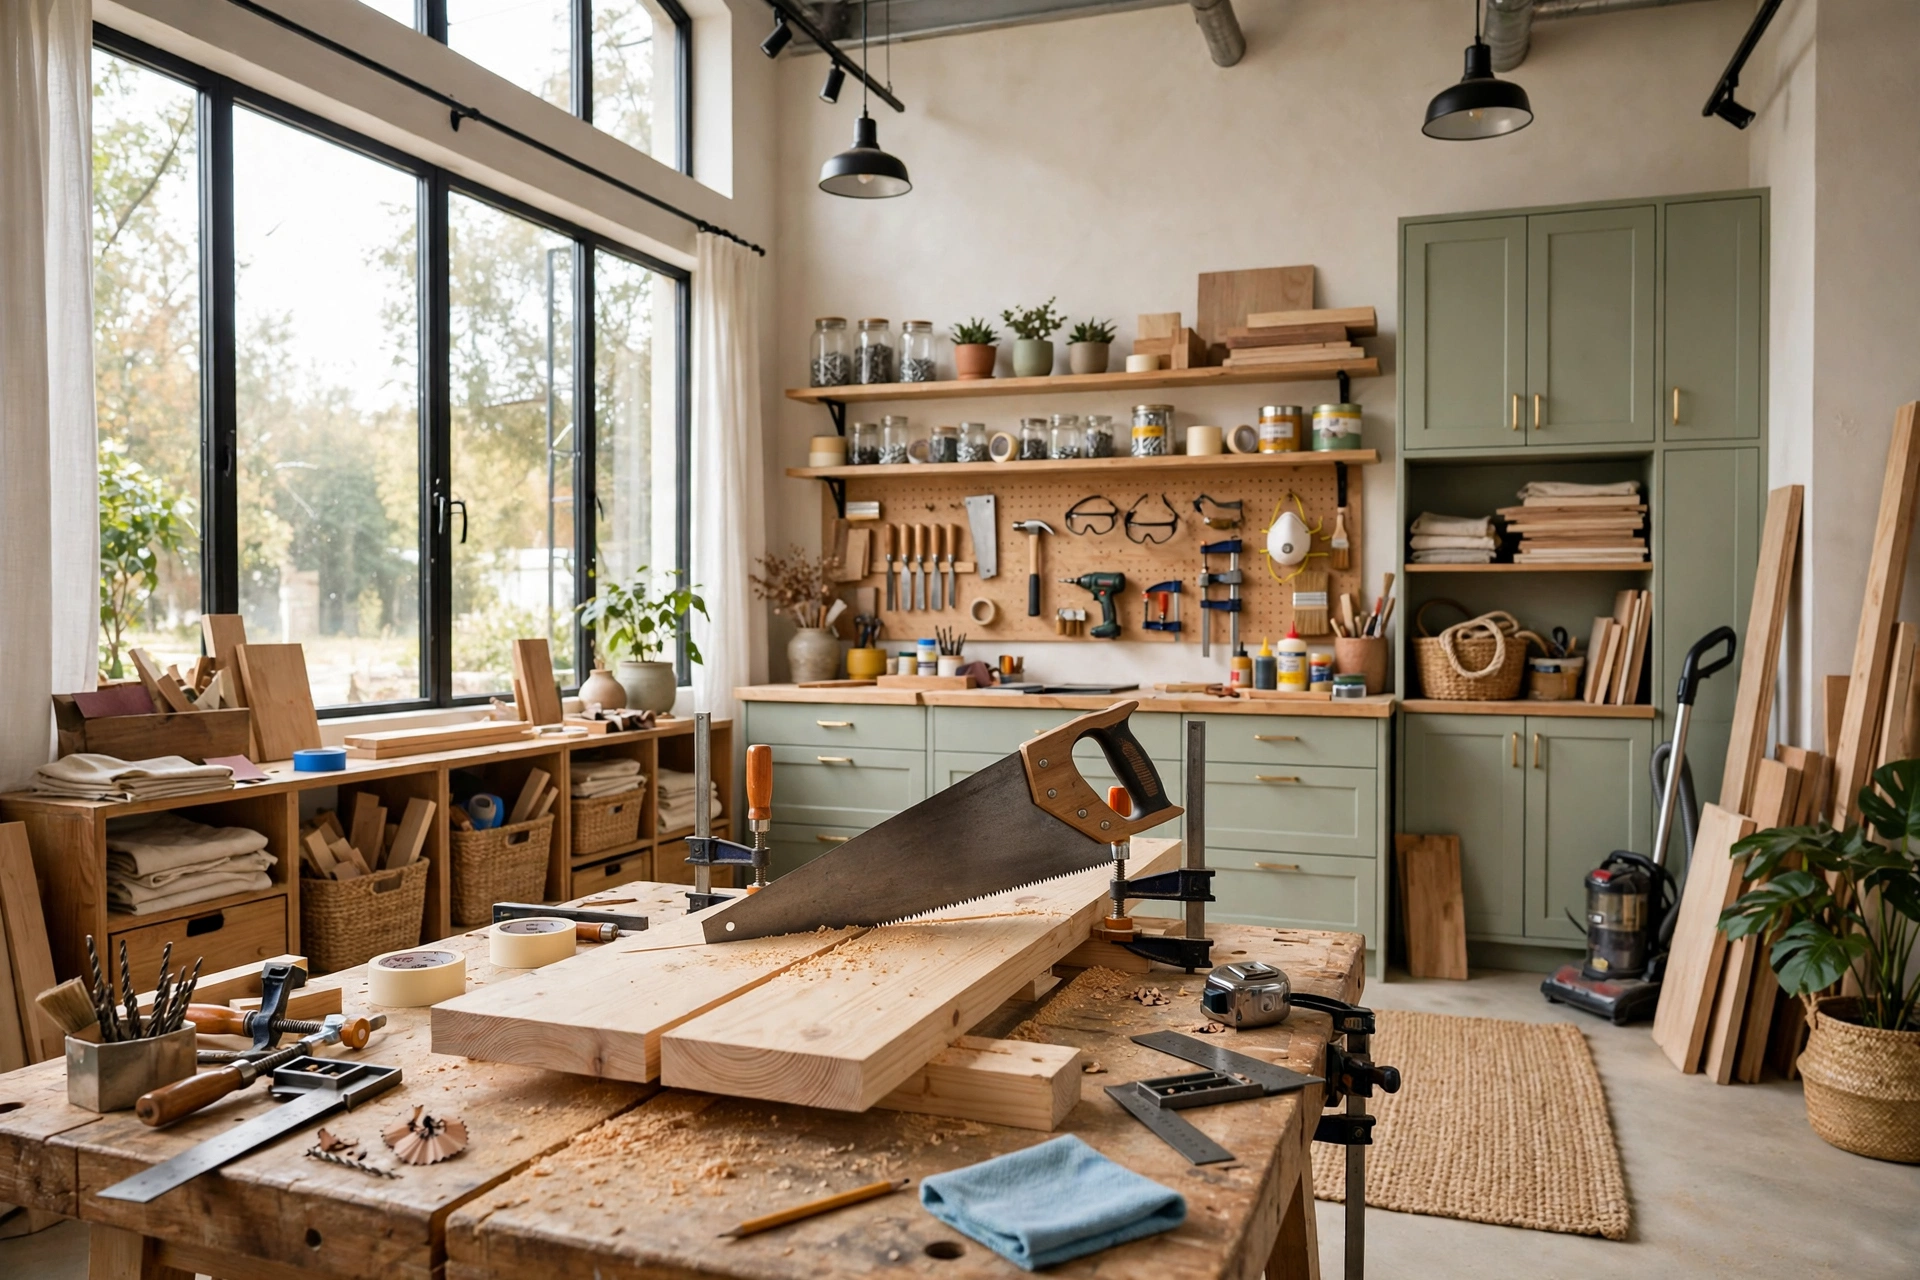
Measure the length you planned and mark it on the board with a pencil and a square, so the cut line is square to the edge. A square cut matters more than you might think — a shelf with a slanted end looks homemade in the worst way, while a clean square cut looks professional even before it is finished. Clamp the board to a stable surface before you cut, and let the saw do the work rather than forcing it through the wood.
If you are making several shelves the same length, cut them all from the same board in one session, and label each one lightly in pencil on the back edge. This keeps the lengths identical and saves you measuring twice. After cutting, check the ends with your square and clean up any rough edges with sandpaper. A quick pass with 120-grit paper on the cut ends removes splinters and gives you a surface that takes stain or paint evenly.
This is also the stage to think about the front edge. A plain square edge is clean and modern, but a slightly rounded edge — made with a few passes of sandpaper or a router if you have one — feels softer and is kinder to hips and foreheads in a busy hallway. Whichever you choose, make the front edge consistent across all your shelves so the set looks like it was made together, because it was.
Quick Comparison: Floating Shelf Options by Cost and Effort
6. Sand and Finish the Wood Before You Mount It

Sanding is the step that separates a shelf that looks handmade from one that looks homemade. Start with 120-grit sandpaper and work along the grain, never across it, because scratches across the grain show up clearly once stain or paint goes on. Sand every face, both edges, and the ends, then wipe the dust away with a slightly damp cloth and follow up with 220-grit paper for a smooth, silky surface.
Finishing the wood before you mount it is far easier than finishing it on the wall. If you want a natural look, apply a clear oil or wax, which deepens the colour of the wood and protects it from rings and spills. For a stained look, test your stain on an offcut or the back edge first — stain always looks darker on the real board than it does on the tin. Two thin coats of stain, wiped off evenly, beat one thick coat that dries blotchy.
For painted shelves, prime first with a wood primer, then apply two thin coats of your chosen paint, letting each coat dry fully in between. A satin or eggshell finish is the best choice for shelves: it wipes clean easily and hides small marks better than flat matt paint. Let the finished shelf dry for at least 24 hours before you mount it, because a shelf that is still tacky will pick up dust and fingerprints the moment you touch it.
7. Build the Hidden Bracket or Choose a Bracket System

The hidden bracket is the secret behind the floating look, and there are two main types. A rod bracket has two or more steel rods sticking out from a wall plate; you drill matching holes into the back of the shelf and slide it onto the rods. A plate bracket is a flat metal bar that screws to the wall and slides into a routed channel in the back of the shelf. Rod brackets are easier for beginners, because drilling round holes is simpler than cutting a channel.
If you are buying a kit, read the instructions before you drill anything, because rod spacing and hole depth vary between brands. The rods usually need holes drilled about two-thirds of the way into the shelf depth, and the holes must be straight and level or the shelf will sit crooked. A drill guide or a simple jig — a scrap of wood clamped to the shelf as a guide — helps enormously here.
For a fully DIY bracket, you can use a length of steel flat bar or a wooden batten screwed to the wall, with the shelf hollowed out to slide over it. This is a satisfying option if you enjoy making things from scratch, but it is harder to get right than a ready-made kit. For your first floating shelf, a good-quality kit is the sensible choice: it costs little, it comes with the right screws, and it takes the guesswork out of the most technical part of the project.
8. Find the Studs and Mark Your Holes

A floating shelf is only as strong as its fixing, and the strongest fixing is a screw driven into a solid timber stud. Use your stud finder to locate each stud behind the shelf position and mark its centre with a pencil cross. Studs are usually spaced 40 or 60 centimetres apart, so a shelf 90 centimetres or longer should cross at least two of them. If your shelf falls between studs, you will need heavy-duty plasterboard anchors rated for the load — never rely on a single small wall plug to hold a loaded shelf.
Hold the bracket plate against the wall at your marked height and use the spirit level to make sure it is perfectly level. A bracket that is even slightly off level will make the shelf slope, and a sloping shelf is obvious from across the room. Mark the screw holes through the plate with a sharp pencil, and double-check the marks by measuring from your level line rather than trusting your eye.
Before you drill, check what is behind the wall. Avoid drilling near light switches, sockets, or pipes, and if you are drilling into a kitchen wall, be aware that water pipes often run vertically below taps. If you are in any doubt, use a cable and pipe detector — it is a small investment that prevents a very expensive mistake. Take your time at this stage: an hour of careful marking saves a day of repairing a wrongly drilled hole.
⚠️ Warning: Never hang a loaded floating shelf from plasterboard alone with standard wall plugs. If you cannot hit a stud, use heavy-duty toggle or spring anchors rated for at least twice the weight you expect the shelf to carry.
9. Drill, Anchor, and Mount the Bracket

Drill your marked holes with the right bit for your wall: a masonry bit for brick or block, a wood bit for studs, and a special bit or no bit at all for plasterboard anchors, which often need a pilot hole. Drill slowly and steadily, keeping the drill level, and stop frequently to clear dust from the hole. A hole full of dust gives a plug nothing to grip, so blow or vacuum the dust out before you push the plug in.
Push the wall plugs fully into the holes so they sit flush with the wall surface, then hold the bracket plate in place and drive the screws through it. Tighten the screws firmly, but stop as soon as they feel solid — overtightening in plasterboard can crush the plug and destroy its grip. Check the plate with your spirit level again once it is fixed, because a plate can shift slightly as the screws bite.
Now test the bracket before the shelf goes on. Grip the rods firmly and pull down gently; the bracket should feel completely solid with no wobble or flex. If it moves at all, remove it, check the plugs, and refix it. It is far better to discover a weak fixing now, when the fix takes ten minutes, than after the shelf is loaded with books and ceramics.
10. Slide the Shelf On and Check It Is Level

With the bracket fixed, slide the shelf onto the rods slowly and evenly, keeping it level as it goes. Do not force it: if it sticks, pull it back, check that the holes line up with the rods, and try again. Some kits include small grub screws underneath the shelf that tighten against the rods to lock the shelf in place — if yours has them, tighten them gently once the shelf is fully home.
Place your spirit level on top of the shelf and check it in both directions. A tiny adjustment is sometimes possible by loosening the bracket screws a fraction and re-tightening, but a shelf that is more than a few millimetres out probably means a rod hole was drilled at a slight angle. If that is the case, take the shelf down, check the holes, and re-drill the worst one with a guide. It is worth the extra half hour — a level shelf is the difference between a project you are proud of and one you quietly ignore.
Step back and look at the shelf from across the room and from the side. It should sit flat against the wall with no visible gap, and the front edge should be parallel to the floor. Give it a gentle push from below to check for movement. If it is solid, level, and flush, you have built a floating shelf — and the hardest part of the whole project is done.
💡 Pro Tip: If the shelf rocks slightly on the rods, a thin strip of masking tape wrapped around a rod adds just enough grip to stop the movement without making the shelf impossible to remove later.
11. Style Your Shelves Without Overloading Them

Styling is where a floating shelf goes from a piece of wood to a feature of the room. The golden rule is to leave breathing room: a shelf that is packed edge to edge looks cluttered, while a shelf with space between objects looks curated and calm. Start with one larger anchor piece — a vase, a stack of books, a framed print — then add two or three smaller items around it, varying the heights so the eye moves along the shelf.
Group items in odd numbers, usually threes, and mix textures: wood, ceramic, glass, and greenery sit beautifully together. A trailing plant softens the straight lines of a shelf and adds life to the display, while a small stack of books lying flat gives you a platform to raise a smaller object to the right height. Keep the heaviest items closest to the wall, where the bracket gives the most support, and the lightest items near the front edge.
Most importantly, respect the weight limit of your bracket. A shelf that looks wonderful on day one but is loaded with heavy books and pottery will eventually sag or pull away from the wall. If you love heavy objects, put them on the lowest shelf, closest to the bracket, and keep the top shelf light. A shelf you can trust is worth far more than a shelf that is merely full.
12. Floating Shelves in the Kitchen

Kitchens are one of the best places for floating shelves, and open kitchen shelving ideas are popular for good reason: they replace heavy wall cabinets with open, airy storage that makes a small kitchen feel bigger. A shelf above the worktop is perfect for everyday items — plates, bowls, mugs, and jars of dry goods — keeping them within easy reach while freeing up counter space. This is exactly why so many small kitchen decor ideas now feature open shelving instead of closed cupboards.
Keep kitchen shelves practical. Store the things you use daily at eye level and the things you use rarely higher up. Use matching jars and containers for dry goods, because a shelf of mismatched packaging looks messy, while a row of uniform jars looks intentional. Leave a little space at the end of each shelf for a small plant or a framed recipe card, so the shelf feels like part of the room rather than a storage unit.
Grease and steam are the enemies of kitchen shelves, so choose a finish that wipes clean — a satin paint or a sealed oil finish — and wipe the shelves down once a week. Avoid putting delicate paper items or unsealed wood on a shelf directly above the hob, where heat and steam will damage them quickly. With a wipe-clean finish and sensible placement, kitchen floating shelves are as practical as they are pretty.
13. Floating Shelves in the Bathroom

A bathroom shelf has to cope with steam, splashes, and damp air, so material choice matters more here than in any other room. Sealed hardwoods, marine plywood, or a good-quality painted board all work well, but raw untreated pine will swell and warp in a humid bathroom. Seal every surface, including the back and the ends, with a waterproof finish, and leave a small gap between the shelf and the wall so air can circulate behind it.
Bathroom shelves are wonderful for towels, rolled flannels, jars of cotton wool, and a small plant that likes humidity. Keep the shelf away from direct spray from the shower, and never put anything on it that cannot survive a splash. A shelf above the toilet or beside the mirror is usually the most useful spot, and a narrow shelf — 150 to 180 millimetres deep — is often enough, because bathroom items are small.
Ventilation is the real secret to a long-lived bathroom shelf. If your bathroom has no window, run the extractor fan during and after every shower, and wipe the shelf dry if it gets splashed. A shelf that stays dry lasts for years; a shelf that stays damp will show mould and peeling finish within months, no matter how well it was sealed.
14. Floating Shelves in Small Spaces and Rentals

In a small flat, floating shelves are one of the best storage tricks available, and they rank among the simplest DIY wall decor ideas for turning a blank wall into something useful. They use wall space that would otherwise be wasted and they do not take up a single centimetre of floor. A narrow shelf above a desk holds books and stationery, a shelf above a bed replaces a bedside table, and a shelf in a hallway gives keys and post a home. If you are short on space, start with the walls you already look at every day and add one shelf at a time.
Renters face one extra question: can you drill holes in the wall? Many landlords allow small fixings if you fill and paint the holes when you leave, but always check your tenancy agreement first. If drilling is not allowed, look for a freestanding alternative, such as a leaning ladder shelf, or use a tension-mounted system. Never use adhesive strips or suction mounts for a floating shelf — they are not rated for the weight and the shelf will fall.
For renters who can drill, choose a bracket system with small fixings and keep the original plugs and screws so you can fill the holes neatly at the end of your tenancy. A few shelves, well placed, can make a rented room feel like home without risking your deposit, and they are easy to take with you when you move.
15. Keep Them Sturdy: Maintenance and Weight Limits

A floating shelf is not a fit-and-forget project. Once a year, check the bracket screws and tighten any that have worked loose, and check that the shelf still sits level. Wood moves with the seasons — it swells slightly in humid summers and shrinks in dry winters — so a small amount of movement is normal. A shelf that has developed a noticeable sag, however, needs attention: take the load off, check the fixings, and refix the bracket if necessary.
Know your weight limit and respect it. Most DIY floating shelves with a good bracket hold between 10 and 25 kilograms when fixed into studs, and much less when fixed only into plasterboard. If you are unsure, test the shelf with books and add weight gradually over a week rather than loading it all at once. A shelf that holds steady for a week under its full load is a shelf you can trust.
Finally, look after the finish. Wipe shelves with a dry or slightly damp cloth, never a soaking wet one, and re-oil a natural wood shelf once a year to keep it looking fresh. A painted shelf can be touched up with a small brush in minutes. A little maintenance keeps your floating shelves looking like the day you made them — and reminds you, every time you look at them, that you built them yourself.
📌 Important: If a shelf ever feels loose, sags visibly, or pulls away from the wall, unload it immediately and refix the bracket before you use it again. A falling shelf can damage your belongings and injure someone standing below it.
Common Floating Shelf Mistakes
Mistake 1: Skipping the Stud Finder
The most common floating shelf mistake is fixing the bracket to plasterboard with ordinary wall plugs and hoping for the best. Plasterboard alone cannot hold a loaded shelf, and the shelf will eventually pull out of the wall, often in the middle of the night. Always find the studs first, and use heavy-duty anchors if a stud is not available.
Mistake 2: Drilling the Rod Holes at an Angle
Rod holes that are not straight make the shelf sit crooked, and the problem only gets worse as the shelf slides further onto the rods. Use a drill guide or a clamped scrap of wood to keep the drill straight, and check each hole with a level before you move on. A few extra minutes here saves a shelf that leans forever.
Mistake 3: Making the Shelf Too Deep
A shelf deeper than 300 millimetres looks heavy and puts a lot of leverage on the bracket, which increases the risk of sagging. Most rooms work best with shelves 200 to 250 millimetres deep. If you need more storage, add a second shelf rather than making one shelf deeper.
Mistake 4: Overloading the Shelf on Day One
New shelves invite overloading, because everything you own suddenly has a home. Resist the urge. Load the shelf gradually, keep heavy items near the wall, and respect the bracket’s weight rating. A shelf that is overloaded in its first week is far more likely to fail than one that is loaded sensibly from the start.
Mistake 5: Finishing the Wood After Mounting
Staining or painting a shelf after it is on the wall means drips on the wall, a finish you cannot reach properly, and a shelf you cannot turn over to coat the underside. Always finish the wood completely — and let it dry for 24 hours — before you mount it. Your walls will thank you.
Frequently Asked Questions
1. How much weight can a DIY floating shelf hold?
It depends on the bracket and the wall. A good rod bracket fixed into two wall studs typically holds 15 to 25 kilograms, while the same bracket in plasterboard with heavy-duty anchors holds roughly half that. Always check the bracket’s rating and keep the heaviest items close to the wall.
2. Can I make floating shelves without a stud finder?
Yes, you can tap the wall and listen for the solid sound of a stud, or look for the line of screws or nails in the skirting board, which usually marks stud positions. A stud finder is cheap and far more reliable, though, and it is worth buying if you plan to hang more than one shelf.
3. What is the best wood for floating shelves?
Pine is the best choice for beginners because it is cheap and easy to work with. Oak and walnut give a more premium look, while plywood with a solid wood edge is a good budget option for painted shelves. Whichever you choose, make sure the board is straight, dry, and at least 25 millimetres thick.
4. How deep should floating shelves be?
For most rooms, 200 to 250 millimetres is ideal — deep enough for books, plants, and vases, but shallow enough to stay strong. Kitchen shelves can be a little shallower at 180 to 200 millimetres, and bathroom shelves work well at 150 to 180 millimetres.
5. Can renters install floating shelves?
It depends on your tenancy agreement. Many landlords allow small fixings if you fill and repaint the holes when you leave, but always ask first. If drilling is not allowed, use a freestanding or leaning shelf instead — never hang a floating shelf with adhesive strips.
6. Why is my floating shelf sagging?
Sagging usually means the shelf is overloaded, the bracket is fixed only into plasterboard, or the board itself is too thin for its length. Unload the shelf, check the fixings, and refix the bracket into studs. If the board is the problem, replace it with a thicker board or add a centre support.
7. Do floating shelves work in bathrooms?
Yes, as long as you choose the right materials. Use sealed hardwood, marine plywood, or a painted board with a waterproof finish, seal every surface including the back, and keep the shelf away from direct shower spray. Good ventilation matters more than anything else in a bathroom.
Conclusion
Making your own floating shelves is one of those rare DIY projects that is genuinely beginner-friendly and genuinely impressive at the same time. There is no complicated joinery, no expensive tools, and no specialist knowledge — just careful measuring, a good bracket, and a little patience with sanding and finishing. The result is a shelf that looks like it came from a high-end furniture shop, for a fraction of the price.
The secret, as always, is in the preparation. Choose straight, dry wood, find your studs, mark everything twice, and finish the shelf before it goes on the wall. Get those steps right and the rest of the project almost takes care of itself. And if you are hungry for more weekend projects after this one, these easy DIY home decor ideas will give you plenty of inspiration for what to build next.
So pick a wall, measure it twice, and make something beautiful. Your floating shelves will hold your books, your plants, and your favourite things — and every time you look at them, you will know you built them with your own hands. That is a feeling no shop-bought shelf can ever give you.